


Laser Engraving and Etching for Beginners: What’s the Difference and How Do You Get Started?
If you’re new to the world of laser crafting, you’ve probably seen the terms laser engraving, laser etching, and laser marking used almost interchangeably. That can get confusing fast, especially when you’re trying to choose your first beginner laser engraving machine, learn the best laser engraving software, or figure out whether a project should use deep engraving or a lighter surface mark. The truth is that laser engraving and laser etching are closely related, but they are not exactly the same.
Both techniques use a focused laser beam to alter the surface of a material. Both can be used to personalize gifts, create small business products, add logos, make signs, decorate drinkware, or produce custom parts. But when you compare laser engraving vs laser etching, the differences show up in the depth of the mark, speed, durability, finish, and the type of material response you get. Understanding those differences is one of the first big steps in any beginner laser engraving guide.
If you’re using an AlgoLaser laser engraver, you also have a major advantage as a first-time user. You can start with AlgoOS laser software for a simpler workflow, then move into LightBurn for beginners or LaserGRBL for beginners once you want more control over layers, rotary setup, image engraving, and material testing. That kind of flexibility makes it much easier to learn how laser engraving works without getting buried in unnecessary complexity.
In this guide, I’ll walk through what laser engraving is, what laser etching is, the difference between laser engraving and etching, what materials are easiest for beginners, which software to use, and how to start getting clean results on your first projects. I’ll also point out where different kinds of beginner-friendly machines—such as a compact desktop unit, a more powerful open-frame engraver, or a tumbler-ready rotary setup—fit into the learning process.
What Is Laser Engraving?
Laser engraving is a process where the laser beam removes material from the surface to create a visible and often tactile recessed design. In simple terms, engraving usually means the laser is cutting slightly into the material rather than just changing the color of the top layer. That’s why laser engraving depth is one of the main factors that separates engraving from etching.
When the beam hits the surface, it delivers enough concentrated heat and energy to vaporize, burn, or ablate material away. The result can be a shallow logo, a deep monogram, a textured graphic, or a detailed custom pattern. Depending on your laser engraving speed and power, focus, material type, and number of passes, the final engraved design can be subtle or dramatically carved.
Common beginner examples of laser engraving:
· Laser engraving wood signs with names or quotes
· Personalizing a leather wallet or patch with laser engraving leather settings
· Making custom engraved cutting boards
· Engraving coated tumblers for gift shops or Etsy-style products
· Creating laser engraved keychains from wood, acrylic, or leather
· Marking slate coasters for home décor or wedding gifts
· Engraving anodized business cards or aluminum tags
For most hobbyists, laser engraving for beginners starts with wood, leather, coated tumblers, and slate because these materials give visible contrast and make it easy to understand what your machine is doing.

What Is Laser Etching?
Laser etching is usually a more surface-level process. Instead of cutting deeply into the material, the laser changes the top layer through heat, discoloration, oxidation, foaming, or a light amount of surface removal. In many cases, laser etching depth is minimal compared with engraving. That’s why etching is often described as a lighter, faster, and more cosmetic technique.
For example, laser etching glass often creates a frosted white look without cutting deeply into the glass. On coated metals or anodized aluminum, the laser may remove or alter the top coating to reveal a contrasting mark underneath. On some plastics and coated surfaces, the beam changes the finish without producing a pronounced recess.
Common beginner examples of laser etching:
· Frosted logos on wine glasses and glass jars
· Surface marks on anodized aluminum cards or tags
· Decorative text on coated tumblers and flasks
· Branding marks on acrylic tags or display pieces
· Light personalization on painted or powder-coated surfaces
· Fine serial numbers or logos on certain coated metal products
When people search for laser etching for beginners, they’re often interested in glassware, subtle branding, frosted finishes, or lightweight surface decoration rather than deeper carved engraving.
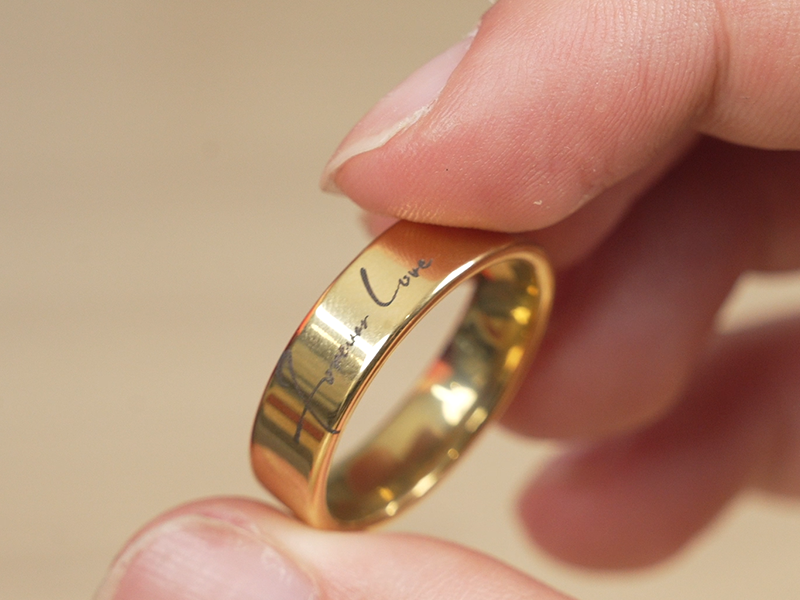
Laser Engraving vs Laser Etching: What’s the Difference?
The easiest way to understand engraving vs etching is this:
· Laser engraving removes more material and usually creates a deeper mark.
· Laser etching affects the surface more lightly and usually creates a shallower mark.
That’s the short answer, but if you want to actually improve your projects, it helps to break the comparison down further.
1. Depth of the Mark
The most important difference in laser engraving vs laser etching is depth.
· Deep laser engraving produces a recessed design you can often feel with your fingertip.
· Surface laser etching creates a visible mark with little or no physical depth.
If you’re making a wooden sign, engraved leather patch, or personalized cutting board, engraving is usually the better choice because it produces a bold, permanent-looking result. If you want a frosted glass monogram or a light decorative logo on coated metal, etching may be the better fit.
2. Speed
In many cases, etching is faster because it doesn’t require the laser to remove as much material. A light surface mark can often be done at higher speed or lower energy than a deep engraved pattern. Engraving generally needs more dwell time, more power, or more passes to achieve the desired depth and contrast.
For beginners, this matters because laser engraving settings for beginners often involve trial and error. If you understand that deeper engraving usually requires more energy than a light etch, your testing becomes much more logical.
3. Durability
When comparing engraving vs etching durability, engraving often has the edge because the design is physically carved into the material. That can make it more resistant to wear, cleaning, and handling over time. Etched or surface-marked designs can still be durable, especially on the right material, but they may be more vulnerable if the mark only affects a coating or a very thin surface layer.
4. Visual Finish
Engraving tends to look bold, textured, and dimensional. Etching often looks lighter, cleaner, frosted, or more refined. Neither is automatically better. The right choice depends on whether you want a tactile engraved effect or a more subtle decorative finish.
5. Material Response
Different materials react in very different ways to the same laser beam. That’s why a beginner should focus not only on the difference between engraving and etching, but also on beginner engraving materials and how they behave.
For example:
· Laser engraving wood often produces dark, high-contrast marks with visible depth
· Laser engraving leather can create rich brown contrast and a premium feel
· Laser etching glass usually creates a frosted surface effect
· Anodized aluminum engraving may look more like marking or etching than deep carving
· Coated tumbler engraving often removes the outer coating to reveal the stainless steel below

Why Beginners Get Confused About Engraving and Etching
One reason there’s so much confusion is that manufacturers, online sellers, and creators often use engraving, etching, and marking as umbrella terms. A machine might be advertised as a “laser engraver,” but the project examples include everything from frosted glass etching to metal marking and surface branding.
For a beginner, the most useful way to think about it is not as a vocabulary test, but as a material and finish decision:
· If you want a recessed laser engraving with visible depth, you’re usually engraving.
· If you want a shallow laser etching or frosted surface effect, you’re usually etching.
· If you simply want a visible identifier, logo, barcode, or serial number, some people will call it laser marking.
The exact terminology matters less than understanding how deeply the laser is affecting the material and what kind of result you want to achieve.

How Laser Engraving and Laser Etching Work
Whether you’re engraving a wooden sign or etching a glass mug, the basic workflow is similar. A digital design is sent to the machine, and the laser head moves according to that file while directing a focused beam onto the material.
What changes the outcome is the combination of settings and material behavior. The most important factors are:
Laser Power
Higher power delivers more energy to the surface. That can increase laser material removal, create darker marks, or help achieve more engraving depth. For example, a higher-output machine like the AlgoLaser Alpha MK2 20W Laser Engraver can give beginners more headroom when moving from light engraving into thicker wood projects or faster production work.
Speed
A slower speed gives the beam more time to interact with the material. That often means deeper engraving, stronger contrast, or more heat buildup. A compact machine such as the AlgoLaser Pixi 10W Laser Engraver can still teach this principle really well because it makes it easy to compare fast, light surface marks with slower, darker engraving passes on beginner materials.
Number of Passes
Multiple passes can increase depth or strengthen the visibility of a mark without forcing everything into one aggressive pass. This is especially useful on wood signs, leather patches, and coated drinkware when you want to refine the finish rather than overdrive the first pass.
Line Interval / Fill Density
For image fills and solid engraving areas, the spacing between scan lines affects smoothness, darkness, and total processing time.
Focus
A properly focused beam is essential for clean laser engraving results. If your focus is off, you may get blurry edges, weak engraving, inconsistent depth, or poor contrast. Beginner-friendly machines with straightforward focusing routines, like the DIY KIT series or Alpha MK2, make this part of the learning process much less intimidating.
Material Surface
Wood, leather, acrylic, coated stainless steel, glass, bamboo, slate, and anodized aluminum all respond differently. That’s why running a laser material test grid is one of the smartest habits a beginner can build.

Best Materials for Beginner Laser Engraving
If your goal is to learn how to start laser engraving, begin with forgiving materials that give visible feedback and don’t require highly specialized machine setups.
1. Basswood Plywood
Basswood is one of the best materials for laser engraving for hobbyists because it engraves cleanly, cuts well, and shows contrast nicely. It’s ideal for ornaments, signs, layered wall art, tags, gift boxes, and craft fair products. If you’re using an Alpha MK2 or DIY KIT machine, basswood is one of the easiest materials for building your first settings library.
2. Solid Wood
Pine, maple, birch, walnut, cherry, and bamboo can all work well. Each wood species engraves a little differently, which makes wood a great way to learn how laser engraving speed and power affect color, depth, and detail. More powerful diode setups like the Alpha MK2 20W or 40W are especially handy when you want to go from simple surface engraving into thicker plywood cutting and layered craft projects.
3. Leather
Laser engraving leather is a favorite among small makers because it looks premium and works for keychains, patches, journals, wallets, coasters, and bag tags. A compact enclosed machine like the Pixi can be a nice fit for small-format leather personalization if your focus is on tags, keychains, and gift items rather than large production runs.
4. Coated Tumblers and Bottles
These are excellent for personalized gifts and laser engraving small business ideas. The laser typically removes the coating and reveals the metal underneath, producing a sharp, high-contrast design. This is where a rotary attachment becomes important. If you plan to engrave tumblers, mugs, bottles, rolling pins, or other cylindrical items, pairing your machine with an AlgoLaser rotary—such as an ARR or RR-style rotary setup, depending on your workflow—opens up a huge category of beginner-friendly projects.
5. Slate and Stone
Slate coasters and plaques are great beginner projects because they often produce beautiful light gray or white contrast with minimal setup. These projects work well on both compact and open-frame machines, which makes them a smart starting point whether you’re using a Pixi, DIY KIT, or Alpha MK2.
6. Acrylic
Laser engraving acrylic can be used for ornaments, signage, tags, LED inserts, display pieces, and custom accessories. Cast acrylic generally performs better for engraving than extruded acrylic. If you’re mainly doing small décor pieces, tags, and desk accessories, a compact machine is often enough. If you’re building larger sign projects or batching multiple pieces at once, a larger work area becomes more helpful.

Best Materials for Beginner Laser Etching
If you want to focus on lighter surface decoration or frosted finishes, these are some of the most useful beginner materials.
1. Glass
Laser etching glass is one of the most recognizable beginner applications. Glass jars, mugs, ornaments, and wine glasses can all produce a frosted etched look. If you want to etch curved glassware consistently, again, a rotary accessory is one of the best upgrades you can add early on.
2. Anodized Aluminum
This is a great material for logos, tags, business cards, and identification plates because the laser can create clean contrast on the anodized layer.
3. Painted or Powder-Coated Surfaces
These surfaces can be ideal for a surface laser etching look where the beam removes only the outer finish.
4. Coated Metal Drinkware
Tumblers, mugs, and flasks are some of the most popular personalized products in the laser world. Depending on the coating and settings, the result may feel like engraving, etching, or marking.

Which Is Better for Beginners: Engraving or Etching?
For most new users, I recommend starting with laser engraving rather than etching. Here’s why:
· The results are easier to see
· Wood and leather are beginner-friendly materials
· You learn how speed, power, focus, and passes interact
· Engraving opens the door to a huge range of gift and décor projects
· It’s a natural foundation for moving into tumblers, acrylic, slate, and leather products
A practical beginner path could look like this:
· Start with basswood, leather, and slate on a machine like the Pixi or DIY KIT if you · want a compact and approachable setup
· Move into larger signs, thicker wood projects, and faster production with an Alpha · MK2 once you want more power and workspace
· Add a rotary attachment when you’re ready for tumblers, mugs, bottles, and glassware
Etching is still incredibly useful, especially for glass, anodized aluminum, and subtle branding work. But if you want the fastest path to understanding your machine, engraving on wood and leather is hard to beat.

What Type of Laser Engraver Do Beginners Need?
If you’re shopping for the best laser engraver for beginners, a desktop diode laser machine is often the most practical starting point. A desktop laser engraver can handle a wide range of materials and project types without demanding the budget of an industrial CO2 or fiber setup.
A diode laser engraver is especially good for:
· Wood engraving
· Leather engraving
· Acrylic projects with compatible material colors/types
· Coated tumblers and bottles
· Slate coasters and stone pieces
· Cardstock, paper, and some craft materials
· Personalized gift items and small business products
For many first-time users, the best machine isn’t just about wattage. It’s about workspace, enclosure style, software comfort, and what you want to make.
A simple way to think about beginner machine types
Choose a compact enclosed machine if you want simplicity and small custom projects
A machine like the AlgoLaser Pixi makes sense if your priority is a cleaner desktop footprint, a more contained beginner experience, and smaller personalized products such as tags, ornaments, wallets, patches, acrylic accessories, and light drinkware work.
Choose a DIY-style open machine if you want affordability and room to learn
The AlgoLaser DIY KIT style of machine is a solid fit for someone who wants to learn the fundamentals of focusing, framing, settings, and material testing while still having flexibility for wood signs, leather goods, and craft projects.
Choose a more powerful open-frame machine if you want room to grow into cutting and production
If you already know you want to make larger signs, layered plywood projects, thicker wood crafts, or higher-output product batches, the Alpha MK2 line is a natural step up. It gives you more power for cutting and more flexibility for scaling beyond small beginner tests.

Why AlgoLaser Is Beginner-Friendly
A beginner doesn’t just need a machine that can fire a laser. They need a machine that fits into a manageable workflow. That’s where AlgoLaser stands out. Instead of forcing you to choose between “ultra basic but limiting” and “powerful but overwhelming,” the AlgoLaser ecosystem gives you a smoother learning curve.
AlgoOS: A Simpler Starting Point
AlgoOS laser software is useful because it makes the machine feel more approachable. Rather than requiring every job to go through a full desktop design workflow, AlgoOS can simplify project management and machine control for first-time users.
Depending on the model, it can help with:
· Running beginner-friendly projects
· Accessing files more easily
· Simplifying machine setup and job launch
· Making positioning and framing more straightforward
· Helping new users start engraving without feeling buried in menus
If your goal is to learn how to start laser engraving without immediately diving into a complicated desktop environment, AlgoOS is a smart on-ramp.
LightBurn: Best for Long-Term Growth
Once you’re ready to move beyond the basics, LightBurn laser engraving software is one of the best upgrades you can make. It’s widely used because it gives you precise control over layers, image processing, fill settings, material tests, rotary engraving, and project layout.
Why LightBurn matters for beginners who plan to grow:
· It supports advanced layer control
· It makes laser engraving file preparation easier for complex jobs
· It offers tools for image cleanup, tracing, and grayscale engraving
· It helps you build repeatable laser engraving calibration workflows
· It’s excellent for batch jobs, small business production, and rotary engraving
LightBurn does have a learning curve, but if you want to build a serious hobby or product business, it’s worth the time.
LaserGRBL: A Budget-Friendly Entry Point
LaserGRBL engraving software is another option for beginners, especially if you want a lightweight and affordable PC-based workflow. It’s often used for simple image engraving, machine communication, and straightforward beginner projects.
LaserGRBL can be a good fit if:
· You want a low-cost starting point
· You’re doing simple engraving rather than complex production
· You want to learn machine control basics before moving into LightBurn
· You don’t need advanced layout tools immediately

A Smart Beginner Workflow
If you’re wondering how to learn laser engraving without getting overwhelmed, here’s a practical progression.
Step 1: Start with easy materials and simple files
Use basswood, slate, leather, or coated blanks. Begin with text, logos, and basic line art before trying detailed photo engraving. If you’re working on a smaller desktop machine like the Pixi, choose compact projects such as keychains, patches, ornaments, and wallet inserts. If you’re starting on an Alpha MK2 or DIY KIT, you can comfortably add signs, plaques, and layered plywood pieces to the practice list.
Step 2: Learn framing, focus, and test grids
A test pattern for laser engraving will teach you more than random guessing ever will. Learn how to focus properly, frame the job, and compare power/speed combinations. Accessories like a camera alignment system or a simple focus aid can make this part easier, but even without them, disciplined testing is what builds confidence.
Step 3: Build a material settings library
Keep notes for every successful material. This becomes your personal laser engraving power chart and saves huge amounts of time later.
Step 4: Move from AlgoOS into LightBurn or LaserGRBL
Once you’re comfortable with the machine, expand into deeper software control for image prep, rotary work, layers, and more advanced project setup.
Step 5: Add rotary projects later
Tumblers, mugs, bottles, rolling pins, and cylindrical gift items are great once you’ve mastered flat materials. This is where an AlgoLaser rotary accessory becomes one of the most useful upgrades you can make, because it immediately expands your project catalog into some of the most sellable beginner products.
Beginner Projects That Teach Engraving and Etching Fast
If you want fast improvement, choose projects that teach one skill at a time.
Good first laser engraving projects
· Wooden name signs
· Leather keychains
· Slate coasters
· Plywood ornaments
· Custom engraved cutting boards
· Acrylic tags
· Coated tumblers with simple text
Good first laser etching projects
· Frosted glass jars
· Glass ornaments
· Acrylic display tags
· Anodized aluminum cards
· Coated flasks or tumblers with logo marks
A nice way to match projects to machines is this:
· Pixi: small leather goods, tags, ornaments, acrylic accessories, mini gift items
· DIY KIT: beginner wood signs, coasters, leather goods, lightweight décor pieces
· Alpha MK2: larger signs, thicker plywood craft builds, faster batch engraving, more ambitious wood projects
· Rotary setup: tumblers, bottles, mugs, glassware, rolling pins, and cylindrical gifts

Accessories That Make Laser Engraving Easier for Beginners
A machine matters, but the right accessories can make the learning curve much smoother too.
Rotary Attachment
If you want to engrave tumblers, mugs, bottles, glassware, pens, or rolling pins, a rotary is one of the best upgrades you can buy. It turns a flat-material workflow into a much broader personalized product business.
Air Assist
For wood projects, especially when cutting or doing deeper engraving, air assist can help reduce scorching, improve edge quality, and keep the work area cleaner.
Enclosure
An enclosure helps with smoke control, cleanliness, and overall workspace comfort. For beginners working indoors, this can make the entire experience more manageable.
Camera / Positioning Tools
If your workflow includes precise placement on coasters, leather patches, tags, or pre-made blanks, camera-assisted alignment or improved positioning tools can save material and reduce setup frustration.
Material Packs
Using known-good basswood, acrylic, leather blanks, and coated tumblers makes the learning process much easier than starting with random materials of inconsistent quality.

8 Beginner Tips for Better Results
1. Always run a material test first
A laser engraving material test is the fastest way to avoid ruined blanks and wasted time.
2. Keep your optics clean
Dirty lenses and smoky residue can reduce engraving quality.
3. Use the correct focus every single time
A small focus error can lead to uneven laser engraving, weak contrast, or blurry text.
4. Don’t assume max power is best
Sometimes lower power and smarter speed choices create cleaner detail with less scorching.
5. Learn one material at a time
If you jump between wood, leather, glass, acrylic, and coated steel too quickly, you won’t build reliable instincts.
6. Save successful settings
Treat every good result like data. A saved settings library is one of the most valuable tools in your workshop.
7. Watch for smoke staining
Masking, airflow, and cleaner settings can help reduce engraving smoke marks and edge discoloration. This is one place where air assist and a tidy ventilation setup really pay off.
8. Don’t start with your hardest project
Skip the ultra-detailed photo portrait on day one. Start with simple text and shapes, then build up.

Common Beginner Problems
If your first few projects don’t look perfect, that’s normal. Here are a few common issues:
· Laser engraving not dark enough because the speed is too high
· Laser engraving too deep because power is too aggressive or the machine made too many passes
· Why is my laser engraving blurry? Often a focus problem or movement issue
· Laser engraving scorch marks caused by too much heat or poor airflow
· Poor contrast on the wrong wood species
· Inconsistent results from low-quality plywood or warped material
· Using internet settings without testing your own material batch
The fix for most of these is simple: focus carefully, test methodically, and build your own settings instead of relying entirely on generic numbers from random posts.

FAQs About Laser Engraving and Etching for Beginners
1. Is laser engraving the same as laser etching?
No. They’re closely related, but laser engraving usually removes more material and creates a deeper mark, while laser etching is generally more surface-level and creates a shallower finish.
2. Which is easier for beginners: laser engraving or laser etching?
For most people, laser engraving for beginners is easier to start with because wood, leather, and coated tumblers give clear visual results and make it easier to understand settings.
3. What is the best material to practice laser engraving on first?
Basswood plywood is one of the best beginner materials because it’s affordable, easy to engrave, and produces visible contrast. Leather and slate are also excellent practice materials.
4. What software should a beginner use for laser engraving?
If you want a simpler beginner workflow, AlgoOS is a great starting point on compatible AlgoLaser machines. If you want more advanced control, LightBurn is one of the best long-term options, while LaserGRBL is a budget-friendly alternative for simpler engraving work.
5. Can a diode laser engraver do both engraving and etching?
Yes, in many cases it can. A diode machine can engrave wood, leather, slate, and coated drinkware, and it can also produce lighter etched or marked effects on certain coated or treated materials depending on the settings and surface.
6. What AlgoLaser setup is best for beginners?
That depends on what you want to make. A compact machine like Pixi is great for smaller desktop projects, a DIY KIT style machine is excellent for learning the fundamentals on wood and leather, and an Alpha MK2 is a stronger fit if you want larger projects, more cutting ability, and room to grow. If you plan to engrave tumblers or glassware, adding a rotary attachment is one of the best upgrades you can make early on.

Final Thoughts: Start with Engraving, Then Expand into Etching
If you’re brand new and trying to decide where to begin, here’s the simplest advice I can give:
Start with laser engraving for beginners on wood, leather, slate, and coated tumblers. Learn how power, speed, focus, and passes affect the result. Use AlgoOS if you want a more approachable first workflow, then move into LightBurn or LaserGRBL as your projects become more advanced.
If your goal is a small, approachable desktop setup for gifts and compact custom work, a machine like the Pixi can make a lot of sense. If you want a more hands-on open-frame learning platform, the DIY KIT is a strong beginner path. If you already know you want to make larger wood signs, layered plywood builds, and faster product batches, the Alpha MK2 gives you more room to grow. And if drinkware, glassware, and cylindrical products are on your list, add a rotary attachment early—it’s one of the most practical upgrades you can make.
Once you understand how to control your machine, laser etching for beginners becomes much easier too. You’ll know how to adapt your settings for glass, anodized aluminum, coated metal, and surface-level branding work. At that point, the difference between engraving and etching won’t feel confusing anymore—it’ll just feel like choosing the right finish for the job.
That’s the real goal. Not memorizing vocabulary, but understanding how to get the exact result you want from the material in front of you.


