Step 3: Load Your File — Click “Projects” → “SD Card”
Step 4: Set the Engraving Material and Parameters
Step 5: Start Engraving
6 FAQs About Laser Engraving a Pet Toy Box
3mm Plywood
How to Laser Engrave a Wooden Pet Toy Box with the AlgoLaser Alpha MK2
If you’re a pet lover and a DIY laser geek like me, you’ve probably wanted to make something special for your furry friend — a personalized wooden pet toy box that’s both functional and stylish. With a powerful laser engraver like the AlgoLaser Alpha MK2 20W, you can create a custom design that reflects your pet’s personality while also showing off your creative engraving skills.
This project combines both engraving and cutting techniques on 3mm plywood, making it perfect for beginners and intermediate laser users who want to learn more about speed, power, and design precision. Below, I’ll walk you through the entire process — from setup to finishing — in five detailed steps.
Laser engraving gives you precision that’s nearly impossible to achieve by hand. You can engrave your pet’s name, paw prints, or even a cute photo silhouette directly onto the wood. The AlgoLaser Alpha MK2 makes the process fast, easy, and highly customizable.
A few reasons why this project rocks:
· Personalized design: Customize every detail for your dog, cat, or hamster.
· Durable and eco-friendly: 3mm plywood is strong yet lightweight — perfect for small to medium pet toy storage.
· Professional results: The Alpha MK2’s 20W laser diode cuts cleanly and engraves with crisp detail.
· Fun and educational: A great hands-on project for understanding engraving parameters, focus adjustment, and material thickness settings.
Start by placing your 3mm plywood sheet in the engraving area of the AlgoLaser Alpha MK2. Make sure the board is flat and secure — uneven surfaces can affect both engraving depth and accuracy.
If you’re using a honeycomb panel or risers, ensure there’s enough airflow beneath the plywood for the air pump to clear smoke efficiently. This helps prevent burn marks and gives cleaner cuts.
Pro tip: Always check that your plywood is free of warps or knots before engraving. The smoother the surface, the better the engraving results.
Proper focus is everything when it comes to laser engraving. The Alpha MK2 includes a convenient focusing post to help you get the right height every time.
Here’s how to focus correctly:
1. Move the laser module directly above the plywood.
2. Insert the focus post between the laser head and the material surface.
3. Adjust the height of the module until it just touches the post.
4. Once the focus is set, remove the post smoothly — it should slide out easily.
Correct focusing ensures your engraving lines are sharp and your cutting edges are clean. If the focus is off, you’ll either burn the wood too much or end up with weak cuts.
Once your material and focus are ready, it’s time to bring your design to life. On the touch screen of the AlgoLaser Alpha MK2, tap on “Projects” and then select “SD Card.”
Here’s where you’ll find your saved engraving and cutting files. If you’re using LightBurn or another design software, save your project as a GCode file and transfer it to the SD card or the virtual USB disk of the Alpha MK2.
Typical design ideas for this project:
· Your pet’s name in a playful font.
· Vector paw prints or bone outlines.
· A silhouette of your pet.
· “Pet Toys” engraved across the front panel.
This stage is where you can get creative. Drag and scale your design on the screen to position it perfectly within the engraving area.
This is where you fine-tune the cutting and engraving settings to get precise results. The AlgoLaser Alpha MK2 gives you control over speed, power, and passes directly from the touchscreen or via LightBurn.
For 3mm plywood, the following parameters worked great for me:
Before engraving the final design, do a small test cut on scrap plywood. It helps confirm your focus and settings. The goal is to have a clean engraving that doesn’t burn too deep into the wood but is still dark enough for contrast.
If you see excessive smoke or charring, lower the power slightly or increase the speed. Every piece of wood reacts a little differently depending on its glue content and grain pattern.
Once everything looks good on the preview, hit Start Engraving. The AlgoLaser Alpha MK2 will begin by engraving the design, then proceed with the cutting outlines if included in the file.
During the process, keep an eye on:
· Air pump airflow: Helps maintain clean lines and prevents soot buildup.
· Laser head movement: Make sure it’s running smoothly along the X and Y axes.
· Safety: Always wear protective glasses and ensure good ventilation.
The engraving process for a medium-sized toy box panel (around 300×200mm) takes roughly 15–20 minutes depending on design complexity.
When finished, gently remove the plywood piece and wipe off any residue using a soft dry cloth. If you’d like to give it a professional finish, lightly sand the edges and apply a coat of natural wood oil or pet-safe varnish.
Now assemble your wooden panels into a small box using wood glue or interlocking joints, and you’ve got yourself a custom laser-engraved pet toy box ready to hold treats, balls, or chew toys!
1. What kind of wood works best for this project?
For laser engraving and cutting, 3mm plywood is ideal. It’s lightweight, cuts easily, and engraves with good contrast. Baltic birch plywood or basswood are both solid options for smooth results.
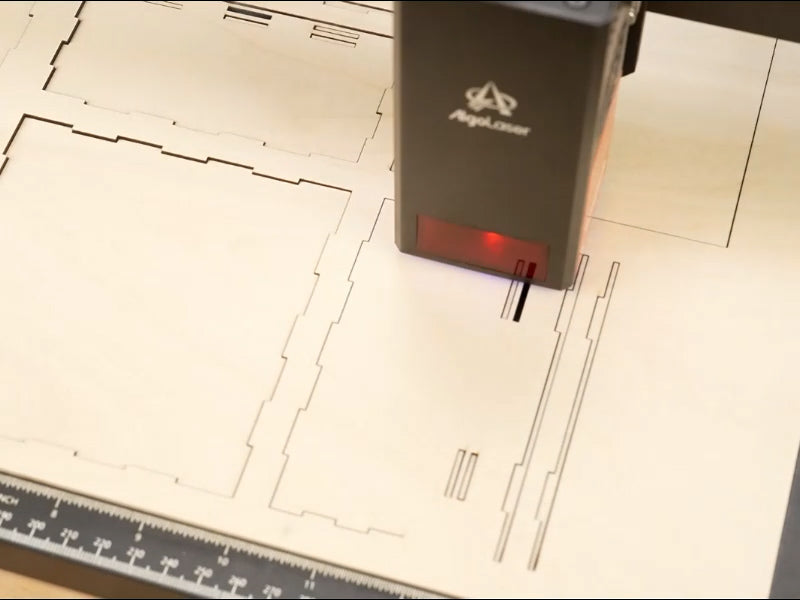
2. How do I avoid burnt edges when cutting plywood?
Use the air assist function on your laser engraver. It clears away smoke and debris, helping to reduce edge burn. You can also slightly increase speed or lower power if burns appear.
3. Can I engrave photos or complex designs on plywood?
Absolutely! The AlgoLaser Alpha MK2 20W handles detailed raster engraving beautifully. Just make sure to preprocess your image (convert to grayscale and adjust contrast) before importing it into LightBurn.
4. What’s the difference between “line” and “fill” modes?
· Line mode traces the outlines — perfect for cutting or outlining designs.
· Fill mode engraves the inner area — ideal for shading, text, and graphics.
For this project, I used line mode for the box edges and fill mode for text and paw prints.
5. Do I need to clean the laser lens after engraving wood?
Yes. Wood engraving can release resin and smoke particles that stick to the laser lens. After a few sessions, use a lens cleaning wipe or a small amount of isopropyl alcohol on a cotton swab to keep it spotless.
6. Can I make larger boxes or use thicker wood?
Definitely. The Alpha MK2 can cut through up to 10mm plywood with multiple passes. Just adjust your power and speed accordingly. For thicker boards, use a slower speed and more passes to ensure a clean cut.
Creating a wooden pet toy box with a laser engraver isn’t just about crafting — it’s about expressing creativity, personalization, and love for your pet. The AlgoLaser Alpha MK2 20W makes it easy to combine engraving precision with powerful cutting capability, giving you professional-quality results right from your workshop.
Whether you’re engraving paw prints, your pet’s name, or fun graphics, the Alpha MK2 brings those designs to life with perfect clarity. Once you’ve mastered focus, settings, and alignment, the possibilities are endless — from custom pet signs to intricate wooden art pieces.
So fire up your laser engraver, grab some plywood, and let your creativity go wild. Your pet deserves a toy box that’s as unique as they are!
Engraving & Cutting Operation Guide Steps
Thanks for subscribing!
This email has been registered!