Download Project Files

Laser Cut Wooden Dinosaur

Materials Needed

Machine Used

Line-Speed

250mm

Power

100%

Pass

1

  • How to Laser Cut a Wooden Dinosaur with the AlgoLaser Alpha MK2 20W Laser Engraver

As a geek laser engraver, I’m always on the hunt for creative projects that bring together fun, precision, and craftsmanship. One of my favorite DIY builds lately has been making a wooden dinosaur model—a perfect mix of engineering, design, and nostalgia. Using the AlgoLaser Alpha MK2 20W Laser Engraver, this project is not only doable but incredibly satisfying to watch as the laser beam brings your prehistoric friend to life, one layer at a time.


I’ll walk you through five detailed steps on how to laser cut a wooden dinosaur from 3mm plywood using the Alpha MK2 20W. We’ll also cover the cutting parameters, answer common FAQs, and share a few pro tips along the way to make your results crisp and accurate.

Step 1: Place the Plywood in the Engraving Area

Before you start cutting, make sure your work area is clean and level. Place your 3mm plywood flat on the engraving bed of the AlgoLaser Alpha MK2. A flat surface ensures consistent focus depth across the board, which is key for sharp, even cuts.


To prevent unwanted movement during cutting, use small magnets, honeycomb pins, or masking tape at the corners. Stability matters—if the wood shifts even slightly, your dinosaur’s joints won’t fit perfectly later on.


Pro Tip: Always double-check that your air pump and ventilation system are running properly before starting. It not only improves cut quality but also keeps your work area safer and cleaner.

Step 2: Adjust the Focal Length of the Module

Next, it’s time to focus the laser module. The Alpha MK2’s focusing tool makes this process simple. Move the laser module above the plywood, then place the focus tool between the module and the surface. Adjust the Z-axis height until the laser head just touches the focus gauge. Remove the gauge—your focus is now spot-on.


The correct focus ensures that the laser beam’s energy is concentrated exactly on the material surface, which maximizes cutting efficiency and prevents overburning. For plywood, a properly focused beam will produce a thin, crisp kerf (cut line) without discoloration around the edges.


Geek Insight: Laser focusing is not just a one-time thing—different material thicknesses or work surfaces may require slight refocusing. A difference of even 0.5 mm can noticeably affect the cut.

Step 3: Click on “Projects” then “SD Card”

The Alpha MK2’s touchscreen interface makes project management easy. Once your plywood is set and focused, tap “Projects” on the screen, then select “SD Card.”


Make sure your dinosaur cutting file—usually a .gcode or .svg file—has been saved to the SD card beforehand. If you’ve designed your own dinosaur model in LightBurn, export it as GCode and transfer it to the card via the virtual USB drive or SD slot.


Select your desired file on the display. You’ll see a quick preview of your design layout, which helps confirm that you’re working with the correct project before proceeding to setup.

Step 4: Set the Engraving Material and Parameters

Now it’s time to set the engraving material type and cutting parameters. On the Alpha MK2’s intuitive interface, choose “Wood” as your material. Then manually input the following parameters for best results:

Speed: 250 mm/min

Power: 100%

Passes: 1

If you’re working with thicker plywood—say 4mm or 5mm—you can either slow down the speed slightly (to 200 mm/min) or increase the number of passes to 2. However, for standard 3mm plywood, one pass is more than enough for clean separation.


After entering the parameters, tap the preview option to confirm your work area.


Pro Tip: Always check your air assist flow. The Alpha MK2’s integrated air pump helps blow away debris and smoke, resulting in cleaner edges and extending the life of your lens.

Step 5: Select the Thickness and Start Cutting

With your file ready and parameters set, you can now select the thickness of your plywood board (3mm) from the material list. The machine automatically optimizes cutting parameters based on this selection, but manual tuning gives you extra control if you want to tweak power or speed.


Next, drag the picture of your dinosaur layout onto the engraving area on the screen. Hit the “Frame” button—this makes the laser outline the cutting boundary without actually firing. It’s a great way to ensure your design fits perfectly on the material and avoids cutting outside the edges.


Once everything looks perfect, tap “Start Engraving.” The Alpha MK2 will hum to life, and the blue laser beam will trace each intricate detail of your dinosaur pieces. The 20W optical output ensures consistent penetration, even for tight inner cuts or small tabs.


Sit back and watch as the Alpha MK2 transforms your plywood into a prehistoric puzzle of beautifully cut dinosaur parts.

6 Frequently Asked Questions (FAQs)

1. What type of plywood is best for laser cutting dinosaurs?


Use birch or basswood plywood. They cut cleanly and resist excessive burning compared to cheaper plywood that contains more glue layers.


2. Do I need to mask the surface of the wood?


Masking is optional but recommended if you want to avoid burn marks. Painter’s tape or laser masking film helps keep the surface clean and peels off easily after cutting.


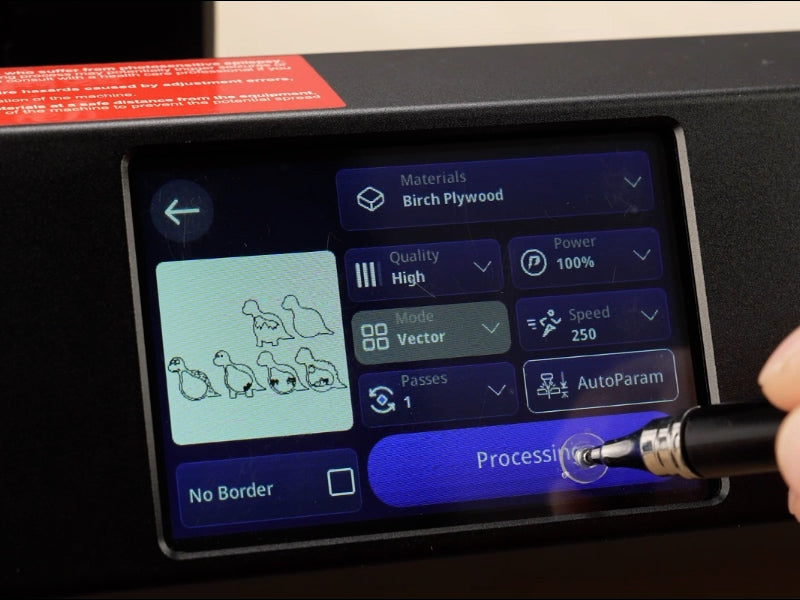
3. Can the Alpha MK2 20W cut thicker wood?


Yes. It can cut up to 10mm wood in multiple passes, depending on wood density. For detailed model parts like dinosaur joints, though, 3mm plywood gives the best fit and flexibility.


4. How do I prevent smoky edges on the wood?


Turn on the air assist and ensure proper ventilation. This prevents scorching and gives a smooth, light edge.


5. What software can I use to design dinosaur models?


LightBurn is the best choice. It’s compatible with the Alpha MK2 and lets you design, trace, and edit vector outlines easily.


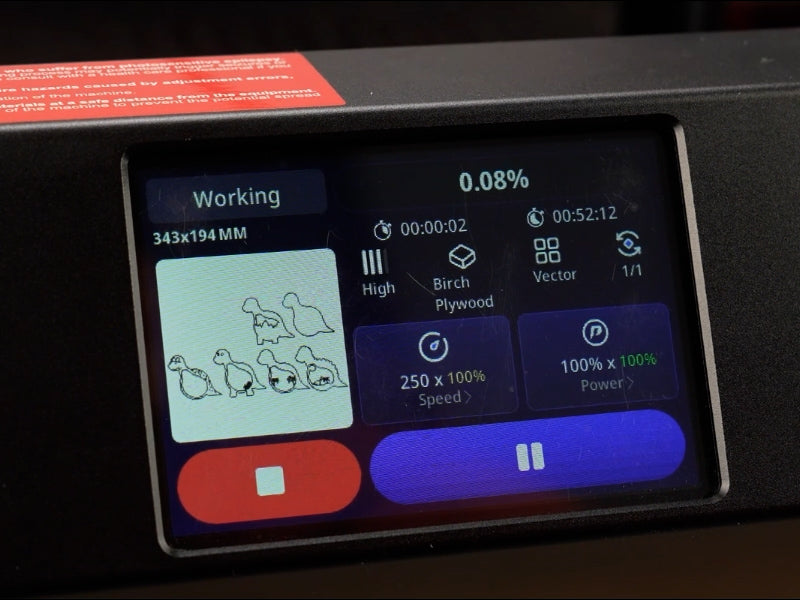
6. How long does it take to cut a wooden dinosaur?


Depending on the size and complexity, it usually takes around 10–20 minutes for a full 3mm plywood sheet using the settings above.

Final Thoughts

Laser cutting a wooden dinosaur isn’t just a fun weekend project—it’s a fantastic way to explore the precision and power of the AlgoLaser Alpha MK2 20W Laser Engraver. Whether you’re a hobbyist, teacher, or DIY crafter, this machine brings your creative ideas to life with professional-level accuracy and detail.


From focusing the laser to assembling the final model, every step feels rewarding. The Alpha MK2’s smart interface, smooth motion control, and strong cutting performance make it a standout choice for anyone diving into laser crafting.


So go ahead—fire up your Alpha MK2, drop in some plywood, and let your imagination roam with the dinosaurs!

You May Also Like