Laser Cut New Year Red Envelopes
Materials Needed
Machine Used
Laser Engraving
Step 3: Start the Cutting Process

Step 4: Fold the Cut Paper Along the Dotted Line

Step 5: Assemble and Finish the Red Envelope

Frequently Asked Questions (FAQs)

Colored Paper
AlgoLaser Alpha MK2 20W
Thickness
1mm
Line 1/Speed 1
1000
Power
100%
Quality
High
Pass
1
How to Laser Cut New Year Red Envelopes: A Step-by-Step Guide
Laser cutting is a precise and efficient way to create intricate designs, and one of the best ways to harness its power is by crafting custom New Year red envelopes. Whether you're creating these as part of a personal gift, a business venture, or just to ring in the Chinese New Year with style, laser cutting offers an incredible amount of control and detail. We will guide you through the process of creating laser-cut New Year red envelopes using the Alpha MK2 20W laser engraver, covering everything from preparation to folding and assembly.
Laser cutting is perfect for red envelopes because it allows you to create fine, intricate designs that traditional methods simply can’t match. Whether you want to include ornate patterns, names, or Chinese New Year symbols like dragons, lanterns, or fireworks, a laser engraver can handle it all.
This comprehensive guide will take you through a five-step process to design and cut your red envelopes, focusing on settings, materials, and techniques for the perfect results.
Before you get started, make sure you have the following materials and equipment:
Once you have everything set up and ready to go, you can begin crafting your laser-cut New Year red envelopes!
The first step in laser cutting your red envelopes is to position the colored paper correctly in the engraving area. Make sure your paper is of the correct size to fit within the cutting area of the Alpha MK2 20W. If you're making multiple envelopes, you can fit several on the same sheet of paper, as long as they are spaced appropriately to avoid overlapping.
1.1. Prepare the Paper
Start by selecting a colored paper that suits your design and the theme of the New Year. Red paper is a traditional choice for Chinese New Year red envelopes, but you can also use other colors like gold or green to make your envelopes unique. Make sure the paper is flat and free from creases or wrinkles, as these can affect the quality of the cut.
1.2. Place the Paper into the Engraving Area
Place the paper flat on the Alpha MK2 20W engraving bed. Align the paper carefully to ensure that the design will fit properly. The Alpha MK2 has a precision alignment system that helps you position the material in the right spot, so take advantage of this feature for perfect results.
The Alpha MK2 20W simplifies the engraving process with a three-step procedure that guides you through the design, parameter settings, and cutting stages. Here’s how you get started with setting up your laser cutter:
2.1. In the First Step: Click on the Screen to Select the Cutting Picture
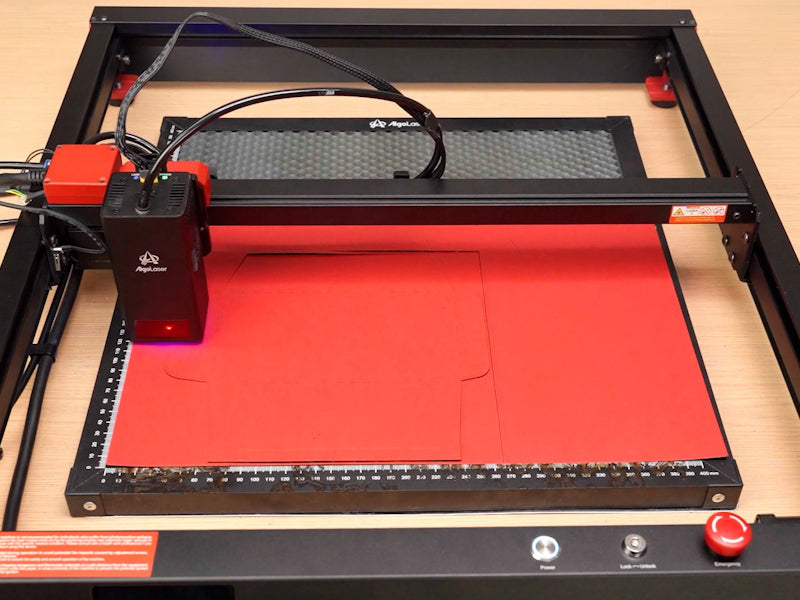
After placing the paper in the engraving area, the next step is selecting the cutting design. This is the image that will be cut into the red envelope. You can create your own design or use pre-made templates for New Year themes.
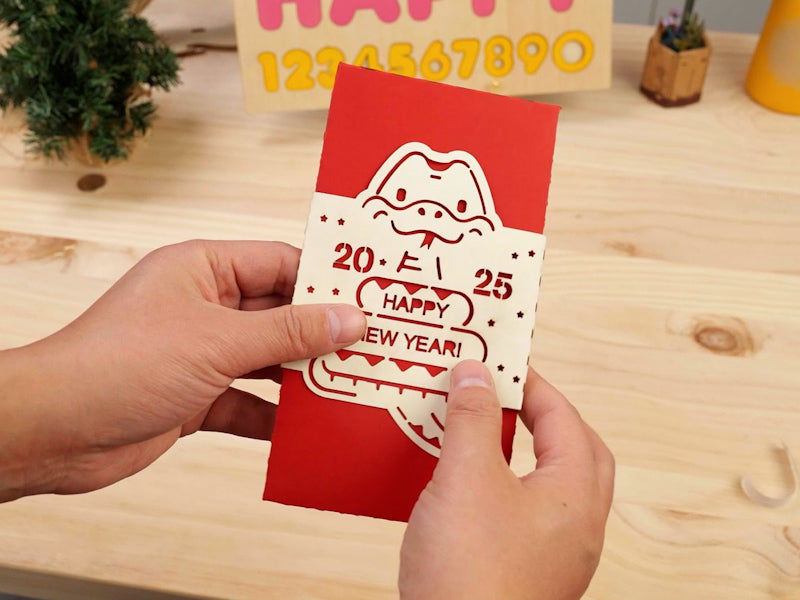
Load Your Design: Insert a USB drive containing your design into the machine. Then, navigate to the screen of the Alpha MK2 20W and select the cutting picture you want to use. This could be a simple pattern, a custom logo, or a more elaborate scene involving Chinese symbols or zodiac animals.
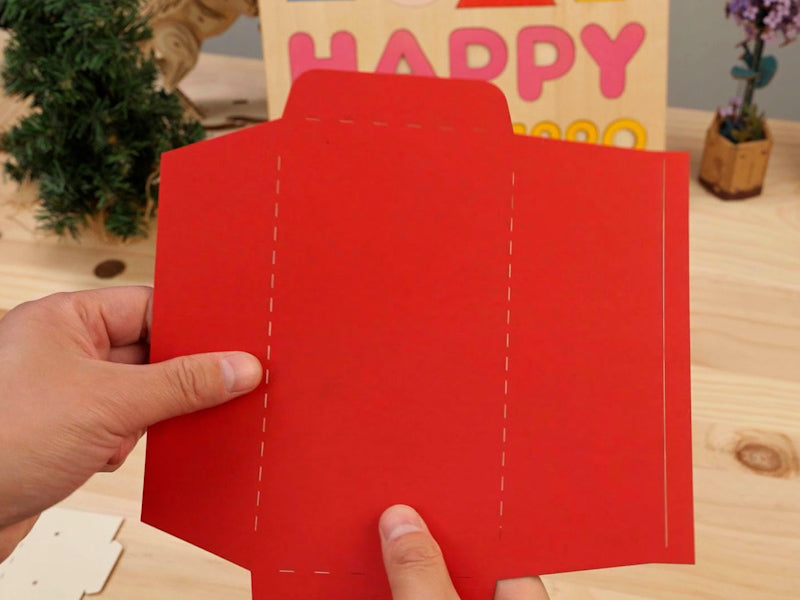
Design Tip: Since you’re making red envelopes, the design should fit within the typical size for an envelope. Consider elements like intricate borders, Chinese characters (e.g., “福” for good fortune), or decorative motifs (e.g., lanterns, dragons, or fireworks).
2.2. In the Second Step: Set the Cutting Parameters and Select the Material
Once you’ve chosen the cutting design, the next step is to set the appropriate parameters for the laser cutting process. Here’s how to adjust them:
Select the Material: In this case, you’ll be using colored paper (1mm thickness). Set this as your material in the machine’s software to ensure the laser cutter applies the correct settings for cutting paper.
Cutting Parameters: Set the following parameters for cutting:
2.3. Drag the Picture to the Engraving Area
Once the parameters are set, drag the design image onto the engraving area on the screen. Position it properly on the paper, making sure it fits within the cutting boundaries and doesn't overlap with other elements if you are cutting multiple envelopes.
Now that your design and parameters are ready, it’s time to start the cutting process. Follow these steps:
3.1. Click "Start" to Begin Cutting
With everything in place, click the “Start” button on your Alpha MK2 20W interface. The laser will begin cutting along the lines of your design. Keep an eye on the machine as it cuts the intricate patterns and shapes into your red envelope.
3.2. Monitor the Process
It’s important to monitor the cutting process to ensure everything goes smoothly. The Alpha MK2 has precise laser movement and should cut through the paper without issue. However, if you notice any irregularities, you can pause the process, adjust the parameters, and restart the cutting.
Once the laser cutting is complete, carefully remove the red envelope from the engraving bed. You should now have a beautiful, intricately cut envelope design with dotted lines where it needs to be folded.
4.1. Fold the Paper
Gently fold the cut paper along the dotted lines that the laser has marked for you. These dotted lines are placed in such a way that when folded, they will form a perfect red envelope shape.
Be sure to fold along the lines precisely to avoid any misalignment. Using a bone folder or a similar tool can help you achieve crisp, sharp folds.
Now that the cutting and folding are complete, it's time to assemble the red envelope. You will need to fasten the back of the envelope to complete the envelope shape.
5.1. Use Double-Sided Tape to Stick the Back Side
To hold the envelope together, apply a strip of double-sided tape along the back edges of the envelope. This adhesive will keep the envelope’s sides securely in place, creating a neat, professional-looking finish.
5.2. Fasten the Back Side
Press the back side of the envelope firmly, ensuring the adhesive sticks and holds the envelope closed. You can add decorative touches to the front, such as glitter, stickers, or seals, to further personalize the envelope.
1. What type of paper is best for laser cutting red envelopes?
2. Can I cut multiple red envelopes at once?
3. How do I set the correct cutting parameters for paper?
4. How do I adjust the design if it doesn’t fit the paper?
5. Can I use designs with intricate details for red envelopes?
6. Can I engrave text or symbols onto the red envelopes?
Laser cutting New Year red envelopes is an excellent way to celebrate the Chinese New Year or any special occasion. The Alpha MK2 20W laser engraver makes the process easy, efficient, and precise, ensuring you can create beautiful, custom envelopes with intricate designs that truly stand out. By following these five steps, you’ll be able to make stunning, personalized red envelopes that are sure to impress everyone who receives them!
Engraving & Cutting Operation Guide Steps
Thanks for subscribing!
This email has been registered!