How To Laser Engrave Photos On Acrylic
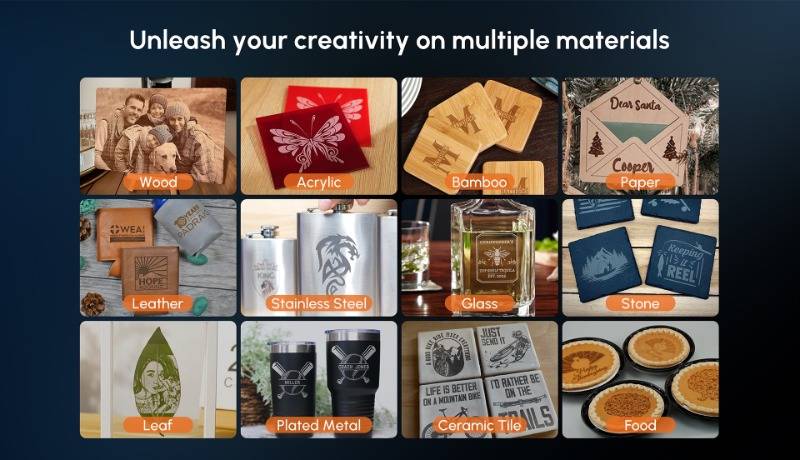
Laser engraving has revolutionized personalization and customization in a way that few other techniques can match. With the ability to etch intricate designs and lifelike photographs on various materials, it has become a favored choice for commemorating special moments, creating unique gifts, and adding a touch of artistry to projects. We'll delve deep into the art of laser engraving photos on acrylic, exploring the intricacies of the process, from image preparation to advanced techniques, ensuring you're equipped to embark on your own engraving journey.
1. Introduction to Laser Engraving on Acrylic
Laser engraving on acrylic is a fascinating process that utilizes a high-powered laser beam to create detailed and permanent markings on the surface of acrylic sheets. It offers an exciting blend of precision and creativity, making it a popular choice for a wide range of applications, including personalized gifts, artistic creations, decorative items, and more.
Key Features of Laser Engraving on Acrylic
Precision: Laser engraving allows for intricate and highly detailed designs, making it ideal for capturing the essence of photographs.
Durability: Engravings on acrylic are resilient and resistant to wear, ensuring the longevity of your cherished memories.
Versatility: Acrylic is available in various colors, finishes, and thicknesses, allowing for customization and creative expression.
Clarity and Transparency: Engravings on acrylic maintain the material's transparency, creating a visually captivating effect.
Customization: Photos, artwork, text, and patterns can be engraved on acrylic to create unique and personalized items.
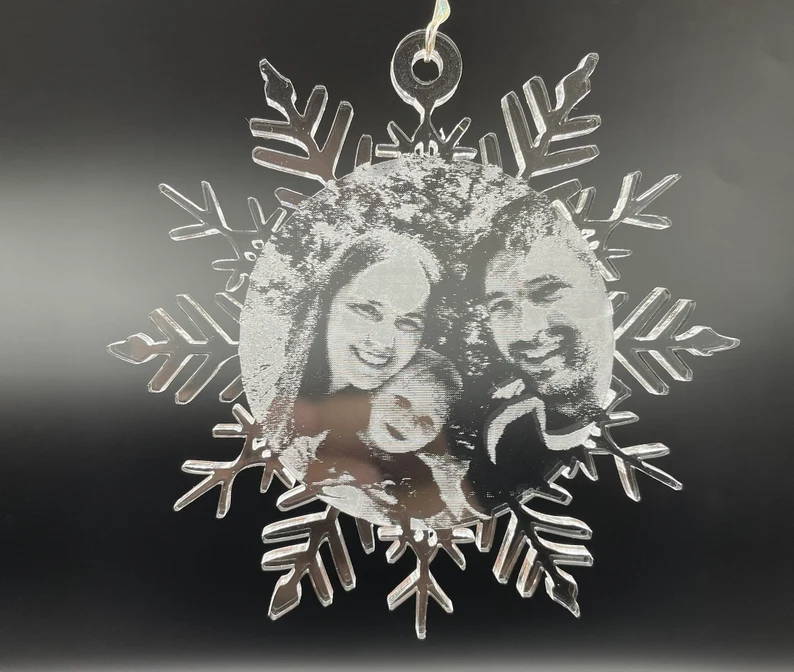
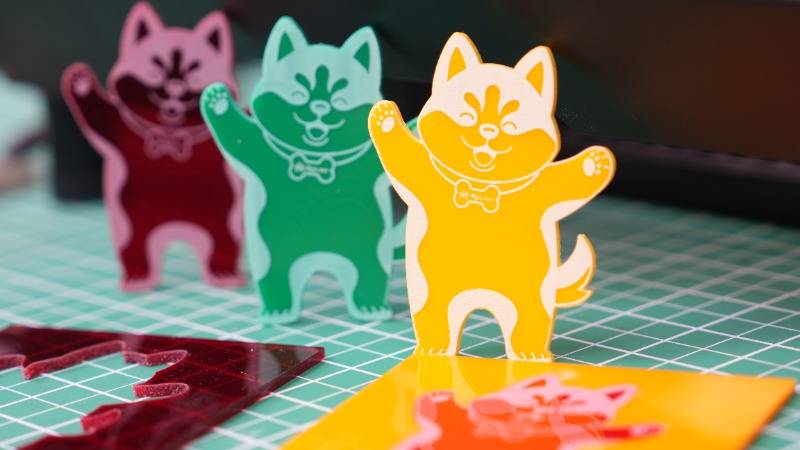
image credit: GenesisLaserDesigns - Etsy
2. Understanding the Laser Engraving Process
Before delving into the specifics of laser engraving photos on acrylic, it's important to understand the fundamental steps of the engraving process:
Image Preparation: Begin by selecting a suitable image and preparing it for engraving. This involves adjusting the image's size, resolution, and contrast to ensure optimal results.
Setting Up the Laser Engraver: Configure your laser engraver, ensuring it's properly calibrated and aligned. This step is crucial for achieving precise engravings.
Selecting the Right Acrylic: Choose the appropriate acrylic sheet, considering factors such as type, thickness, and finish, to match your project's requirements.
Configuring Engraving Parameters: Fine-tune the engraving settings, including power, speed, and frequency, to achieve the desired depth and quality of the engraving.
The Engraving Process: Place the acrylic sheet in the laser engraver and initiate the engraving process. Monitor the process to ensure it proceeds smoothly.
Cleaning and Finishing: After engraving, clean the acrylic surface and apply any finishing touches to enhance the appearance and protect the engraving.
3. Benefits of Engraving Photos on Acrylic
Laser engraving photos on acrylic offers several advantages that set it apart as a preferred method for preserving memories and creating personalized artwork:
1. Exceptional Clarity and Detail
Laser engraving provides the ability to reproduce photographs with remarkable clarity and detail, ensuring that every aspect of the image is faithfully captured.
2. Durability and Longevity
Engravings on acrylic are highly durable and resistant to fading, ensuring that your memories remain vivid and intact over time.
3. Versatility of Acrylic
Acrylic sheets are available in various colors, finishes, and thicknesses, allowing for creative expression and customization. You can choose the perfect acrylic to complement your image and project.
4. Quick Turnaround
Laser engraving is an efficient process, suitable for both small-scale and large-scale projects, with fast turnaround times.
5. Transparent Engravings
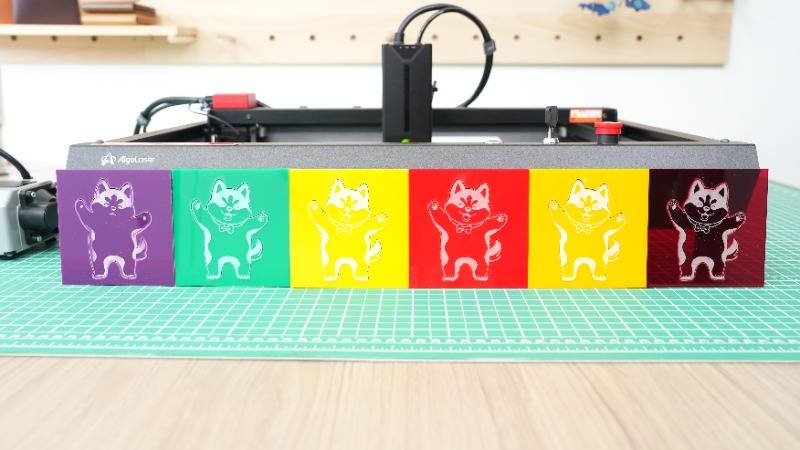
The transparent nature of acrylic ensures that the engraving maintains the material's see-through quality, creating a visually captivating effect when placed against different backgrounds or illuminated.Special attention should be paid to the fact that the diode laser engraving machine cannot engrave transparent acrylic materials. It needs colored cardboard or engraving colored acrylic materials.
6. Customization
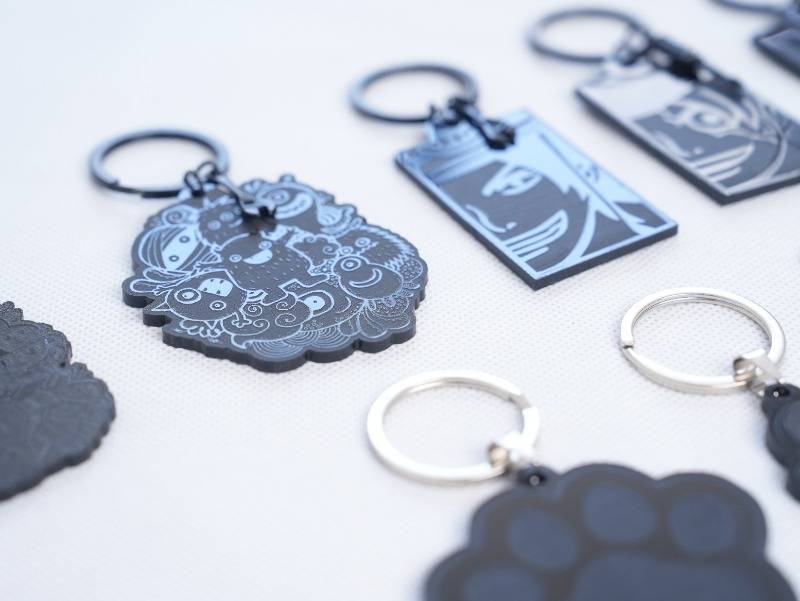
Engraving on acrylic is highly customizable, making it suitable for a wide range of applications, from personalized gifts and home decor to signage and artistic creations.

4. Image Selection and Preparation
The key to a successful photo engraving on acrylic begins with selecting the right image and preparing it effectively. Here's a breakdown of the steps involved:
1. Image Selection
Choose a high-resolution image with good contrast, sharp details, and appropriate lighting. For photo engravings, select a clear and well-focused photograph.
2. Image Editing
Utilize graphic design software to crop, resize, or adjust the image as needed. Ensure that the image dimensions match the size of the acrylic sheet to avoid distortion.
3. Grayscale Conversion
For photo engravings, it's often best to convert the image to grayscale. This simplifies the image and makes it more suitable for engraving while retaining the essence of the photograph.
4. Image Enhancement
Depending on the quality of the image, you may need to make adjustments to brightness, contrast, and sharpness. Enhancing the image can help optimize it for engraving.
5. Selecting the Right Acrylic
Choosing the appropriate acrylic sheet is crucial for achieving the desired results in your photo engravings. Consider the following factors:
1. Acrylic Type
Opt for cast acrylic, which is known for its clarity and engraving-friendly properties. It produces excellent results and is widely preferred for photo engravings.
2. Acrylic Thickness
Select the acrylic sheet thickness based on your project's requirements. Common thicknesses range from 1/16 inch (1.5 mm) to 1/4 inch (6 mm), but thicker options are available for added depth.
3. Acrylic Finish
Acrylic comes in various finishes, including matte, glossy, and textured. The finish you choose can significantly affect the appearance of the engraving, so select one that complements your design and project.

6. Setting Up Your Laser Engraver
A successful engraving begins with proper setup and calibration of your laser engraver. Here are key considerations:
1. Laser Type
Ensure your laser engraver is suitable for engraving on acrylic. CO2 lasers are commonly used for this purpose, providing the ideal wavelength for acrylic engraving.
2. Engraving Software
Use dedicated laser engraving software to control your laser. Popular options include LightBurn, RDWorks, and Trotec JobControl. Import your prepared image into the software and position it correctly within the engraving area.
3. Focusing and Alignment
Properly focus the laser beam on the acrylic surface to achieve the sharpest results. Ensure that the engraving area is aligned with the acrylic sheet to avoid misalignment issues that could affect the quality of your engravings.
4. Safety Precautions
Safety is paramount in laser engraving. Take the following precautions:
Wear laser safety glasses appropriate for your laser's wavelength to protect your eyes from harmful laser radiation.
Ensure your workspace is well-ventilated to disperse any fumes or smoke produced during the engraving process.
Have fire safety measures in place, including a fire extinguisher, to respond to any potential fires that may occur during laser engraving.
Avoid leaving the laser engraving machine unattended during operation, as this can lead to unforeseen issues.
Wear appropriate protective clothing to prevent accidental exposure to the laser beam. Avoid loose clothing and accessories that could get caught in the machine.
7. Fine-Tuning Your Engraving Settings
The quality of your photo engraving largely depends on how well you configure the engraving settings. It's essential to adjust the power, speed, and frequency parameters to achieve the desired depth and quality of the engraving:
1. Power
The power setting controls the intensity of the laser beam. A higher power results in deeper engravings, while lower power creates lighter marks. Adjust the power according to the characteristics of your acrylic material and the desired effect.
2. Speed
The speed setting determines how quickly the laser head moves across the acrylic surface. Slower speeds result in deeper engravings, while faster speeds produce shallower marks. The choice of speed depends on the desired effect and the characteristics of your acrylic.
3. Frequency (Pulse Rate)
The frequency, also known as the pulse rate, controls how many laser pulses are emitted per second. This parameter can affect the quality of the engraving. Higher frequencies can result in smoother engravings, while lower frequencies may produce a stippled effect.
4. Test Engravings
Before committing to your main engraving project, conduct test engravings on a scrap piece of the same acrylic. This allows you to fine-tune the parameters and ensure that the settings are optimized for the best results without risking errors on your primary project.
8. The Art of Laser Engraving Photos on Acrylic
With your acrylic sheet cleaned and prepared, your image edited, and your laser engraver properly set up, you're ready to embark on the engraving process. Follow these steps for a successful photo engraving on acrylic:
Step 1: Positioning
Place the prepared acrylic sheet on the engraving platform, ensuring it's securely fixed in place to prevent any movement during the engraving process.
Step 2: Software Configuration
Load your edited image into the laser engraving software and configure the engraving settings, including power, speed, and frequency, based on your earlier test engravings.
Step 3: Preview
Utilize the software's preview feature to verify that the image is correctly positioned and scaled on the acrylic. This step ensures that the image will be placed accurately during engraving.
Step 4: Commence Engraving
Initiate the engraving process through the software. The laser will begin etching the image onto the acrylic, following the configuration you've set.
Step 5: Monitor
Throughout the engraving process, keep a close eye on the machine to ensure it proceeds smoothly. Be ready to pause or stop the engraving if any issues arise, such as misalignment or inconsistent engraving depth.
Step 6: Completion
Once the engraving is complete, allow the machine to finish its final pass, and then turn off the laser. Carefully remove the engraved acrylic from the machine.
9. Achieving High-Quality Photo Engravings
Creating high-quality photo engravings on acrylic requires attention to detail and a commitment to excellence. Here are some tips to ensure your engravings are the best they can be:
1. Optimal Image Resolution
Begin with a high-resolution image. For detailed and lifelike engravings, ensure the image has a minimum resolution of 300 DPI (dots per inch).
2. Correct Engraving Settings
Fine-tune your laser settings to achieve the right balance of power and speed. This balance will vary depending on the thickness and type of acrylic you're using.
3. Depth Control
For photo engravings, aim for a shallow engraving depth to maintain the transparency and clarity of the acrylic. Adjust the power and speed settings to control the depth effectively.
4. Test Engraving
Perform test engravings on a scrap piece of the same acrylic to fine-tune your settings and verify the quality of the engraving before proceeding with your main project.
5. Consistency Check
Inspect the engraved image for consistent depth and shading. Ensure that there are no areas that are too light or too dark, which could indicate issues with your settings.

10. Beyond Basic Engraving: Advanced Techniques
While basic photo engravings are stunning, there are advanced techniques that can elevate your acrylic engraving projects to the next level:
1. 3D Engraving
With the right software and equipment, you can create 3D engravings on acrylic, adding depth and dimension to your artwork. This technique is ideal for architectural models and artistic creations.
2. Multiple Passes
Consider using multiple passes to achieve deeper and more pronounced engravings. This technique can enhance the contrast and visibility of your photo engravings.
3. Color Filling
Some acrylic materials allow for color filling, where acrylic paint or ink is applied to the engraved areas to add vibrancy and dimension to the artwork. This technique works particularly well for logos and signage.
4. Multi-Layer Engraving
Create multi-layered acrylic artworks by engraving different layers of acrylic and assembling them to form a complete design. This technique adds depth and complexity to your projects.
11. Post-Engraving: Cleaning and Finishing
After the engraving process is complete, there are essential steps to ensure that your engraved acrylic looks its best and is protected:
1. Cleaning
Clean the engraved acrylic piece to remove any debris or residue. Use a gentle brush or compressed air to get rid of loose particles, and then use isopropyl alcohol or a mild solvent to clean the surface. Cleaning ensures that your engraving is clear and free from any impurities.
2. Surface Inspection
Inspect the engraved image for quality and clarity. Check for any inconsistencies or imperfections in the engraving. If necessary, you can lightly sand or polish the engraved area to achieve the desired finish. Use fine-grit sandpaper and a polishing compound for this purpose.
3. Protective Coating (Optional)
Applying a protective coating can enhance the durability of the engraving. Clear acrylic spray or a lacquer designed for acrylic can help protect the design from scratches and wear. Apply the coating in a well-ventilated area according to the manufacturer's instructions.
4. Assembly and Presentation
If your engraved acrylic piece is part of a larger project or decorative item, assemble and present it in your preferred manner. This might include framing a photo engraving, mounting an acrylic sign, or incorporating it into a piece of artwork. Ensure that your presentation complements the style and purpose of your engraving.

12. Displaying and Gifting Your Engraved Acrylic Art
Once your photo engraving is complete and any necessary finishing touches have been applied, it's time to decide how to display or gift your engraved acrylic art. Here are some creative ideas:
1. Easel Display
Use an easel to display your acrylic photo engraving on a tabletop or shelf. This is an elegant way to showcase your art and makes it easily viewable.
2. Wall Mounting
Consider mounting your acrylic art on a wall. Special mounting hardware designed for acrylic can give your engraving a floating appearance, adding a touch of modern sophistication to your space.
3. Photo Frames
Frame your photo engraving in a clear acrylic frame to protect it and give it a polished look. These frames are sleek and unobtrusive, allowing the focus to remain on the engraving itself.
4. Lighted Bases
Enhance the visual impact of your acrylic art by placing it on a lighted base. LED bases can illuminate the engraving from below, creating a captivating, glowing effect.
5. Standalone Decor
Integrate your engraved acrylic piece into your home decor. For instance, you can use an engraved acrylic panel as a room divider, decorative screen, or unique piece of furniture.
6. Gift Ideas
Engraved acrylic art makes for thoughtful and personalized gifts. Consider engraving family portraits, wedding photos, or cherished memories to give to loved ones on special occasions.
13. Preserving Memories and Moments
One of the most beautiful aspects of laser engraving photos on acrylic is its ability to preserve memories and moments in a tangible and enduring form. Whether you're creating a keepsake for yourself or a gift for someone else, acrylic engravings offer a unique way to cherish special events and people.
1. Family Portraits
Create acrylic engravings of your family photos to hang in your home, preserving cherished moments and the bonds between family members.
2. Wedding Memories
Capture the magic of your wedding day by engraving a stunning wedding photo on acrylic. These engravings make for wonderful anniversary gifts and keepsakes.
3. Newborn and Baby Photos
Commemorate the arrival of a new family member with an engraved acrylic photo. Baby photos on acrylic are a heartfelt gift for new parents.
4. Pet Portraits
Pay tribute to your furry friends by engraving their portraits on acrylic. These engravings can serve as lasting memorials for beloved pets.
5. Travel Souvenirs
Remember your adventures by engraving your favorite travel photos on acrylic. Display them in your home to relive your journeys and inspire future travels.
6. Milestone Celebrations
Capture milestone celebrations such as graduations, anniversaries, and birthdays with engraved acrylic art. These pieces make for meaningful gifts and lasting mementos.
14. Troubleshooting Common Engraving Issues
Despite careful preparation, issues may occasionally arise during the engraving process. Here are some troubleshooting tips to address common problems:
1. Incomplete Engraving
If the engraving is incomplete or uneven, adjust the power and speed settings. Incomplete engraving can also result from dirty or improperly focused optics, so ensure that they are clean and correctly aligned.
2. Excessive Heat
If the acrylic gets too hot during engraving, consider reducing the power and increasing the speed to minimize heat buildup. Excessive heat can cause the acrylic to melt and produce undesirable results.
3. Artifacts or Ghosting
Artifacts or ghosting can result from vibrations, loose components, or inconsistencies in the laser beam. Check and tighten all components, including mirrors and lenses. Additionally, ensure that the engraving platform is stable and free from vibrations.
4. Uneven Depth
Uneven engraving depth can occur if the acrylic sheet is not level or if it has irregularities on the surface. Ensure that the acrylic is properly secured and that the surface is smooth and even.
5. Inaccurate Positioning
If the engraving appears misaligned, double-check the alignment and calibration of the laser engraver and the acrylic sheet. Misalignment can occur if the sheet is not correctly positioned or if the machine's settings are off.
15. Safety Measures in Laser Engraving
Laser engraving involves powerful lasers, and safety precautions are essential to protect yourself and those around you. Here are important safety measures to follow:
1. Protective Eyewear
Always wear laser safety glasses appropriate for the laser's wavelength to protect your eyes from potentially harmful laser radiation. These glasses are specially designed to absorb or block specific wavelengths and should be chosen accordingly.
2. Adequate Ventilation
Ensure that your workspace is well-ventilated to disperse any fumes or smoke produced during the engraving process. If your laser engraver has an exhaust system, ensure that it's properly connected and functioning.
3. Fire Safety
Have fire safety measures in place, including a fire extinguisher, to respond to any potential fires that may occur during laser engraving. Acrylic can ignite under certain conditions, so be prepared to extinguish flames.
4. Laser Control
Never leave the laser engraving machine unattended during operation. Always be ready to pause or stop the process if necessary. It's essential to stay in control of the machine and monitor its performance.
5. Safe Material Handling
Be cautious when handling acrylic sheets, especially immediately after engraving. The material can become extremely hot, and touching it without proper protection can result in burns.
6. Protective Clothing
Wear appropriate protective clothing to prevent accidental exposure to the laser beam. Avoid loose clothing and accessories that could get caught in the machine.
16. Conclusion: Unleash Your Creativity
Laser engraving on acrylic is an artful and technically fascinating process that allows you to capture memories, create personalized gifts, and add a touch of artistic expression to your projects. Whether you're a professional engraver, a creative artist, or someone looking to add a personal touch to a special gift, the world of laser engraving on acrylic offers a wealth of possibilities for artistic expression and customization. The combination of precision, durability, and creativity that laser engraving provides makes it an exciting avenue for artists and entrepreneurs alike. So, embrace this medium, explore new horizons, and let your creativity shine through your laser-engraved acrylic creations.
Free SVG & Gcode Files for Laser Engraving & Cutting can be found here, wich you can import into our laser cutters directly.