


How to Laser Engrave a Photo on Glass
Laser engraving is a captivating and precise technique that allows you to etch intricate and personalized designs, images, or text onto a wide range of materials. When it comes to transforming ordinary glass into a canvas for artistry, laser engraving is an excellent choice. In this comprehensive guide, we will explore the art of laser engraving photos on glass, step by step, and provide essential insights into each aspect of the process.
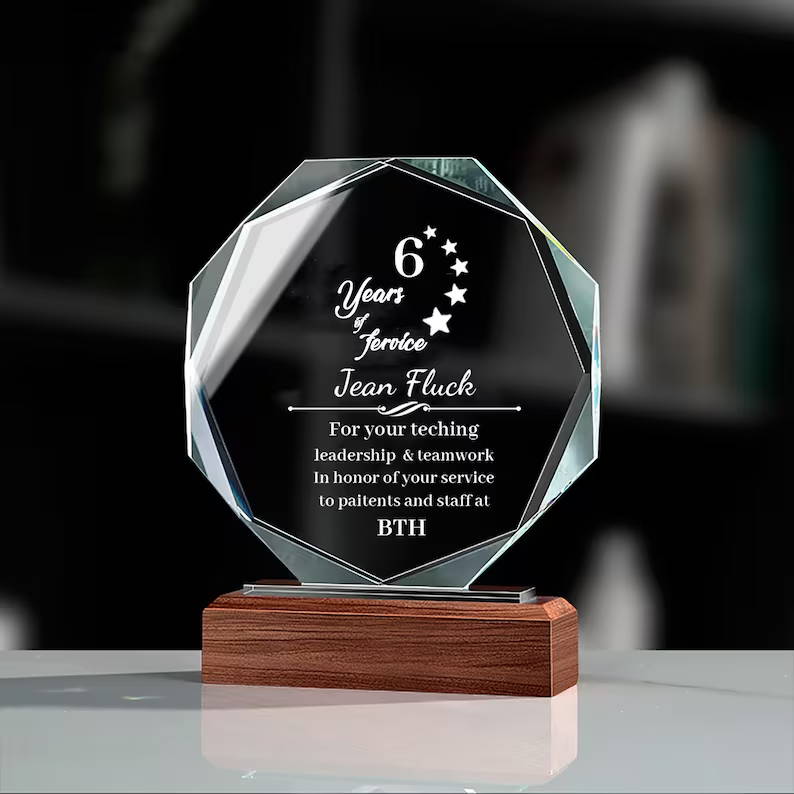
image credit: ColinArtWork - Etsy
What is Laser Engraving
Laser engraving is a versatile and precise method that uses a high-powered laser to mark or engrave the surface of various materials. This non-contact process delivers remarkable precision, enabling the creation of intricate and detailed designs. The laser beam focuses its energy on a small area, vaporizing or melting the material and leaving a permanent mark.
Types of Laser Engraving
Laser Etching: This method creates a shallow, frosted effect on the material's surface. It is commonly used for adding text or simple graphics to items like glassware and trophies.
Laser Engraving: In this process, the laser penetrates deeper into the material, creating a more pronounced and visually striking mark. It is ideal for intricate artwork and photographs.
Laser Cutting: Although not directly related to engraving, laser cutting employs a high-powered laser to cut through materials such as wood, acrylic, or metal, following precise patterns and designs.
Can You Transfer a Photo to Glass with Laser Engraving
Absolutely, you can transfer a photo to glass through laser engraving. This process empowers you to transform ordinary glass into a canvas for your favorite photographs, resulting in stunning and personalized keepsakes, gifts, or decorative pieces. Laser engraving on glass offers several advantages, including:
Personalization: Laser engraving allows you to add a personal and sentimental touch to your glass items. Whether it's a cherished family photo, a wedding picture, or a special message, the ability to customize your glass engravings makes them unique and meaningful.
Durability: Laser engravings on glass are permanent and highly durable. Unlike printed images or stickers that may fade, peel, or wear off over time, laser-engraved designs remain vivid and sharp, making them a lasting memento.
Aesthetic Appeal: The precision of laser engraving creates a striking contrast on the glass surface. The frosted appearance of the engraved area against the clear glass background produces an elegant and visually appealing effect, making it suitable for a wide range of decorative and artistic applications.
Versatility: Laser engraving can be applied to various types of glass, including flat glass, curved glass, and even crystal. It can be used to personalize glassware, mirrors, awards, and decorative glass items, providing a versatile platform for creative designs.
Fine Detail and Precision: Laser engraving is known for its exceptional level of detail and precision. It allows you to reproduce intricate images, text, and graphics on glass with remarkable clarity, ensuring that your designs meet the highest quality standards.

image credit: CLight3D - Etsy
What Type of Laser Do You Need to Transfer a Photo to Glass
To transfer a photo to glass, you need a laser engraving machine equipped with specific features and capabilities. The choice of laser type and machine largely depends on your intended applications, the level of detail you want to achieve, and your budget. The most common types of lasers used for engraving on glass are:
CO2 Lasers
CO2 lasers are widely used for engraving on glass because they can produce high-quality results. These lasers use a carbon dioxide gas mixture as the medium for producing the laser beam. Key features of CO2 lasers for glass engraving include:
High Precision: CO2 lasers are well-known for their precision, allowing for intricate and detailed engravings on glass surfaces.
Versatility: They can engrave on a wide range of glass types, including flat and curved glass, making them suitable for various applications.
Power Range: CO2 lasers come in a range of power options, with higher wattages allowing for faster engraving and deeper marks.
Multiple Materials: In addition to glass, CO2 lasers can engrave and cut various other materials, expanding their utility.
Quality Results: They produce high-quality, frosted engravings with fine detail, making them ideal for photo transfers to glass.
Price Range: CO2 laser engraving machines are available in a range of price points, making them accessible to hobbyists and professionals.
Fiber Lasers
Fiber lasers are another option for glass engraving, although they are more commonly used for marking and engraving on metal materials. While they can be used for engraving on glass, they are typically not the first choice due to their primary application on other materials. Key features of fiber lasers for glass engraving include:
Speed and Precision: Fiber lasers are known for their speed and accuracy, which can be beneficial for high-volume production.
Marking on Glass: They can produce surface marks on glass, such as text or basic graphics, but are less suited for detailed engravings.
Limited Depth: Fiber lasers are better at creating surface marks on glass rather than deep engravings.
Cost: Fiber laser machines are typically more expensive and are often chosen for specific applications where their unique capabilities are required.
Diode Lasers
Diode lasers are a less common choice for engraving on glass, primarily because they are not as powerful as CO2 lasers. However, they can be suitable for certain glass engraving applications. Key features of diode lasers for glass engraving include:
Compact Design: Diode lasers are often smaller and more portable than CO2 lasers, making them a practical choice for hobbyists and small-scale projects.
Ease of Use: They are typically easier to set up and operate, which can be advantageous for beginners.
Limited Depth: Diode lasers are best for creating shallow engravings on glass. They may not achieve the same depth as CO2 lasers.
Lower Cost: Diode laser machines are generally more affordable, making them a cost-effective option for those with budget constraints.
When selecting a laser engraving machine for glass, it's essential to consider the machine's compatibility with your intended applications. Ensure that the machine is equipped with the appropriate laser type and power to achieve the best results for transferring photos to glass.
How to Transfer a Photo to Glass
The process of transferring a photo to glass through laser engraving involves several steps, from image preparation to the actual engraving. Here's a detailed guide on how to accomplish this:
Step 1: Prepare Your Image
Select the Right Photo: Choose a high-resolution image with good contrast. Images with clear subjects and well-defined details work best for laser engraving. Black and white photos are often recommended for the most striking results.
Image Editing: Use image editing software to enhance your photo, adjust contrast, and convert it to grayscale if needed. Grayscale images are often more effective for creating depth and contrast in the engraving.
Sizing the Image: Resize the image to fit the dimensions of the glass. Ensure that it's proportionate and correctly positioned for the engraving.
Mirror the Image: Most laser engraving software provides the option to mirror the image horizontally. Mirroring the image is essential because the laser will engrave it in reverse on the glass. Mirroring ensures that the final image appears as intended.
Step 2: Select the Right Glass
The type of glass you choose plays a significant role in the final appearance and quality of your engraving. Consider the following factors when selecting glass for your project:
Glass Type: Different types of glass can be engraved, including soda-lime glass, borosilicate glass, crystal, and more. The choice of glass affects the appearance and clarity of the engraving. For optimal results, use high-quality glass.
Glass Thickness: The thickness of the glass impacts the depth of the engraving. Thicker glass allows for deeper engravings, creating a more pronounced effect.
Smoothness and Cleanliness: Ensure that the glass is clean, free of any smudges, and without visible imperfections. Even minor blemishes can affect the quality of the engraving.
Textured vs. Smooth Glass: Consider the texture of the glass. Smooth glass provides a clear and polished surface, ideal for creating sharp and well-defined engravings. Textured or frosted glass can also be engraved but will produce a different aesthetic effect, with a frosted appearance in the engraved areas.
Flat vs. Curved Glass: Laser engraving is more straightforward on flat glass surfaces, as they provide consistent focus for the laser beam. While engraving on curved glass is possible, it may require specialized equipment and adjustments to maintain focus and precision.
Glass Transparency: Consider the transparency of the glass. Fully transparent glass will showcase the image with clarity, while tinted or colored glass will affect the appearance of the engraving. The choice of transparency can complement your design.
Step 3: Setting Up the Laser Engraver
Properly setting up your laser engraver is crucial for achieving precise and high-quality results. Follow these steps:
Machine Calibration: Ensure that your laser engraving machine is properly calibrated to the glass's surface. Check the machine's focus, speed, and power settings to match the glass thickness and type.
Material Placement: Secure the glass piece within the machine. Depending on the machine, you may need a special platform or bed designed for holding the glass safely during the engraving process. Ensure that the glass is level and correctly positioned.
Focus Adjustment: Adjust the laser's focus point to the glass surface. Proper focus is essential for achieving a sharp and precise engraving. Many laser engraving machines offer autofocus features, simplifying this step.
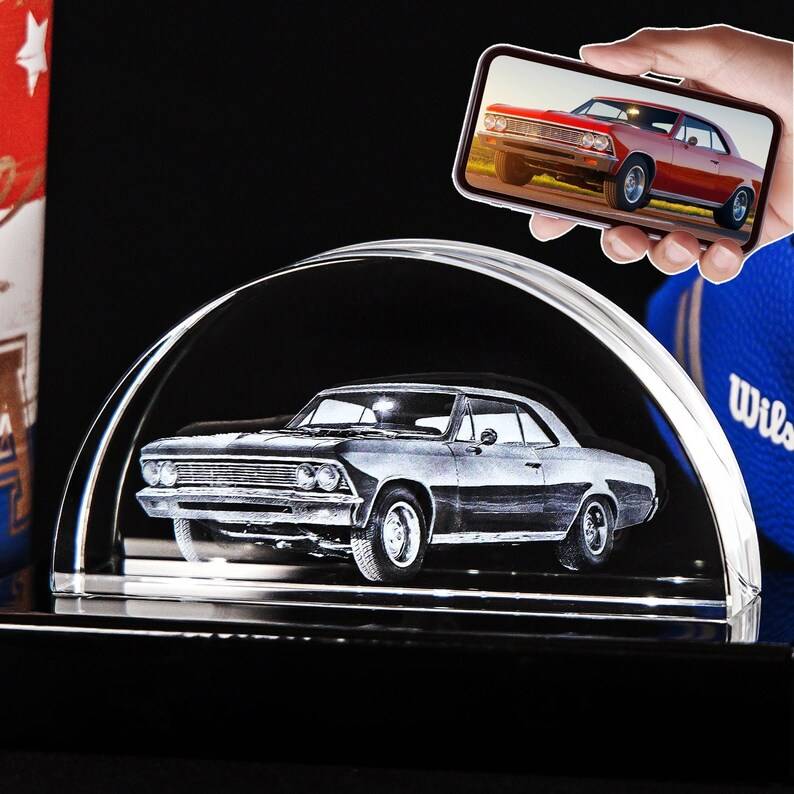
image credit: CrystalCreations3D - Etsy
Step 4: The Engraving Process
The actual engraving process involves using the laser to etch your selected image onto the glass. Here's how to carry out this step:
Software Configuration: Load your prepared image into the laser engraving software. Use the software to set the engraving parameters, which include speed, power, resolution, and engraving depth. These settings will vary based on the machine, glass type, and image complexity. Most software programs allow you to preview the engraving before initiating the process.
Safety Precautions: Prior to starting the engraving process, take necessary safety precautions. Ensure that you and anyone in the vicinity are wearing appropriate laser safety glasses designed to protect your eyes from laser radiation. If your machine produces fumes, ensure your workspace has proper ventilation to minimize exposure to potentially harmful emissions.
Image Alignment: Use the software to precisely align the image on the glass surface. This step is crucial to ensure that the image is positioned accurately and exactly where you want it on the glass.
Start Engraving: After confirming all the settings and safety measures, initiate the engraving process. The laser will follow the path defined by your image and software settings, etching the photo onto the glass. The duration of this process depends on the complexity and size of the image.
Monitor Progress: Keep a close eye on the engraving process, especially during the initial stages. Ensure that the engraving is proceeding correctly, and the glass is secure. Be prepared to stop the process if any issues or irregularities arise.
Step 5: Finishing
After the engraving is complete, you'll need to perform some finishing steps to enhance the final appearance of the glass:
Cleaning: Carefully remove the glass from the laser engraving machine. Depending on the machine and glass type, there may be some residue, debris, or particles on the engraved surface. Use a clean, dry cloth or brush to gently remove any debris. Be cautious not to scratch the glass.
Sanding (Optional): If you desire a smoother finish or want to enhance the contrast of the engraving, consider light sanding. Use fine-grit sandpaper and sand in the direction of the glass grain. Be gentle to avoid scratching the glass.
Applying a Finish (Optional): Depending on your project and design, you may choose to apply a finish to the glass. This step is not always necessary, but it can add protection and enhance the engraving's appearance. Select a finish suitable for glass, such as a glass or acrylic spray. Follow the manufacturer's instructions for application.
Inspect the Engraving: Examine the engraving carefully to ensure it meets your expectations. Look for any areas that may need additional cleaning or touch-ups.
Step 6: Safety Considerations
Laser engraving, especially when working with glass, involves certain safety considerations. Here are some important safety precautions to keep in mind:
Eye Protection: Always wear laser safety glasses that are appropriate for the type of laser you are using. These glasses protect your eyes from harmful laser radiation.
Ventilation: If your laser engraving machine produces fumes or emissions, ensure that your workspace is well-ventilated. Use an exhaust system or work in an area with proper air circulation to minimize exposure to potentially harmful fumes.
Fire Safety: Laser engraving can generate heat, so be cautious about flammable materials in your workspace. Keep fire extinguishing equipment nearby.
Training and Knowledge: Ensure that anyone operating the laser engraving machine has received proper training and understands safety procedures. Untrained or inexperienced operators can pose risks to themselves and others.
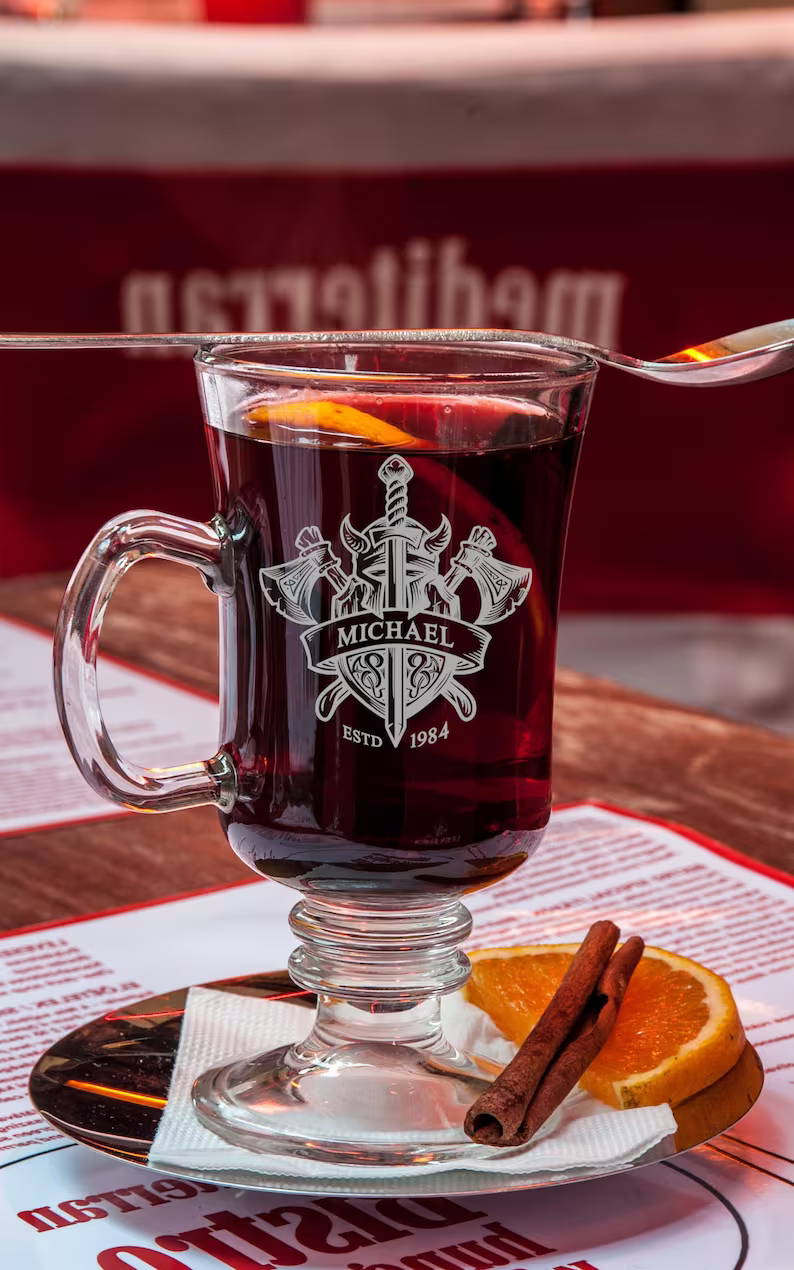
image credit: Kodelandia - Etsy
Conclusion
Laser engraving a photo on glass is a captivating and creative process that transforms ordinary glass items into extraordinary and personalized works of art. The combination of personalization, durability, aesthetic appeal, versatility, and precision makes laser-engraved glass pieces a sought-after choice for gifts, awards, home decor, and artistic creations.
By following the steps outlined in this guide and prioritizing safety, you can successfully laser engrave your chosen images onto glass, creating beautiful and enduring pieces that will be cherished for years to come. Whether you're creating a unique gift or commemorating a special moment, laser-engraved glass will capture the essence of your chosen images and make them shine.


