How the Laser Engravers'Work Area Relates to the Task Area in the Software
When using LaserGRBL or Lightburn, it is common to encounter situations where the machine works properly, but the task is interrupted due to an error in the engraving area. Therefore, it is important to understand the relationship between the machine's work area and the engraving task area in the software.
This will assist in completing the task more efficiently and securely.
The subsequent explanation is based on the Algolaser Alpha as an example, but it is applicable to LaserGRBL and Lightburn, regardless of the brand or model, as long as a G-code file is utilized.
The article is to explain how the laser engraver’s working area related to the working area in the LaserGRBL and Lightburn.
Main Point
1. Recognizing the Engraving Area
2. Engraving Position Settings for Various Software
1. Recognizing the Engraving Area
Maximum engraving area of AlgoLaser Alpha :400*400 (MM)
After powering on the machine and automatically homing it to the lower left corner, the machine's state can be observed.
(1) The laser module emits laser light from its center, resulting in an engraved area that is smaller than the machine frame.
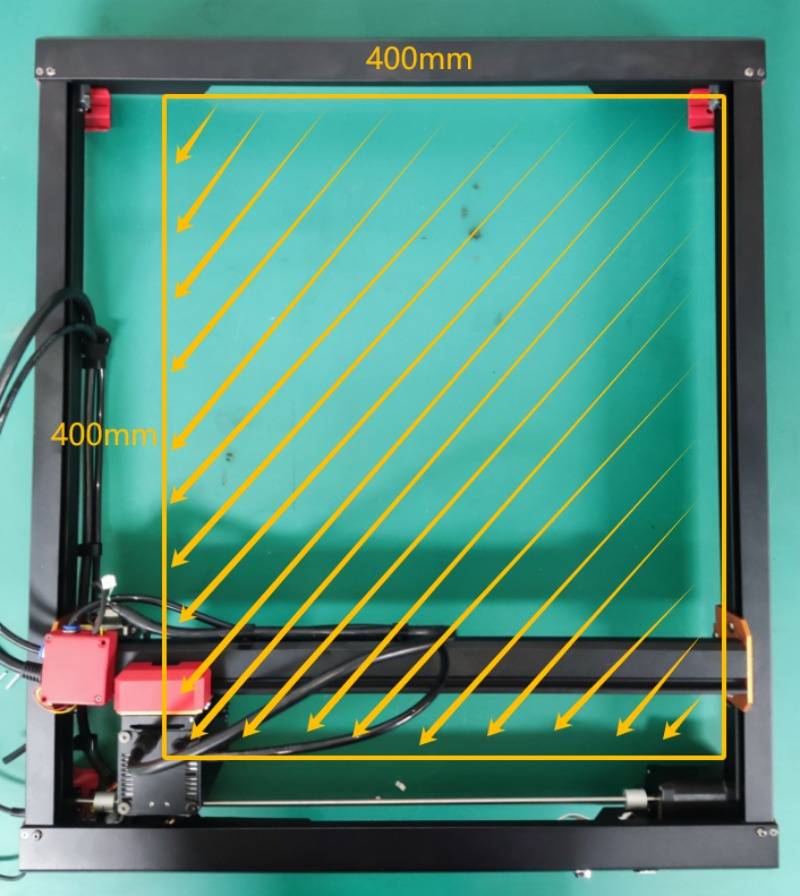
(2) Define the x and y directions within the engraved area.
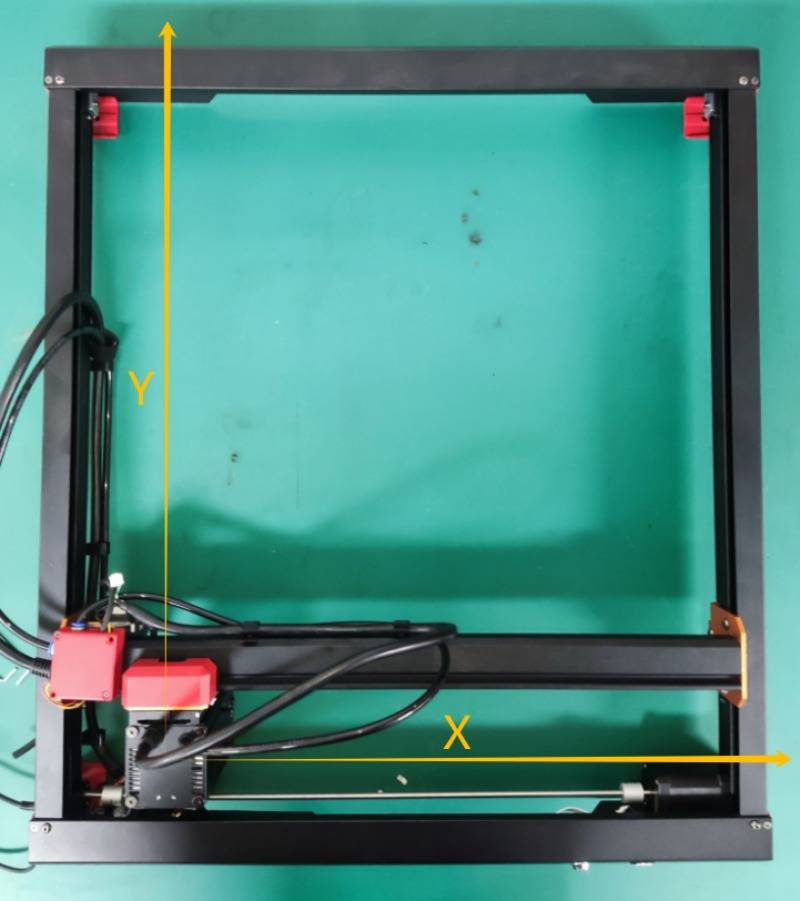
With each homing, the module returns to the initial point in the lower left corner. (0,0).
Tips:
A. The machine's firmware specifies that it can only be operated within the maximum engraving area of 400 by 400 units.
B. When the machine is homed, the firmware recognizes the current position as (0, 0), so it can operate normally in the engraving area.
If the homing is incorrect or disabled, the position must be adjusted in the software to ensure the machine operates within the correct engraving area.
Please refer to the documentation below for assistance in understanding and resolving this issue.
2. Engraving Position Settings for Various Software
LaserGRBL:
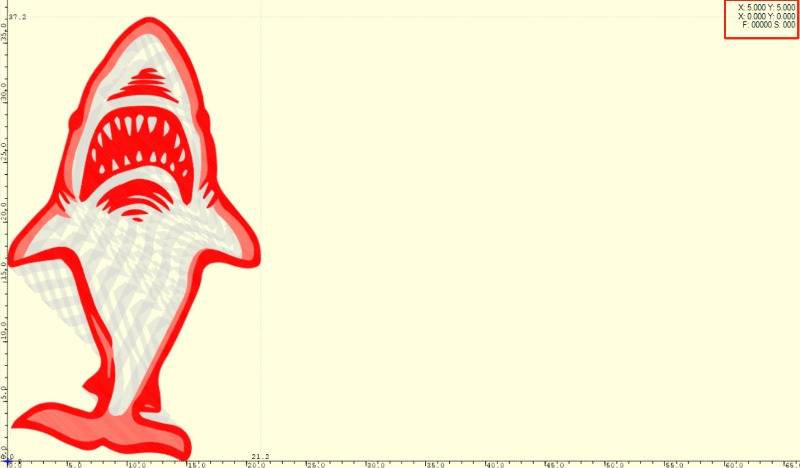
To begin, it is important to understand the meaning of the first two rows.
The first row indicates the location of the laser module within the machine's working area. (Absolute Coordinate Axis) e.g.
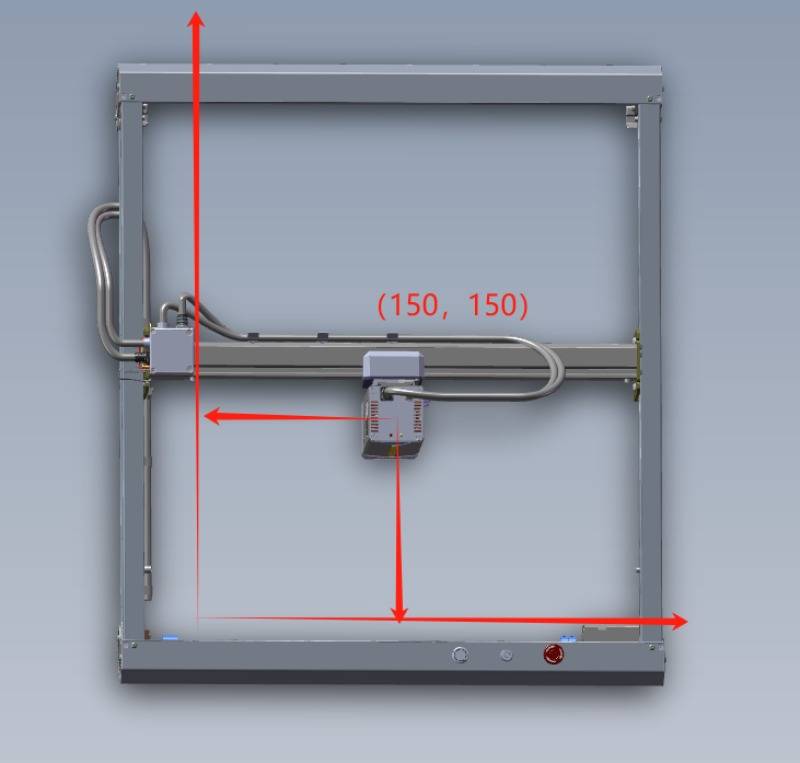
(The coordinates of the laser module currently located in the first row of the engraving area will be displayed as (150, 150)).
The second row indicates the position of the laser in a coordinate system with a user-defined zero point. (User Coordinate Axis)
By default, this point overlaps with the first row, resulting in no data.
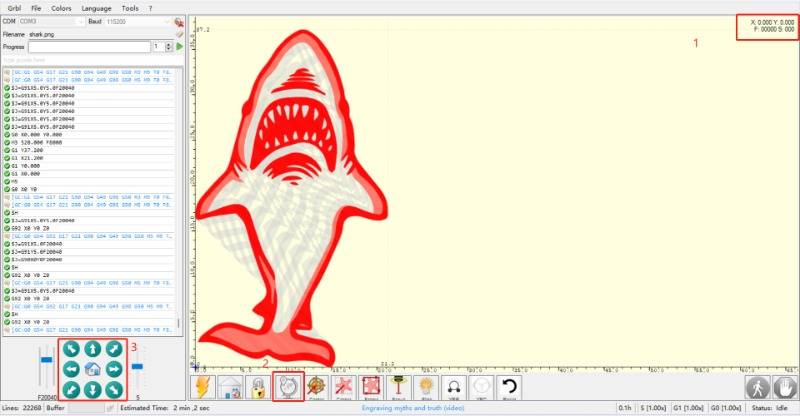
The laser module is the same with the zero position, represented by the upper right 1. Therefore, it is not possible to set a new user zero position at this time, with the icon of red box 2 in gray.
The position of the laser module can be adjusted and a new user zero point can be set by clicking on the arrow symbol located in the red box 3.
Example:
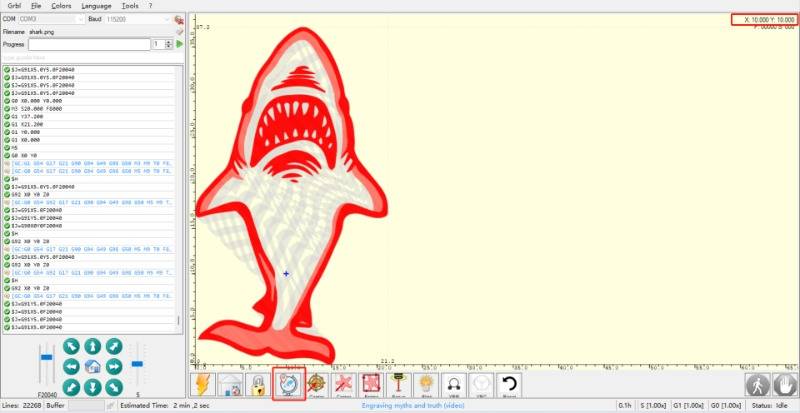
The current position of the laser is (10, 10), set as the user original point.
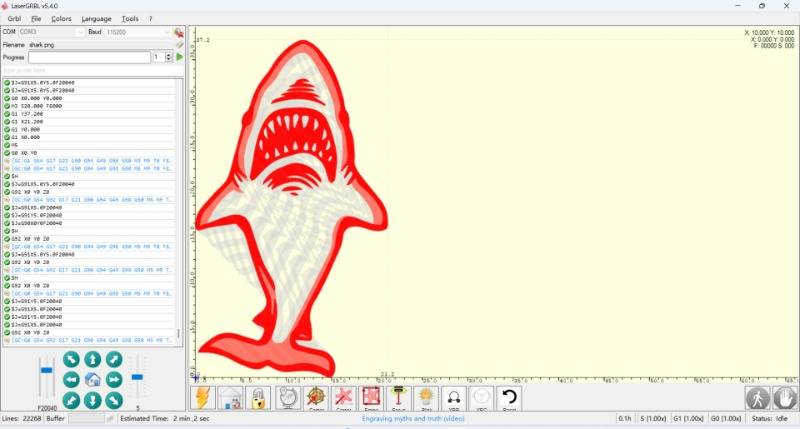
Absolute position: (10, 10)
User position: (0, 0)
If any part of the current engraving is located in negative coordinates.
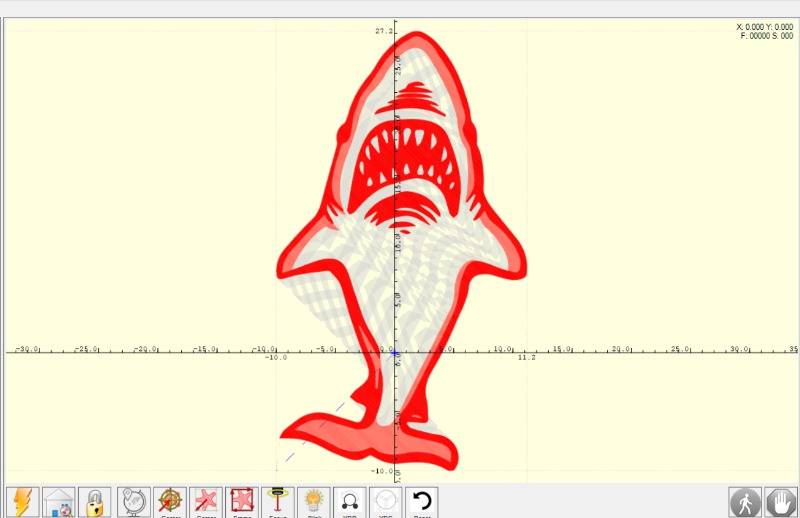
The content engraved would be:
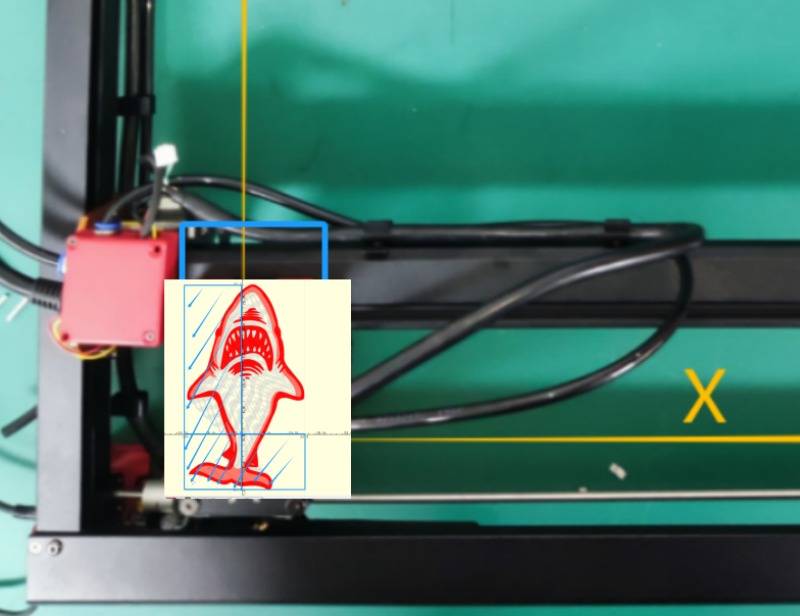
The engraving failed because the laser module could not move any closer to the left and down.
How to solve:
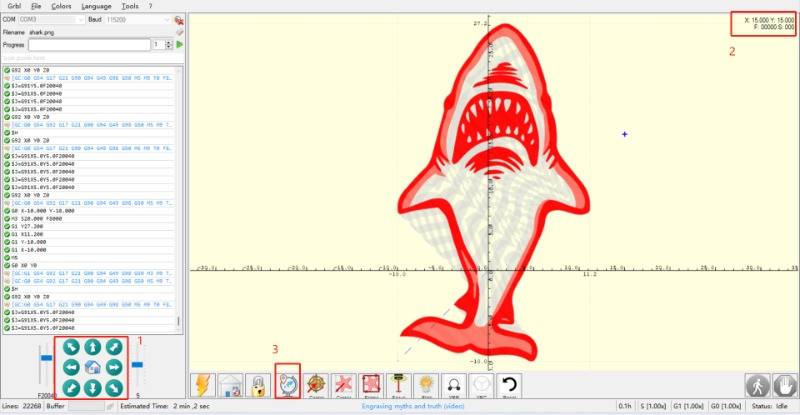
1)Using the Move command (Red box 1), adjust the position of the laser module until the space in its lower left corner is suitable for the engraved content.
2)Set user zero point (Red box 3).
3)Operate as usual.
Hope this example can familiarize you with the relationship between user coordinates and engraving area coordinates.
It is important to avoid using your hands to move the laser, especially for beginners. Doing so can cause the engraving position of the machine to not correspond to the actual position, resulting in a risk of out-of-travel engraving.
Lightburn:
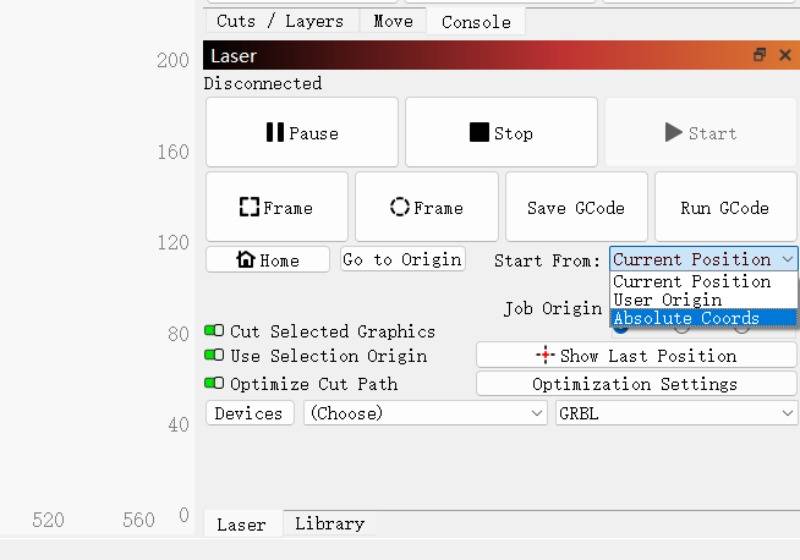
LightBurn offers three starting points:
1)Current Position
2)User Origin
3)Absolute Coords
The user origin can be found in the previous LaserGRBL user origin settings.
This section will cover the Current Position and Absolute Coords.
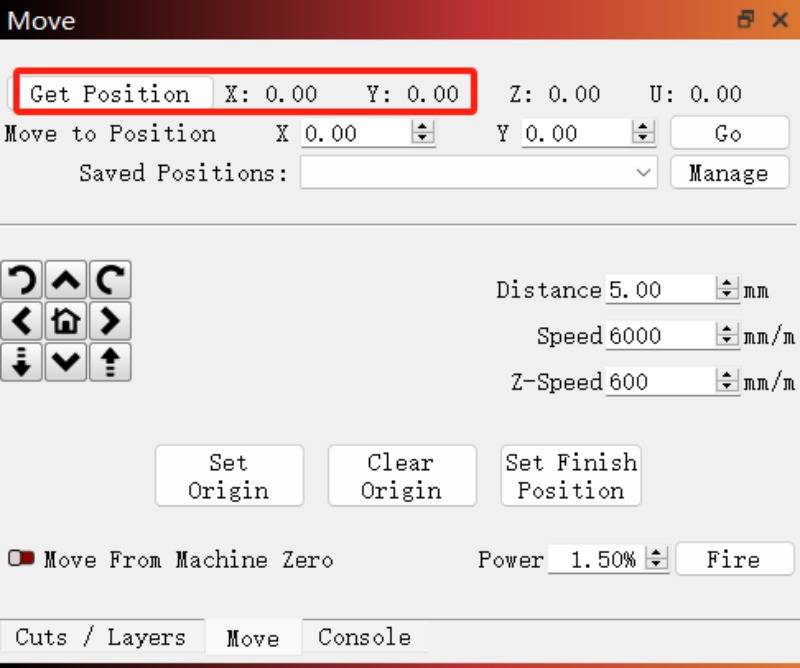
Before proceeding, ensure that the machine is homed by either powering it on (which will automatically home it) or clicking the HOME button. Then, confirm that the location is (0, 0).
Current Position
This option applies the current position of the laser module as the starting point for engraving or cutting.
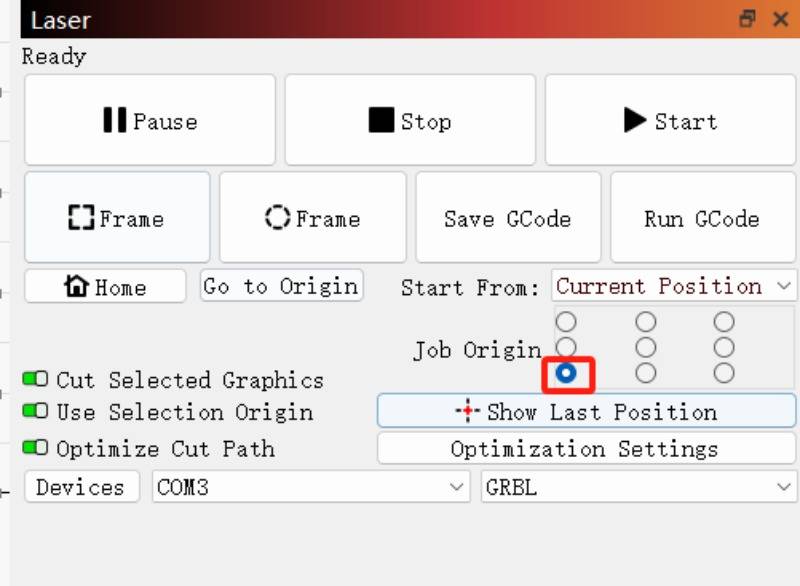
Simultaneously, a reference point should be established on the engraving pattern that corresponds to the starting point of the pattern.
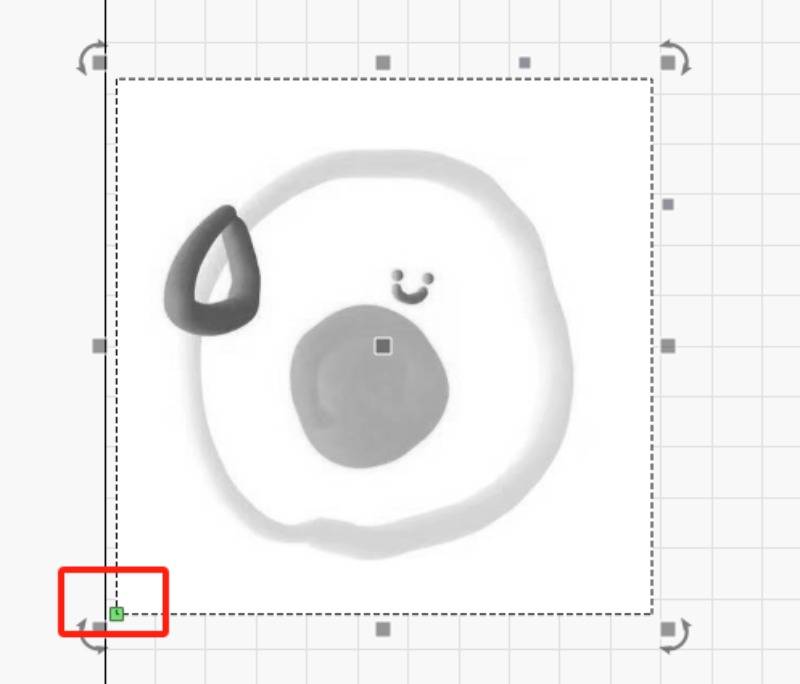
To ensure the function is available at the (0, 0) position, it is recommended to set it up in the lower left.
Additionally, when engraving pictures, turn off the overscan function (refer to the note on absolute coordinates).
Absolute Coords
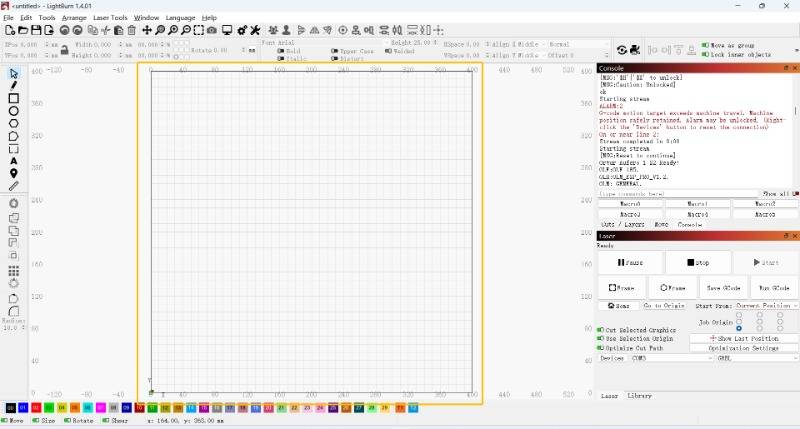
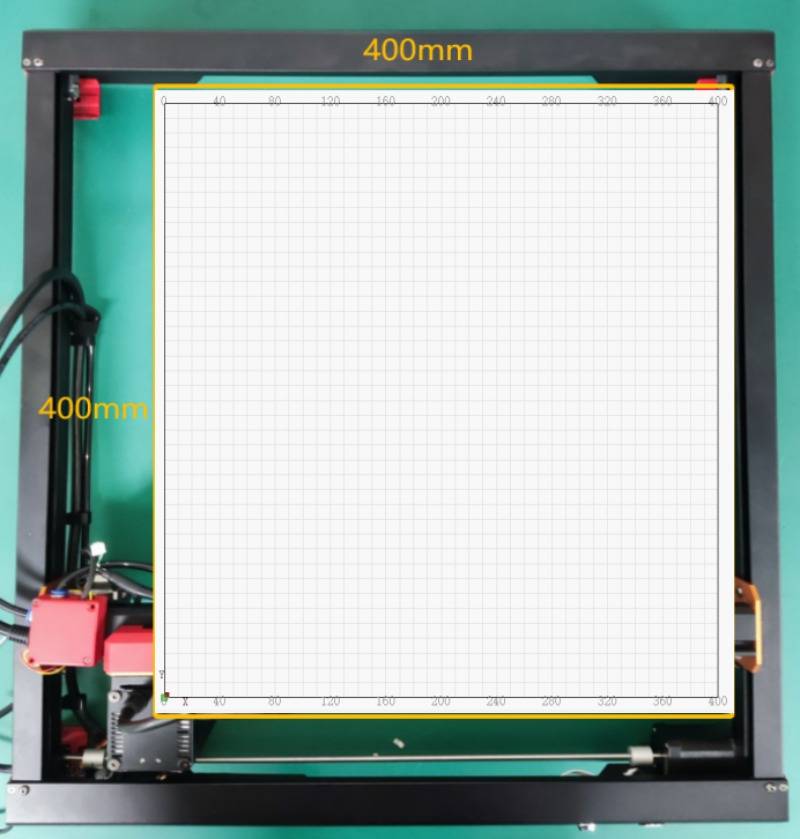
Ensure that the coordinate point is (0, 0) when the laser is in the lower left corner.
That way, the machine's movement coordinates are exactly the same as the coordinates in the software.
It is possible to engrave or cut any design as long as it fits within the software's working area.
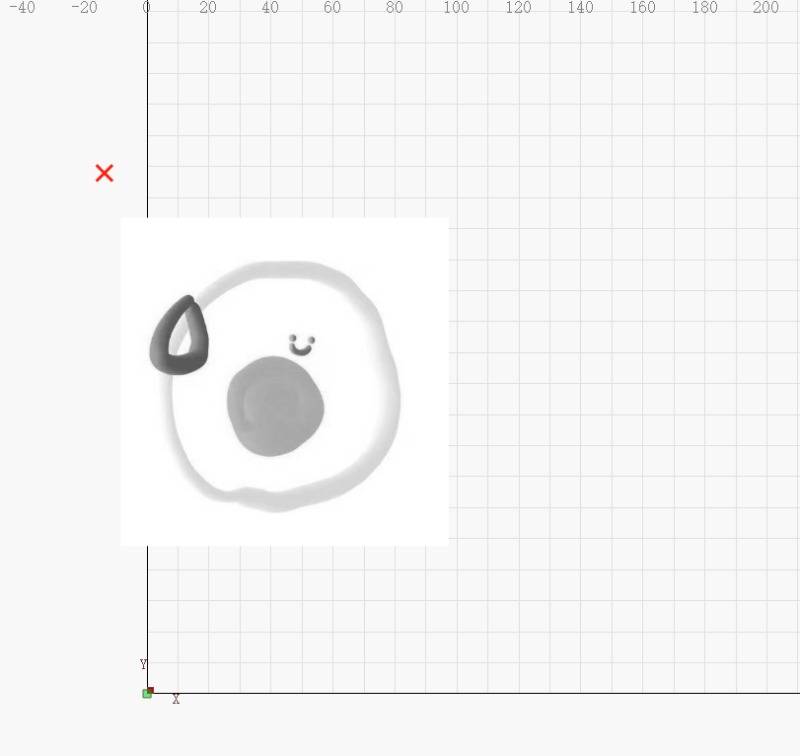
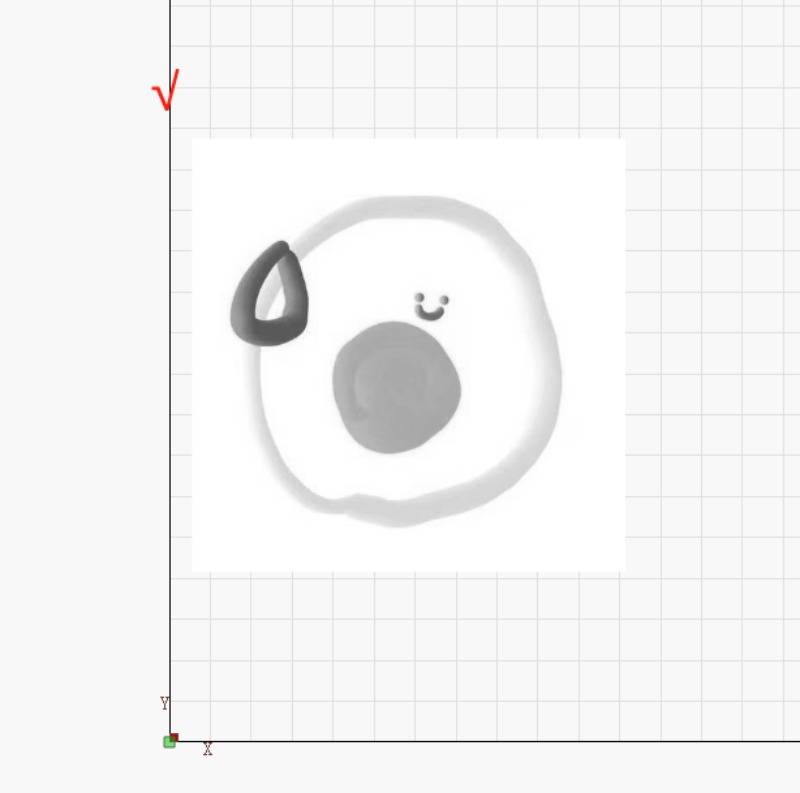
Special Note: When engraving pictures, it is necessary to turn off the overscan setting if it is near the edge of the stroke.
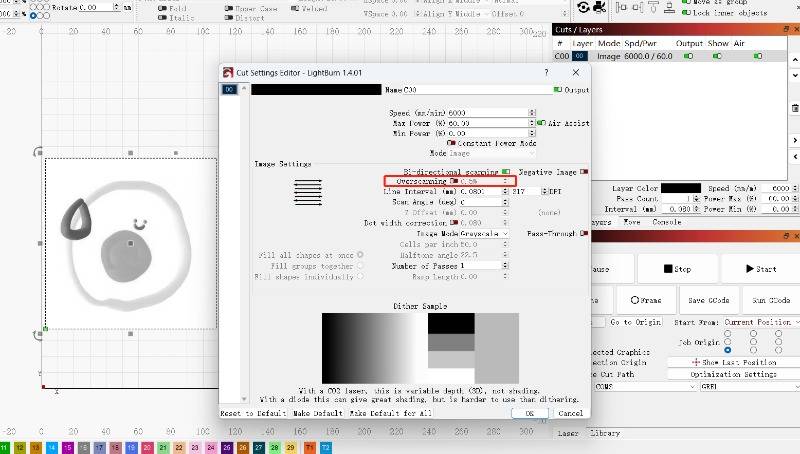
Since this setting increases the original stroke, the purpose is to minimize the increase in carving depth due to the reduction in steering speed without changing power.
If enabled, content that would otherwise be cut off at the edge of the area will extend beyond the area due to this feature increasing its length by 2.5%, which may cause it to stop working.
From Layne:
When engraving, I often use the move function to the position (30,30).
Afterward, I manually adjust the laser module position for optimal engraving using the 'current position' mode. This way I don't have to turn off the overscan function.
This needs to be ensured:
1) The size of the engraved content must be less than (370, 370) (400-30).
2) Always use 'Get position' to determine the machine's location.
Free SVG & Gcode Files for Laser Engraving & Cutting can be found here, wich you can import into our laser cutters directly.


