How to connect the machine and app or LightBurn with WiFi
The guide helps people to know how to connect the AlgoLaser Machine and App, also the way of connect machine to LightBurn or LaserGRBL by Wi-Fi.
The tutorial contains:
1. Two ways to connect to the app are through its own hotspot or the LAN (2.4G only).
2. Connect to Lightburn or LaserGRBL via Wi-Fi.
(Caution. After establishing a LAN connection, the laser engraver machine's hotspot becomes hidden, making it impossible to reconnect using the previous method. To reconnect, connect the USB to the PC software such as Lightburn or LaserGRBL.
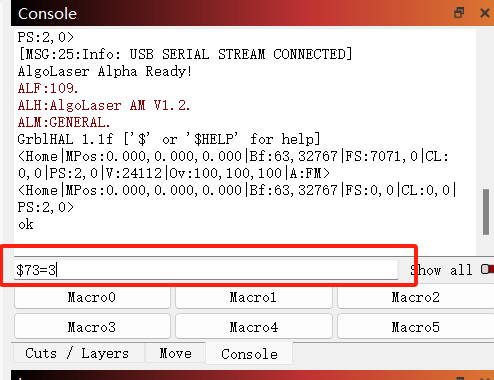
Enter $73=3
in the Console Window, confirm successful input, and restart the machine.)
Two ways to connect to the App
Method 1, Find the machine's hotspot, usually ALA1(or DK)-AP-XXXX, with a password of 12345678.
1. Turn on the machine and ensure that it powers up and homes in on the lower left corner automatically.
2. Open the Wi-Fi list on your cell phone, find ALA1 (or DK)-AP-XXXX, and enter the password 12345678.
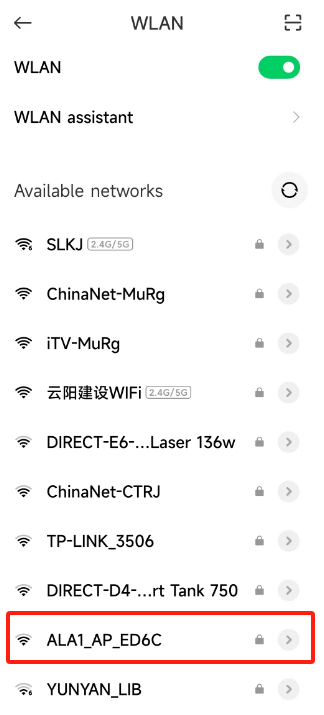
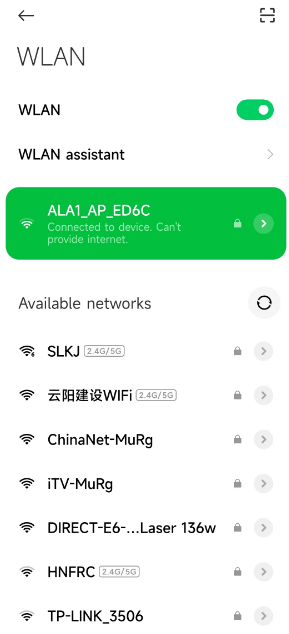
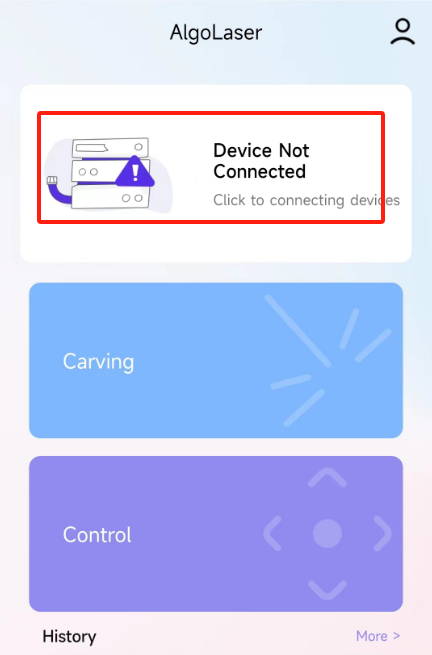
3. Open the application and click 'Connect' to automatically search for the machine that has issued a hotspot.
4. Click 'Connect' .
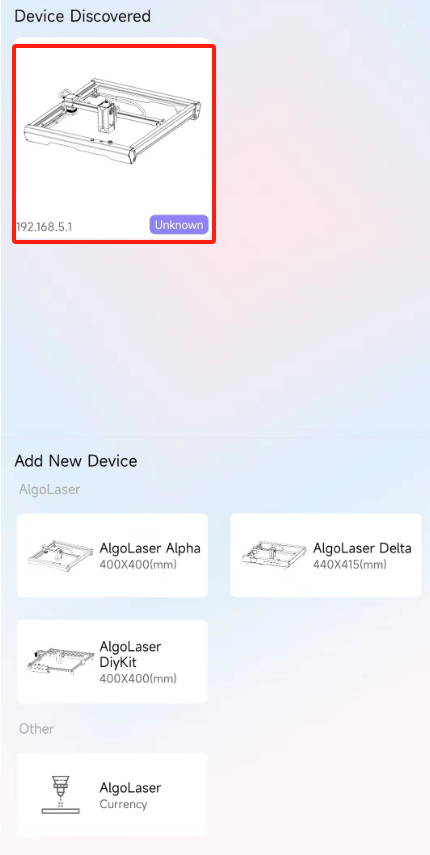
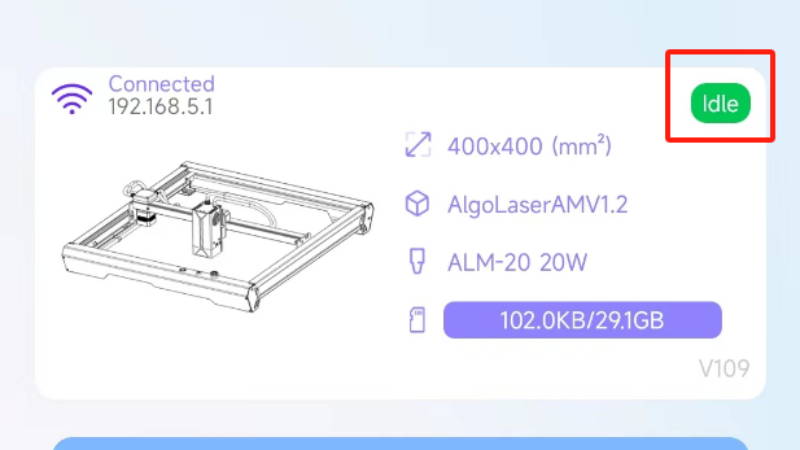
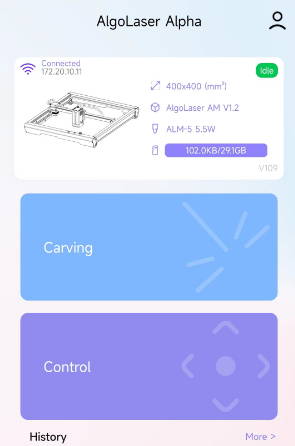
5. The machine is successfully connected and ready to receive commands, as indicated by the ‘Idle’ status in the upper right corner.
Video for Reference:
https://drive.google.com/file/d/1nzaufaiA9LcJHUtVVrX25p0E2XiajdBt/view?usp=drive_link
Method 2: Ensure that the machine, cell phone, and router are connected to the same LAN, and use the cell phone to control the machine through the LAN.
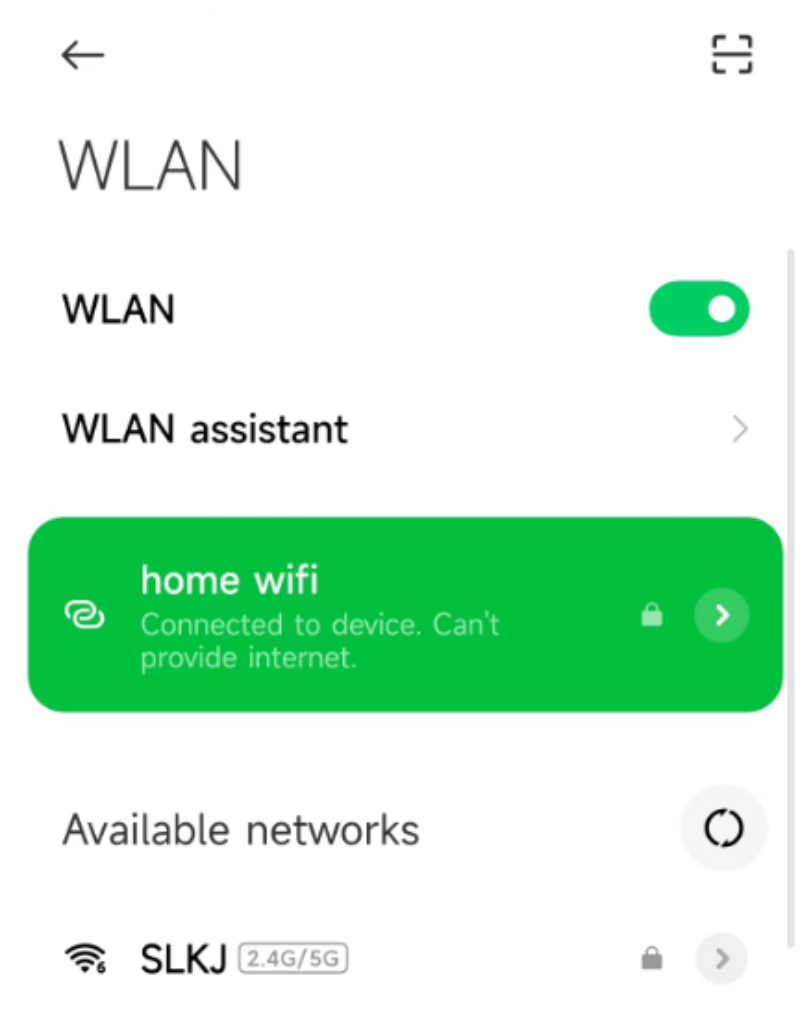
1. Connect to your home (Business or Personal) Wi-Fi.
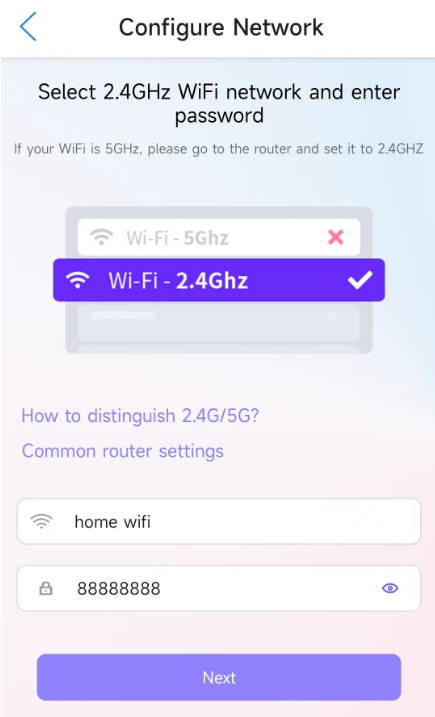
(For instance, in the image, my home WiFi network name is 'home wifi' and the password is '88888888'.)
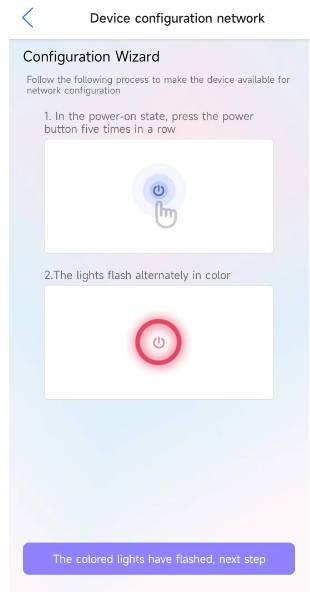
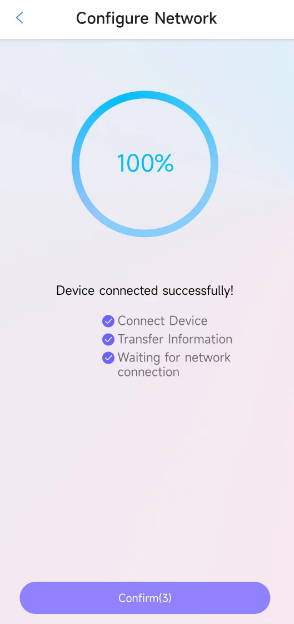
2. Choose your device and input your WiFi password (e.g. my password 88888888)
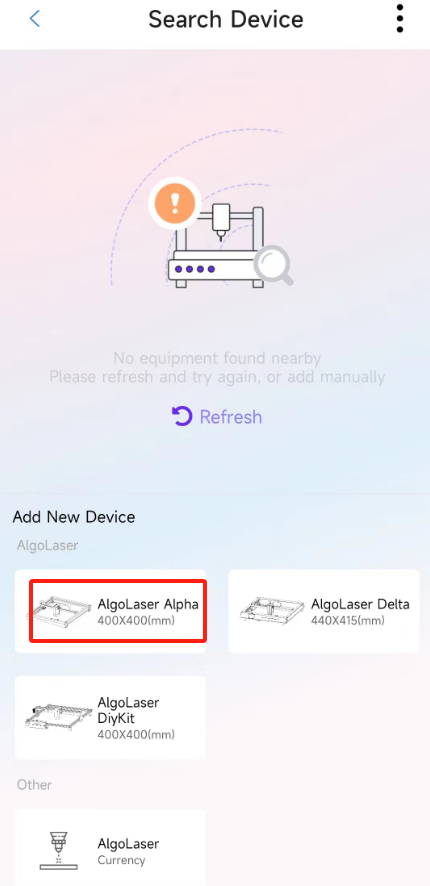
3. Click the button five times and wait for the machine lights to flash. Once the lights flash, the connection will be successful.
Video for Reference:
https://drive.google.com/file/d/1sVZGNIaNIEI7PzTr16lXsYa_uvDRimVf/view?usp=drive_link
Connect to Lightburn or LaserGRBL via Wi-Fi.
LightBurn:
1. First turn on the Lightburn and connect it to the machine via USB.
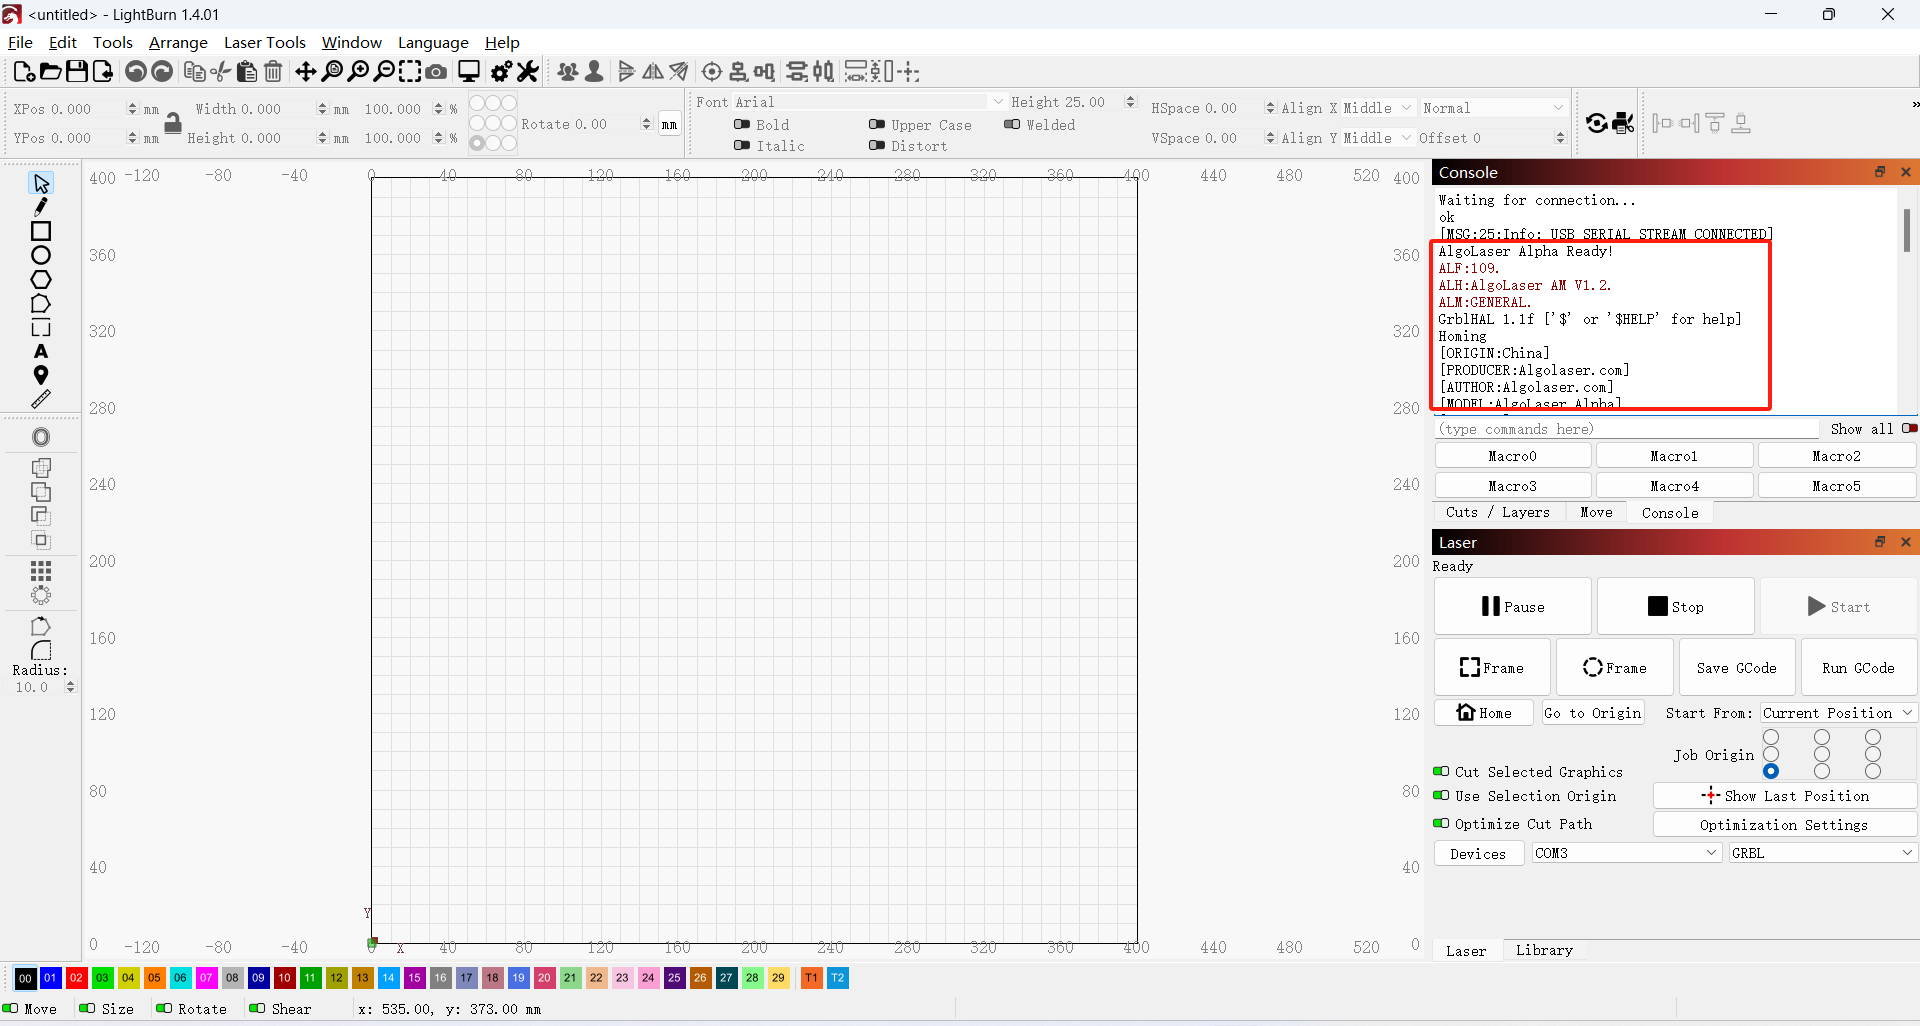
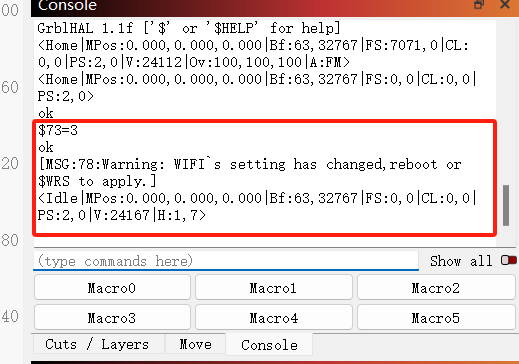
2. Type in the Console Window
Enter $73=3
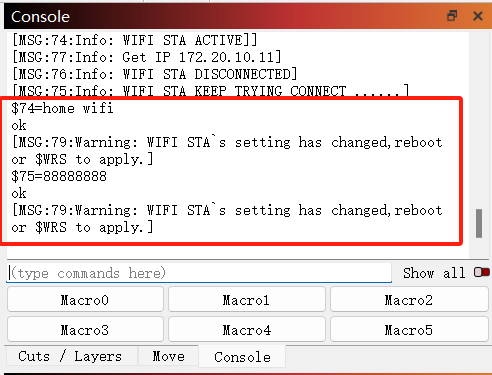
3. Then enter your home (Business or Personal) WIFI and password
(e.g. my home WiFi:home wifi ; password:88888888
Enter $74= (wifi name) $75=88888888)
4. Enter $WRS to refresh the status of machine reading
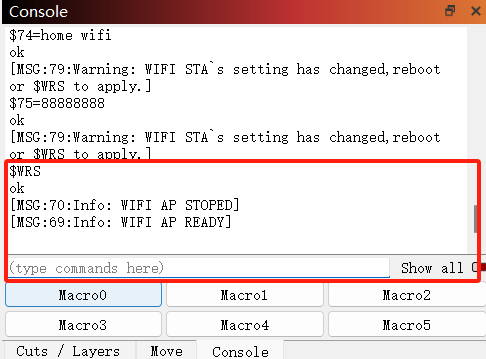
5. Wait for MGC:77, and get IP (If the connection fails, it is likely due to incorrect WiFi. Please check.)
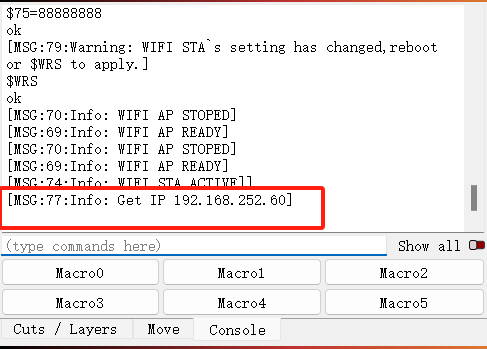
My current IP is 192.168.252.60
6. Re-add the device by clicking Device - Manual Add - GRBL - Next - TCP - enter IP respectively.(e.g.: my 192.168.252.60)
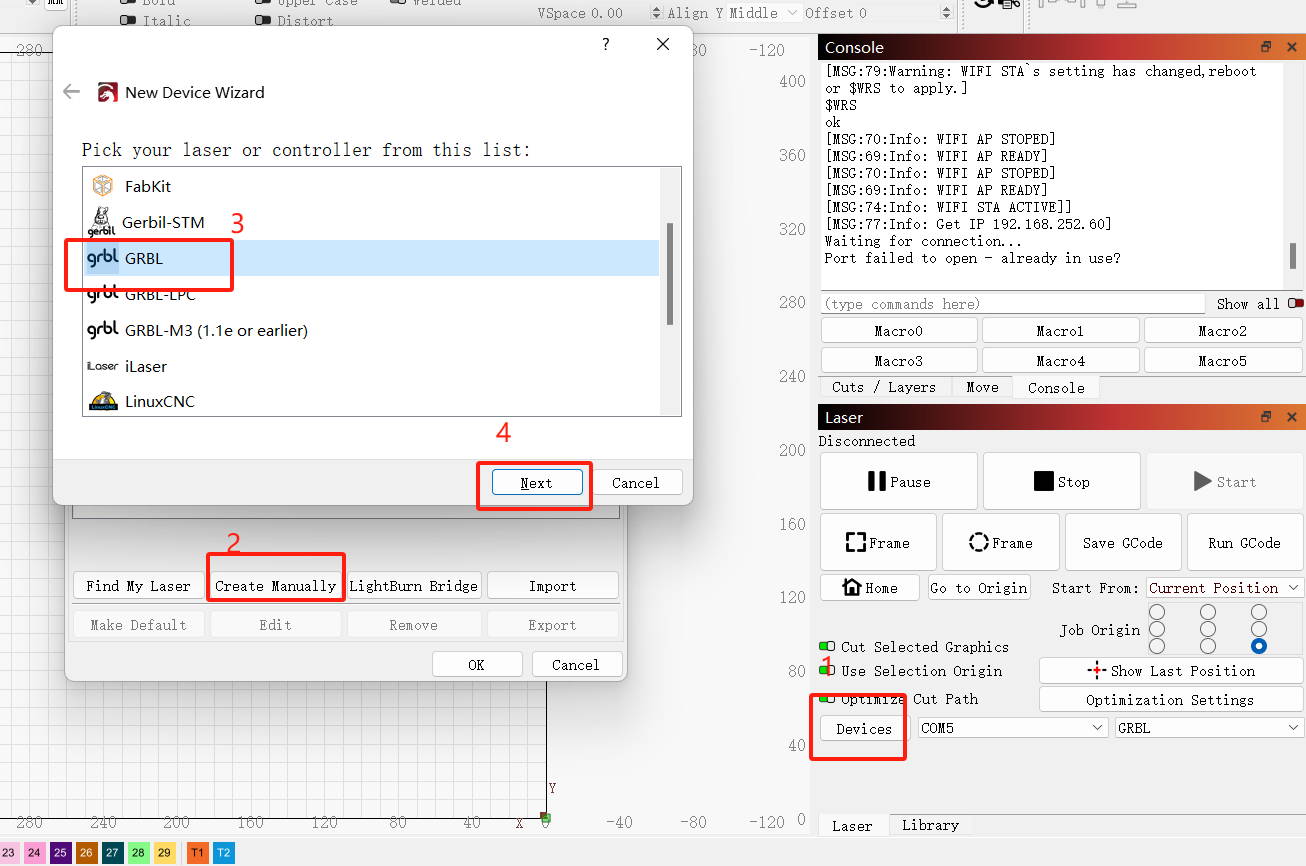
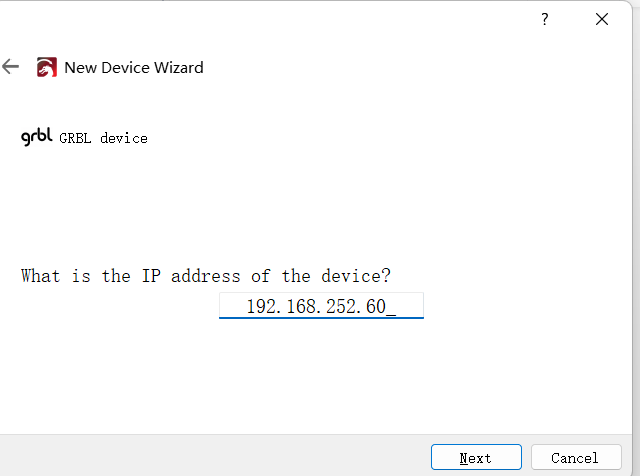
7. Input name-engraving area 400*400 (440*415 if Delta) - Next - Finish.
8. Switch the device to the TCP device with the new name.
9. Make sure that the computer running LightBurn is connected to the same WiFi or LAN.
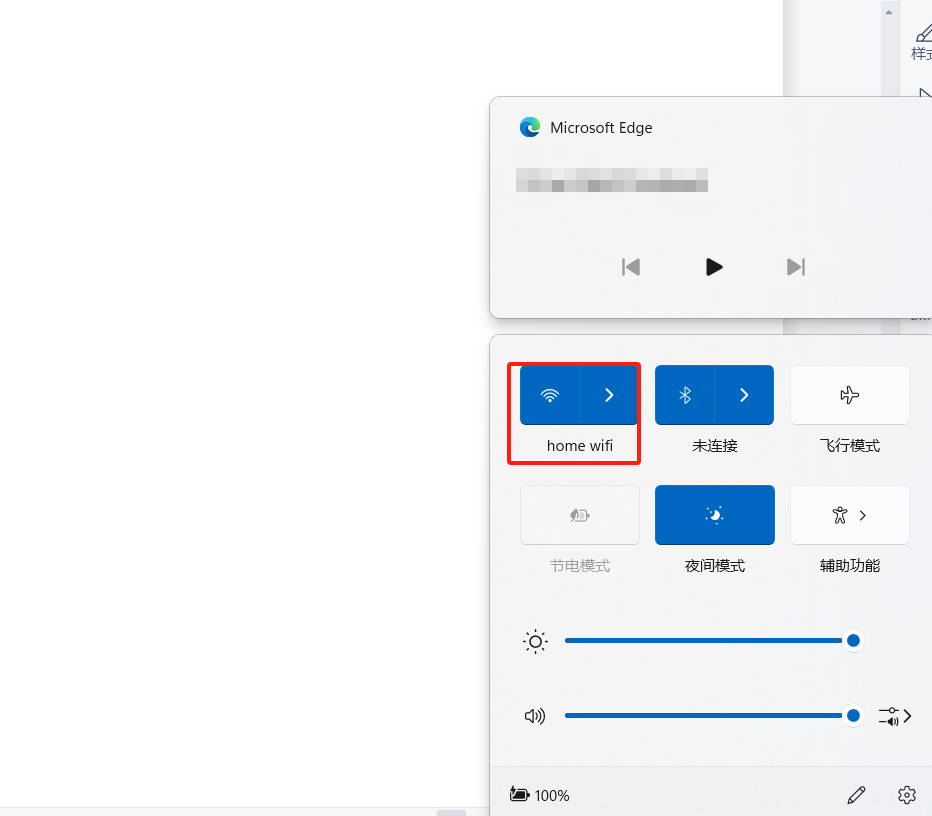
10. Connected successfully.
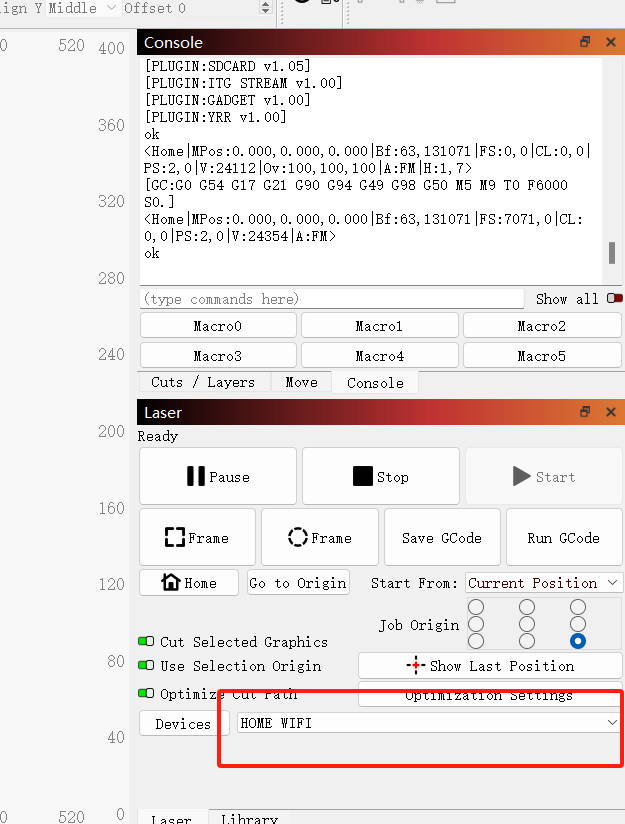
Video for Reference:https://drive.google.com/file/d/1dR4HcuuMwitIOP_J6Br0bg7YX8cjQ9n5/view?usp=drive_link
LaserGRBL:
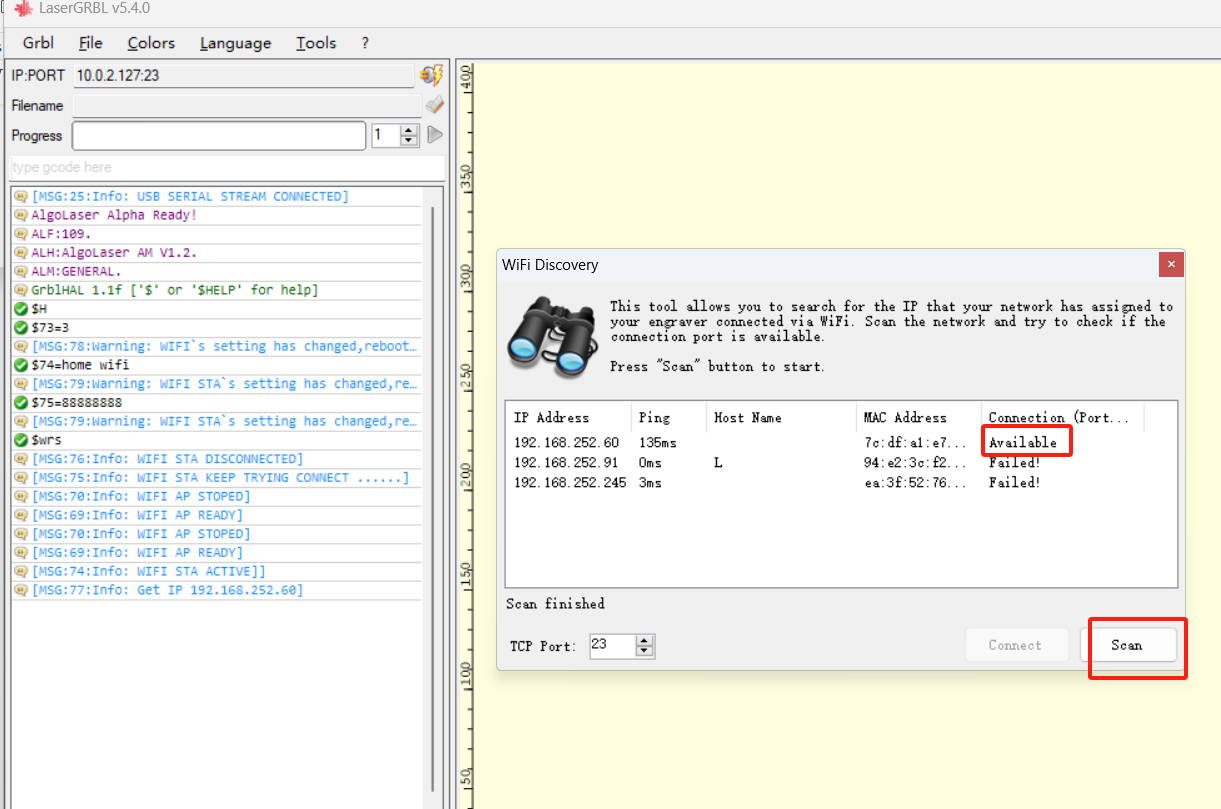
1. Make sure the USB is connected to the machine and entered in the Console Window.
Enter $73=3
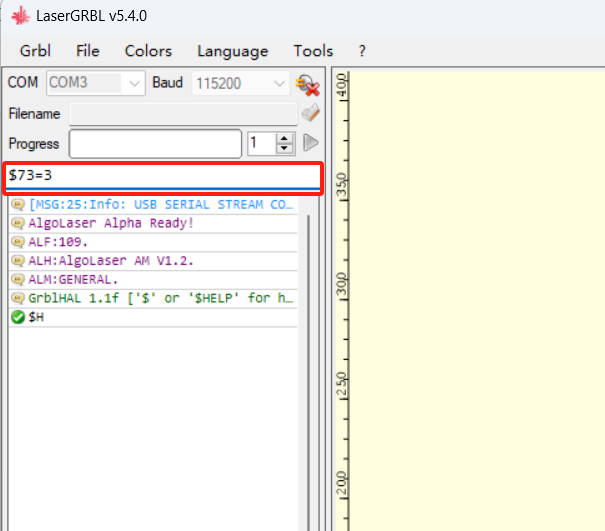
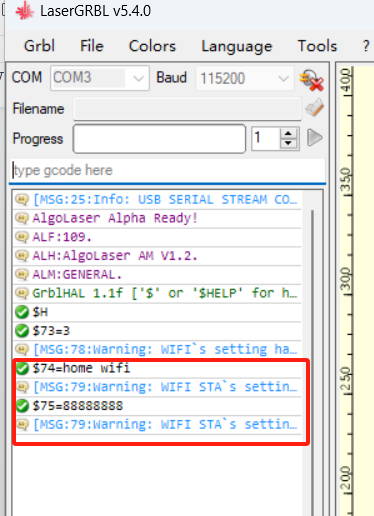
2. Enter in the Console Window respectively.
$74=(WIFI NAME)
$75=(PASSWORD)
(e.g. my home Wi-Fi Name: home wifi Password:88888888)
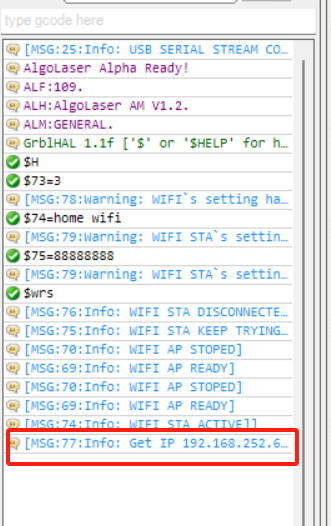
3. To refresh the status and obtain the IP address, enter $WRS. If the connection fails, please check that the WiFi is correct. To view the full IP, move the status bar left or right.
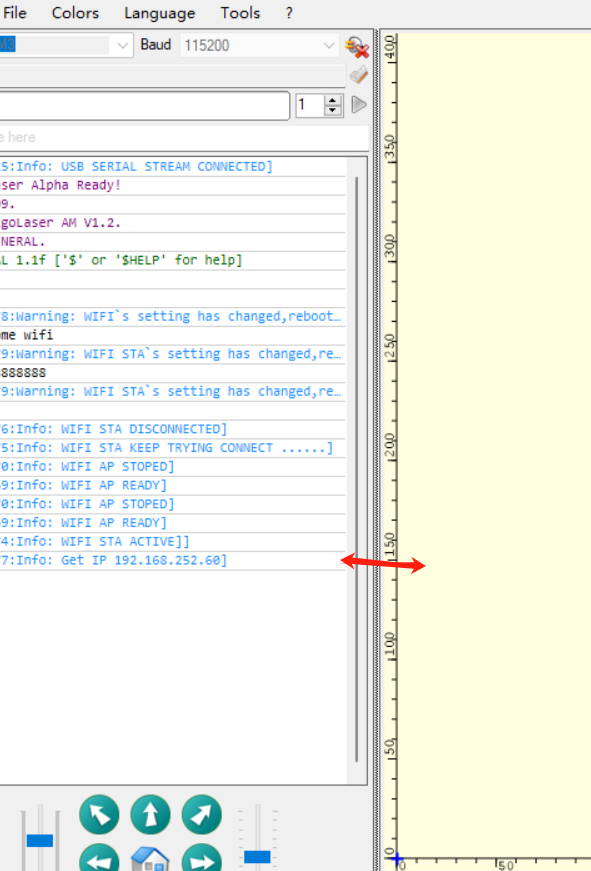
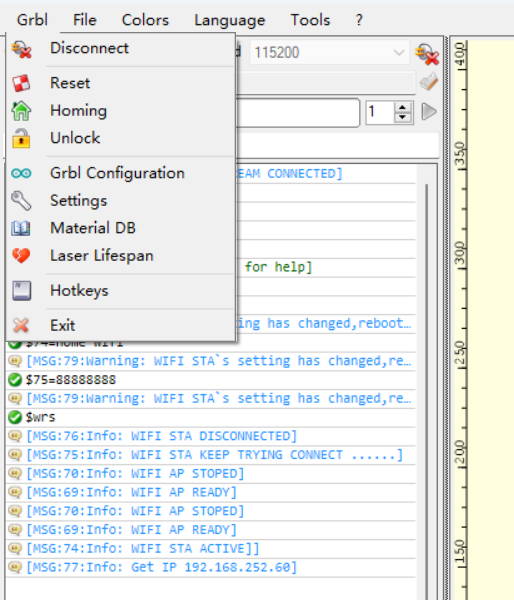
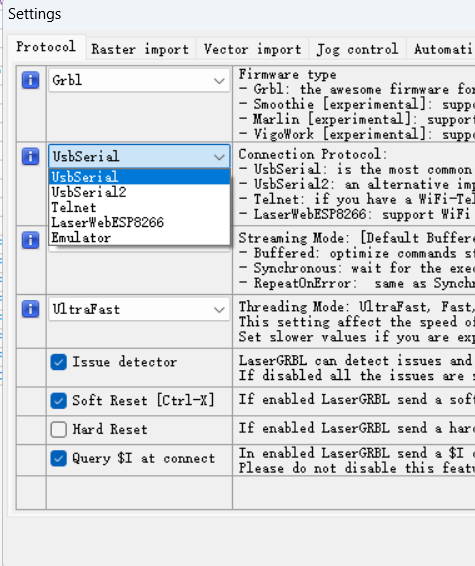
4. Click Setting - UsbSerial -- Telnet -- Save.
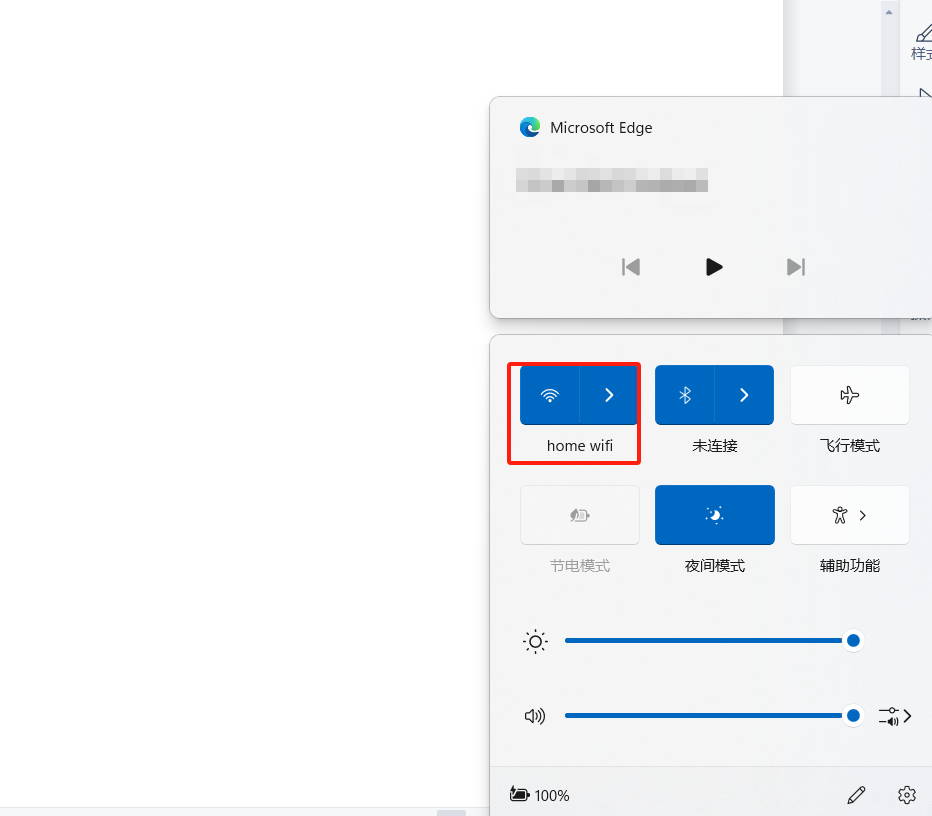
5. Make sure that the computer running LightBurn is connected to the same WiFi or LAN.
6. Disconnect - Grbl - wifidiscover - Scan - Click ‘available’.
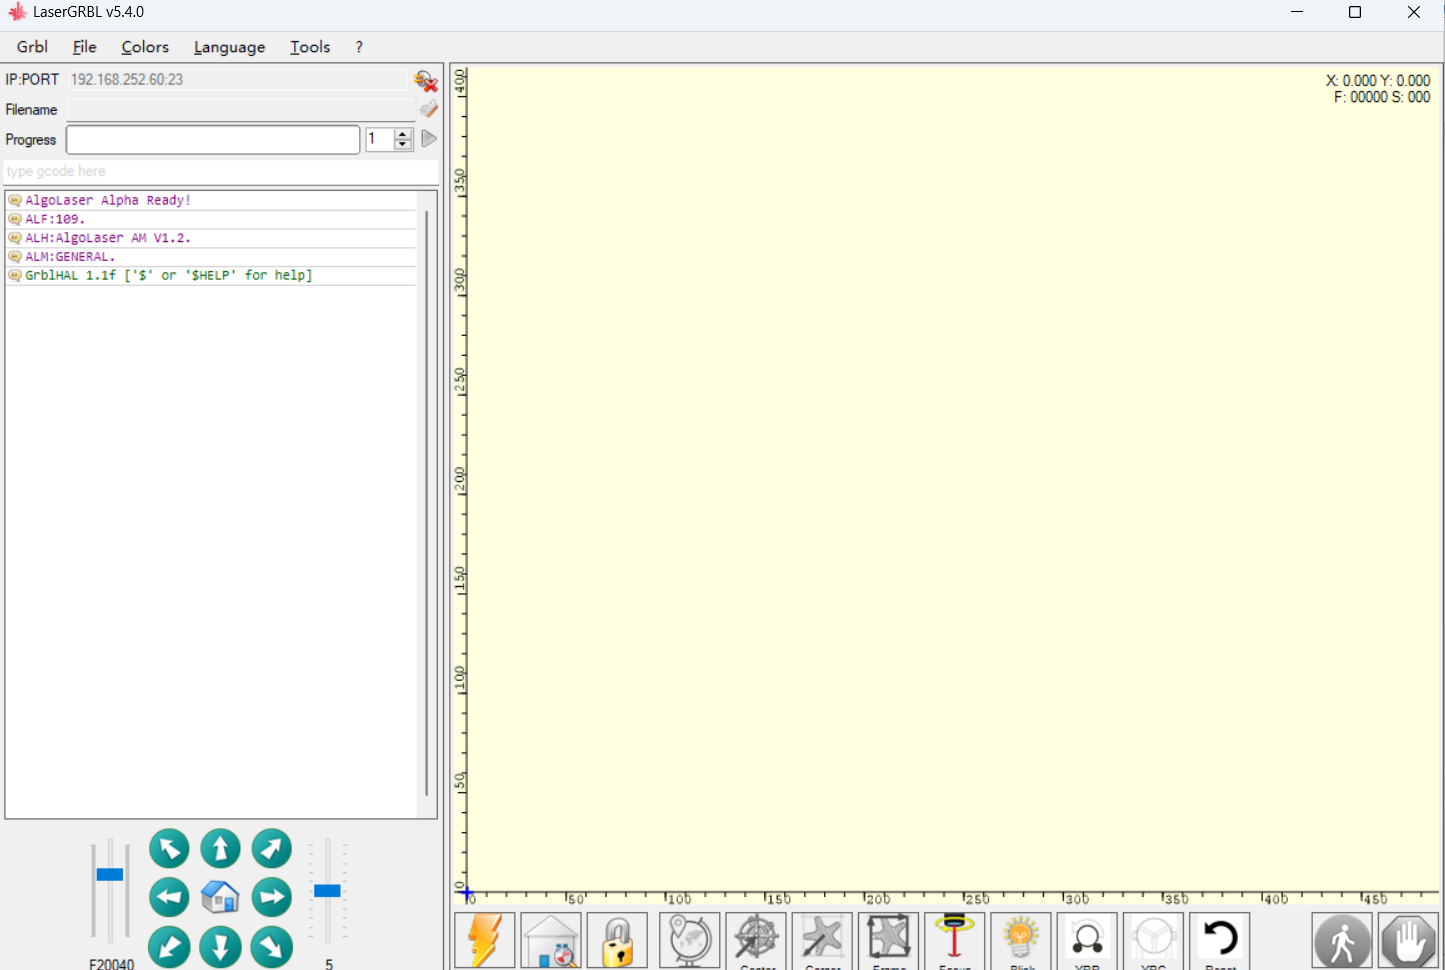
7. Connected successfully.
Free SVG & Gcode Files for Laser Engraving & Cutting can be found here, wich you can import into our laser cutters directly.


