Guide to Learn AlgoLaser App
This article describes the AlgoLaser APP Easy Mode, which aims to assist users in comprehending the functions of different parts of the AlgoLaser APP and completing engraving and cutting projects with ease.
To make it easier to get started, this article presents the user interface in a clear and logical way, following the color box and title background.
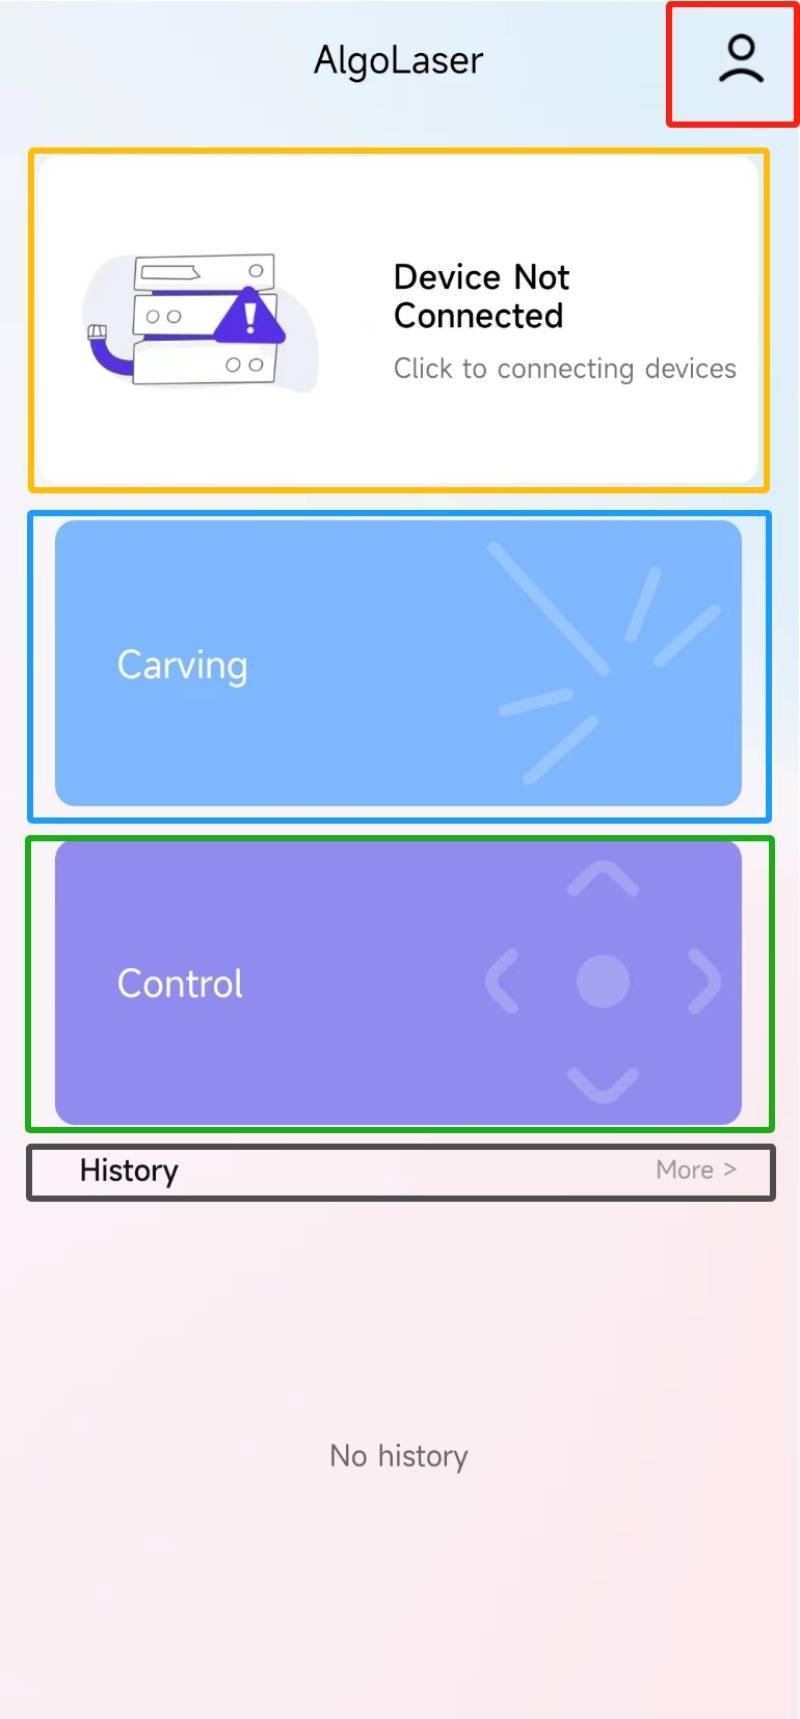
Machine Configuration
Engraving Setting
Control Function
Engraving Track Record
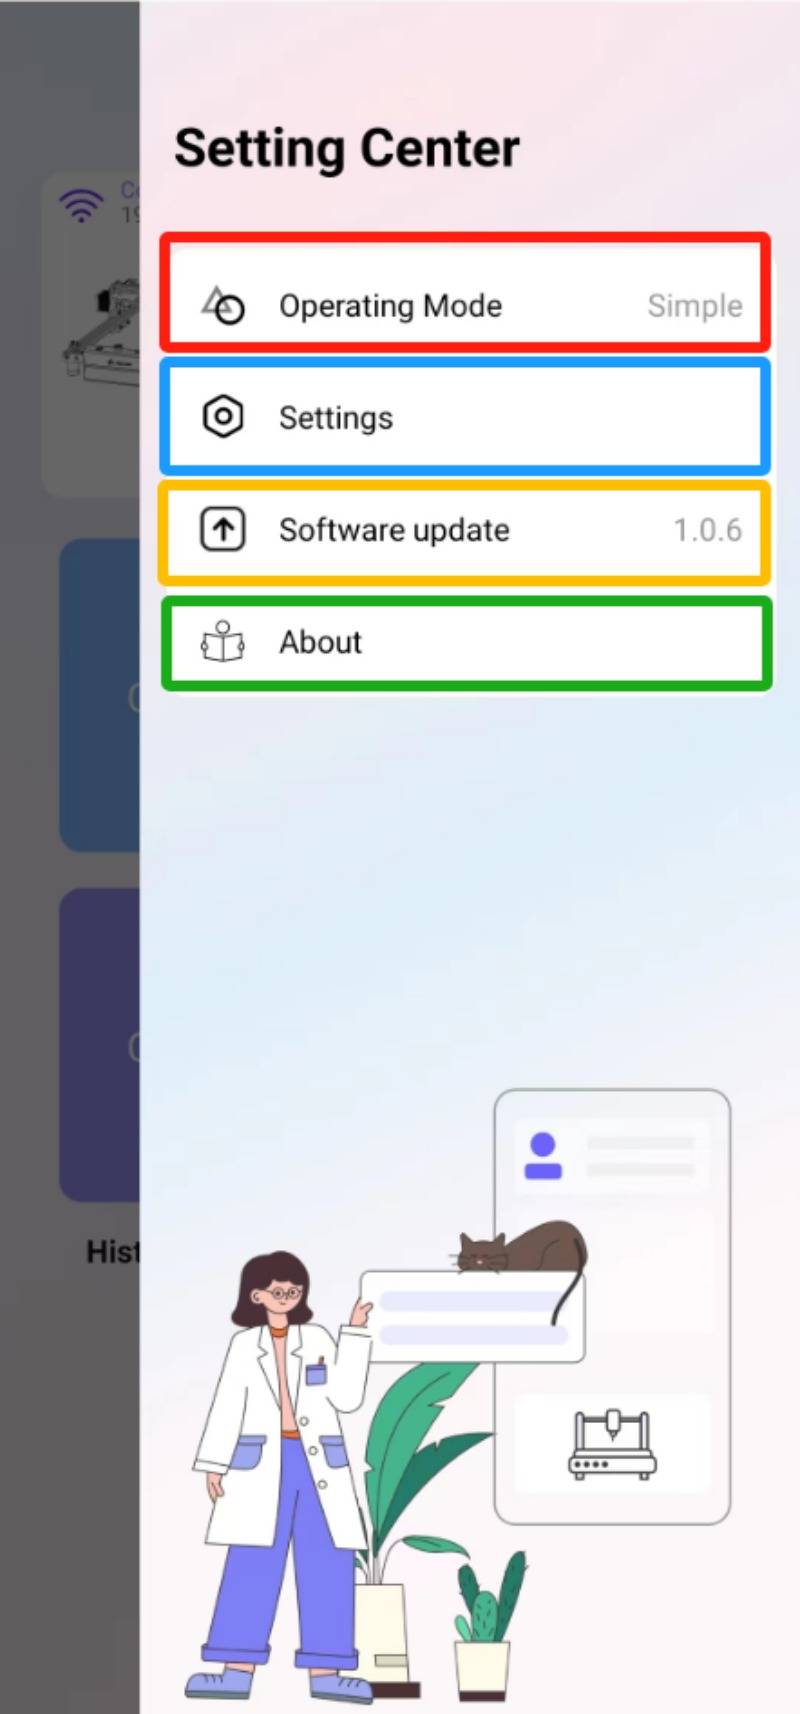
APP Setting Center
Operation Mode:
The mode can be switched to either Pro or Simple mode. Pro mode offers additional functions, suitable for professional users who use it frequently..
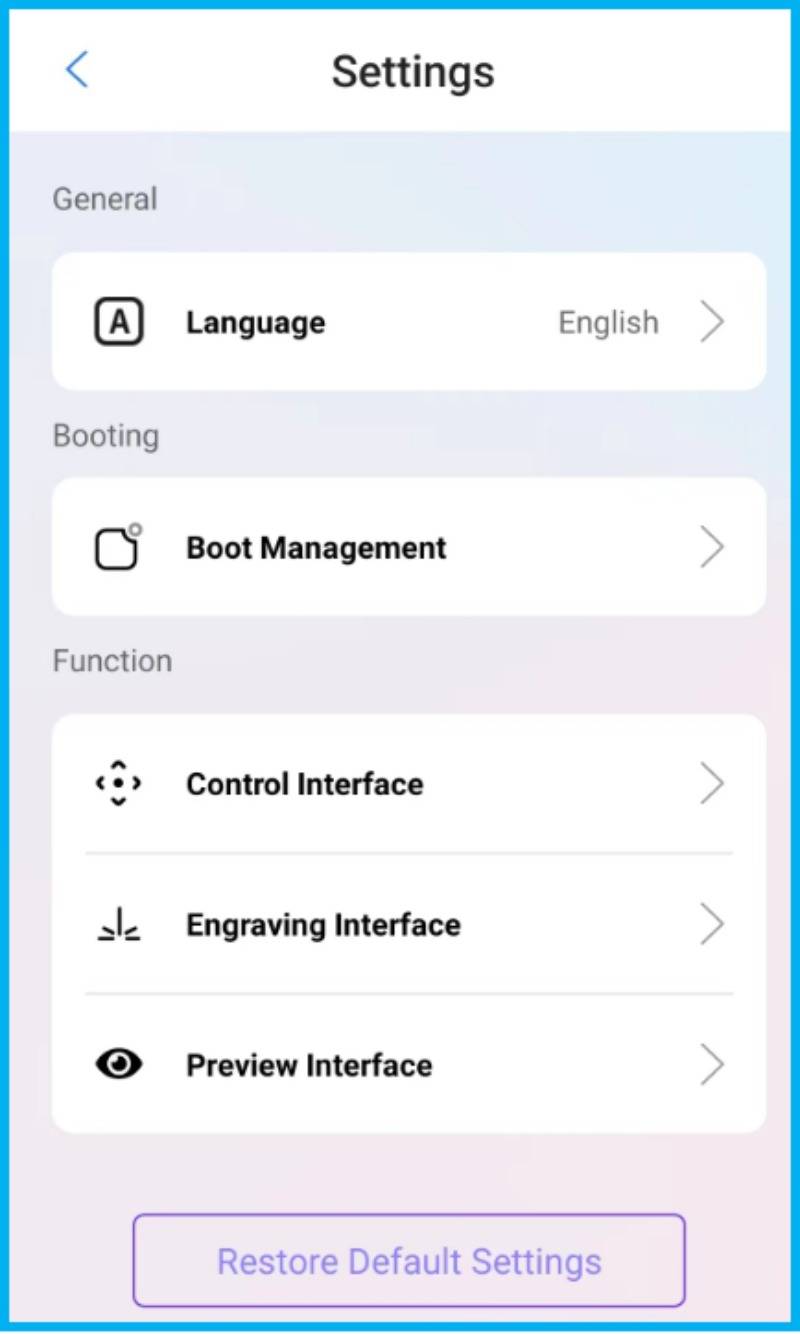
Settings:
Language (13global languages supported)
Boot Management
(Recommended to be turned on to provide guidance for user alerts)
Function
Functional interface settings (no changes recommended)
Software Update
Upgrade to the latest version of the app through this option.
About
Some information about the APP
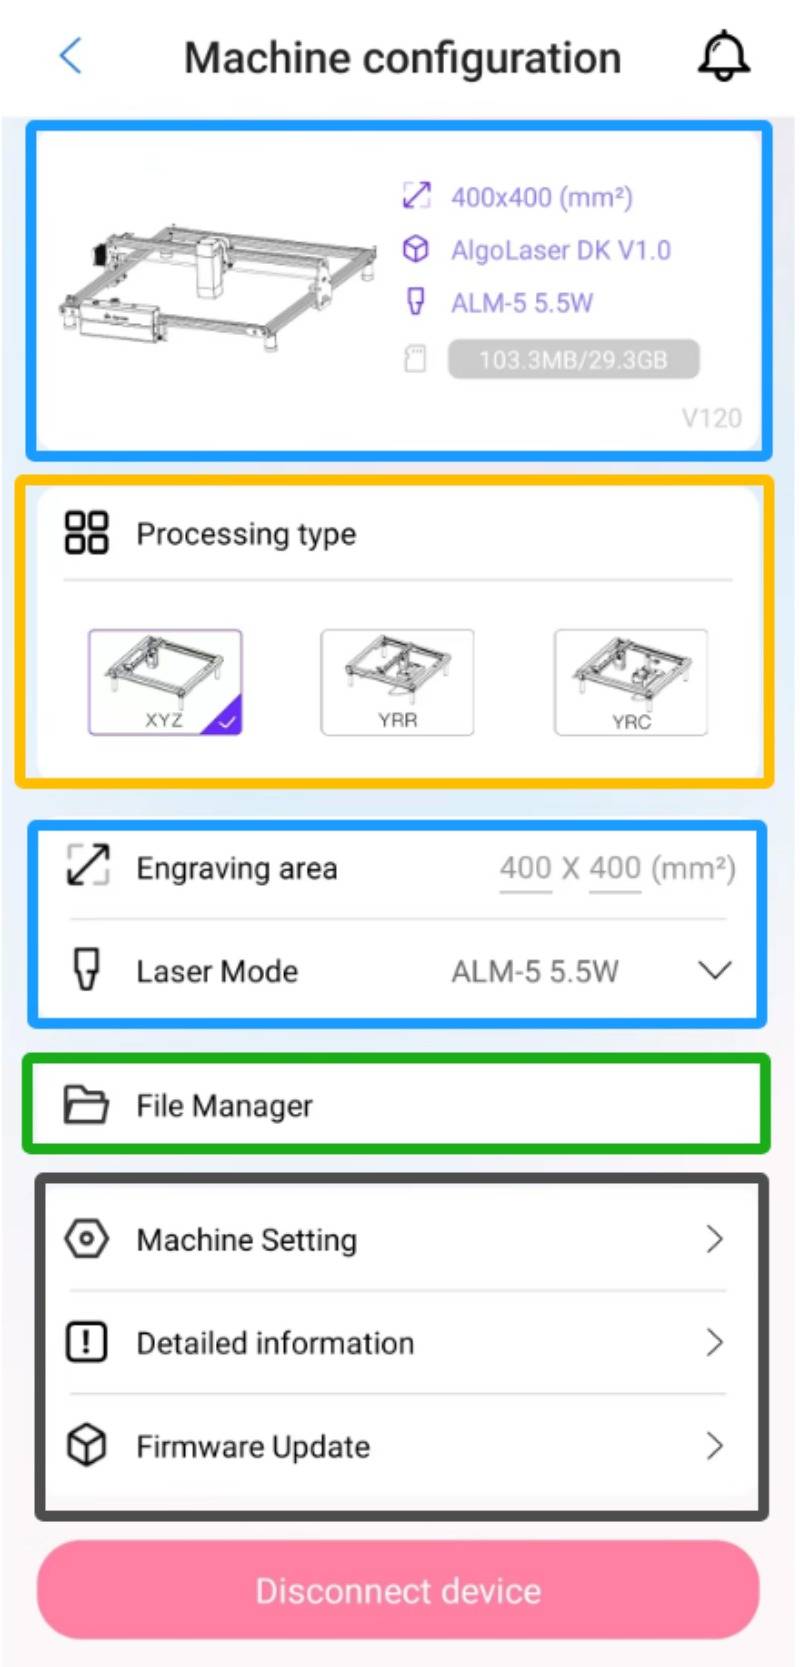
Machine Configuration
(Please refer to the FAQ ‘how to connect WiFi via APP ’for details)
Machine Information:Size of engraving area, Firmware version, Laser module information.
Processing type:The default is XYZ processing, which can be replaced with YRR or YRC processing types. (Remember to revert to XYZ after using the latter two types)
Engraving Information:Size of engraving area (Unchangeable),
Laser Mode (The modification does not alter the power level, but only updates the recommended parameter table.)
File Management:The files stored in the machine's SD card can be viewed and managed.
Settings Menu:
Machine Setting (Professional users may refer to the description for modifications)
Detailed Information (Information on machine manufacturing and firmware)
Firmware Upgrade (This function is to upgrade to the latest firmware.
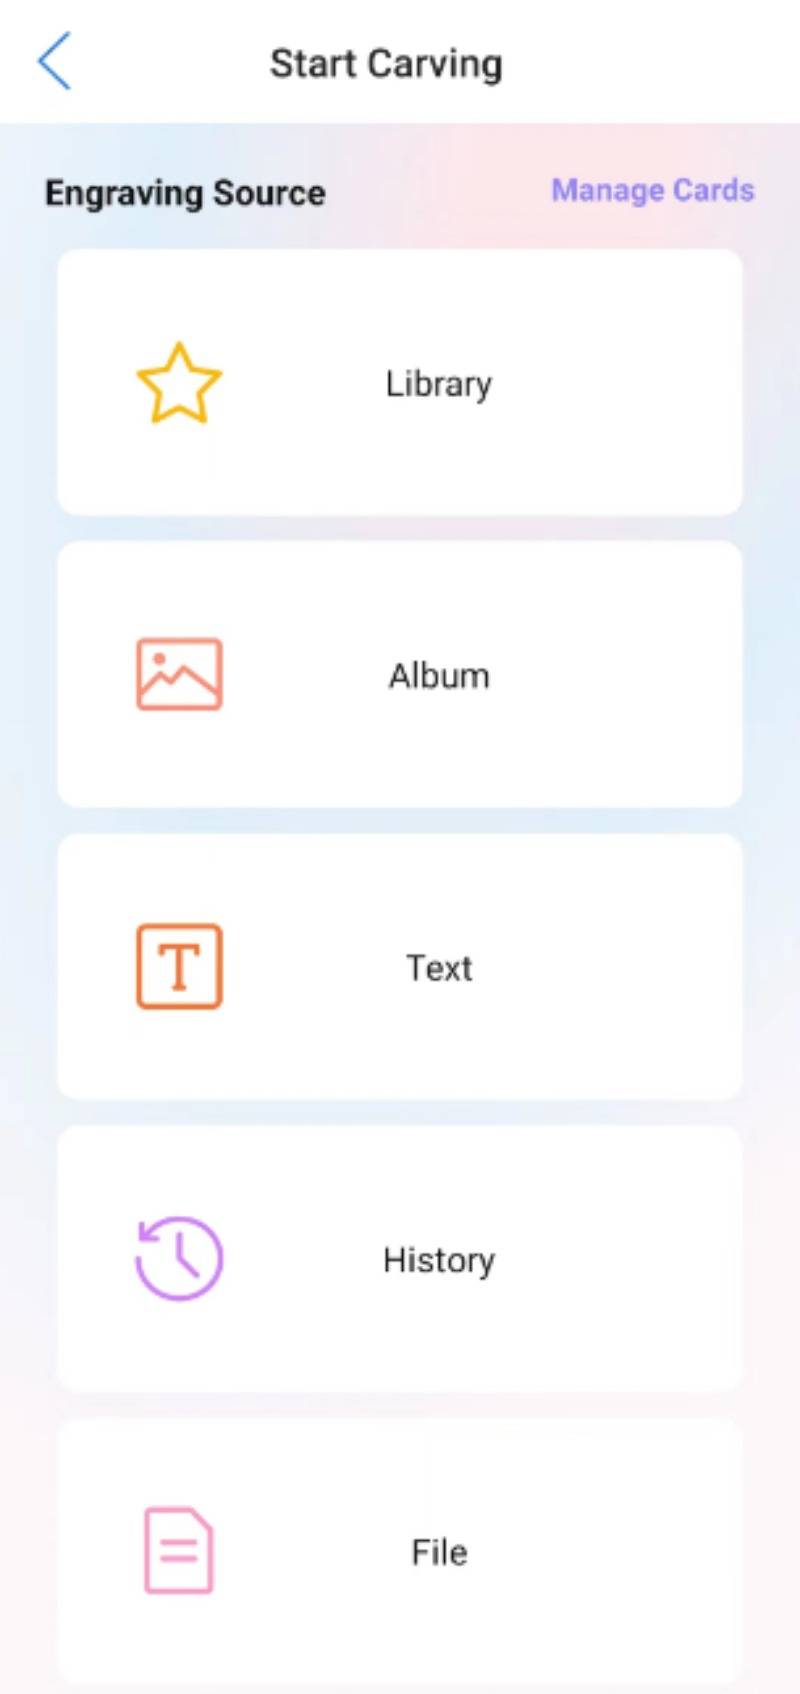
Engraving Setting
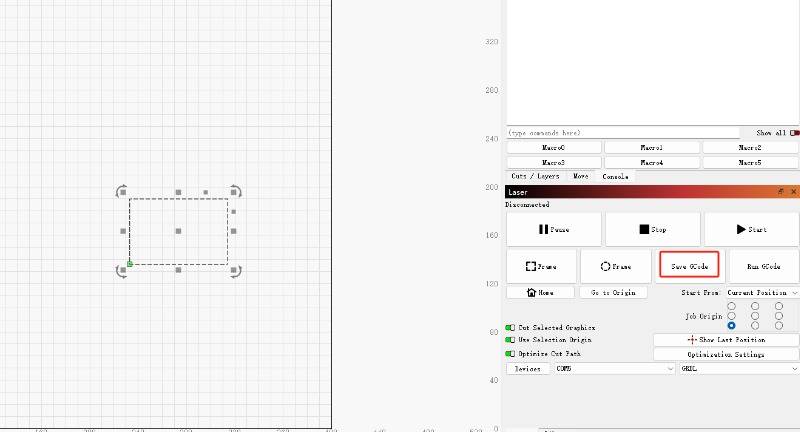
The engraving content is typically an image or a file in a specific format, such as G-code or NC. This can be obtained online or created on a computer. (Instructions on how to create a G-code is provided below)
The way to make G-code with Lightburn
Engraving source: The app provides a library of materials, mobile albums, and mobile files.
DIY design: Text, pattern
QR code, barcode, and jigsaw making functions
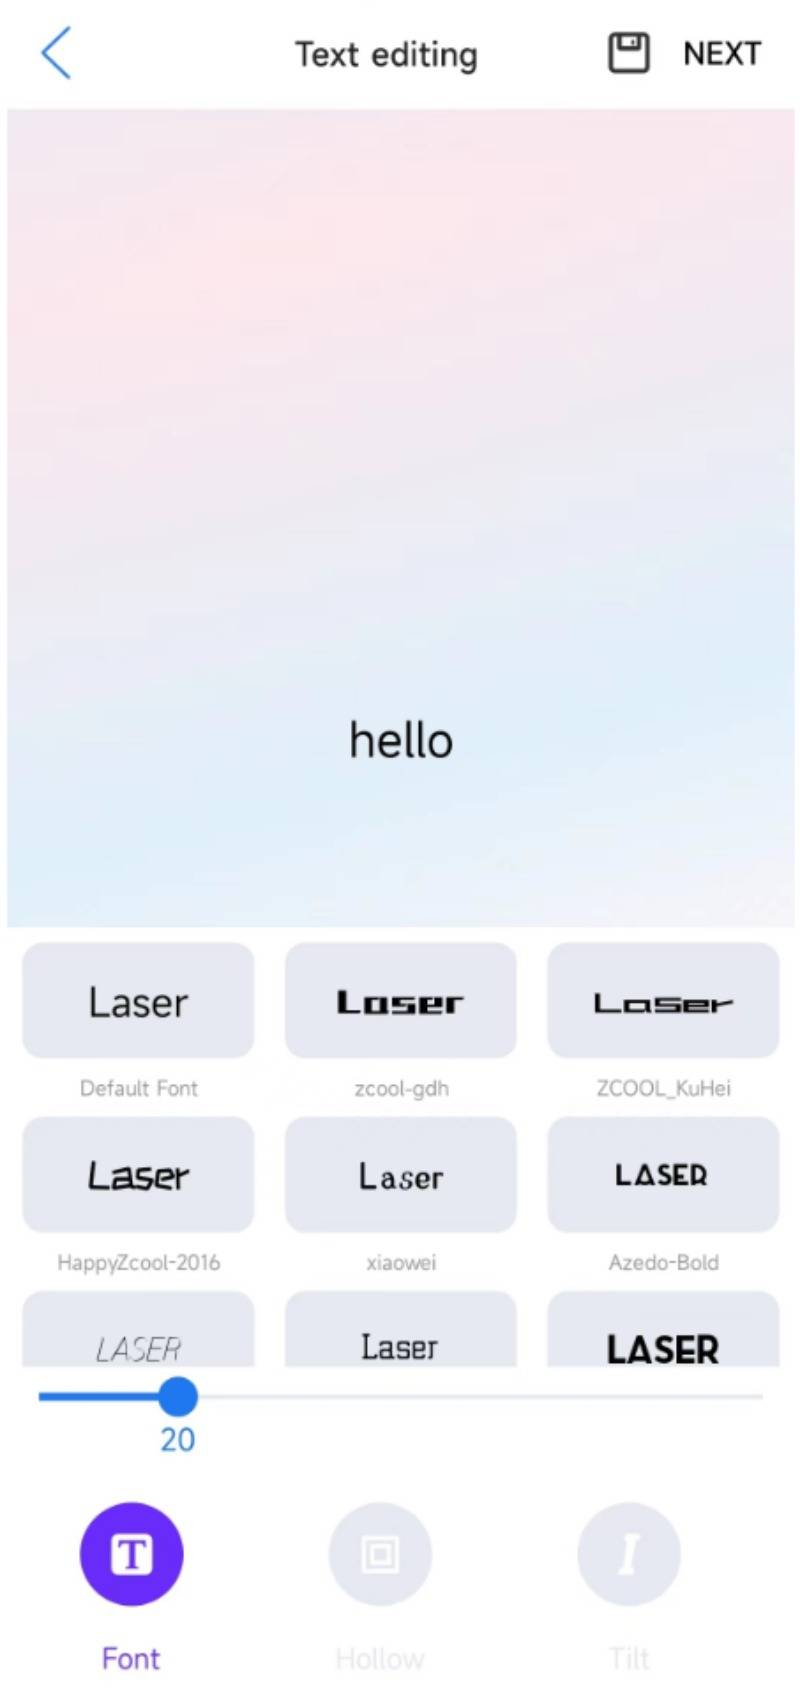
Take “Text” as an example
Choose ‘Text’ -> In ‘Text editing’ interface, the three option below offer different text styles.
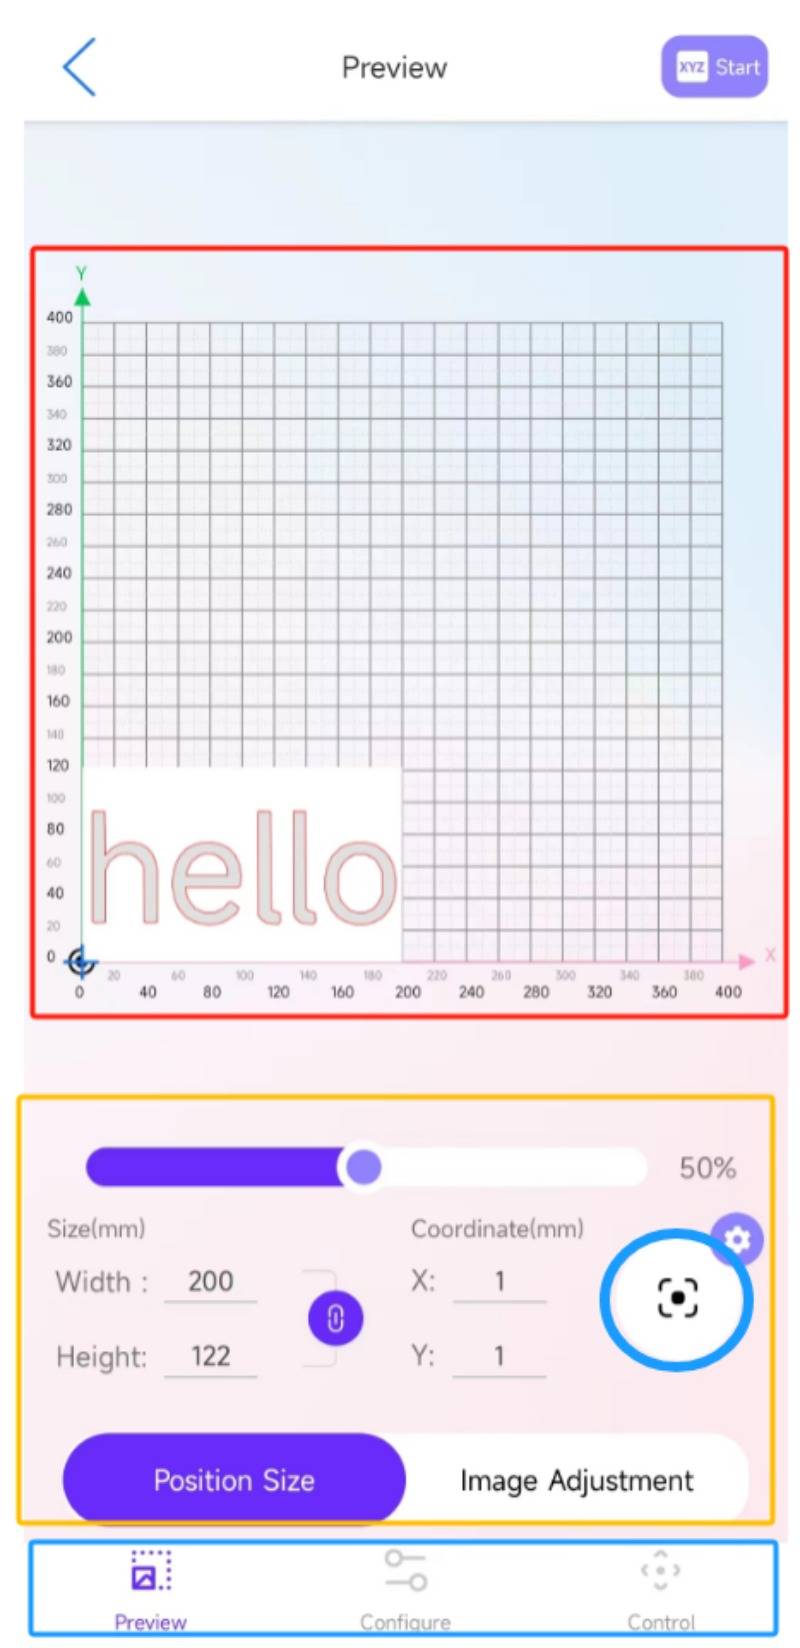
Preview Interface: Adjustment of Engraving Pattern
Engraving position: You can manually move to the position corresponding to the coordinates.
Adjusting the size of the engraving content
The calibration icon circled helps to preview the engraving area in laser engraver machine.
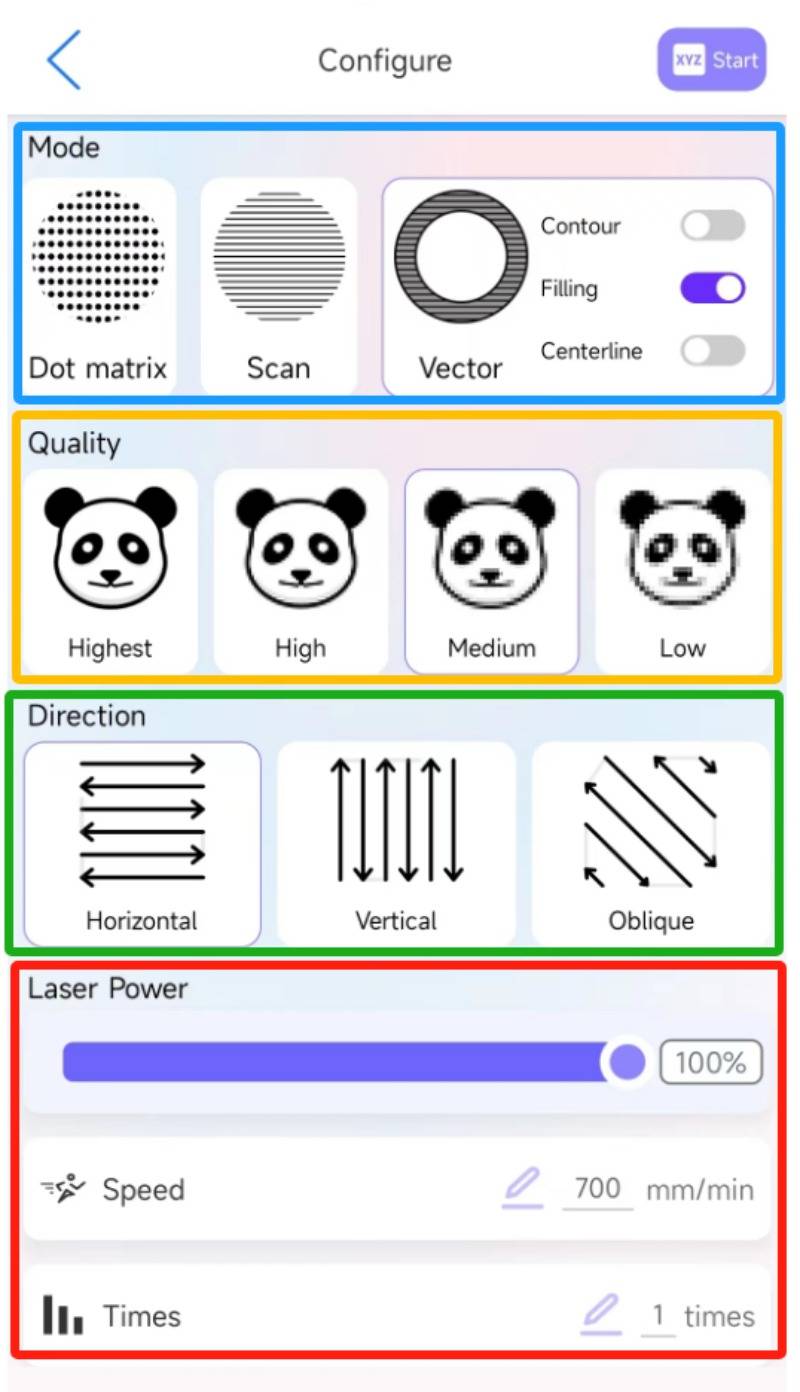
Mode:(Generally)
Please choose ‘Scan’ for engraving;
Please choose ‘Vector’ for cutting. (Select Contour, Filling, Centerline)
Quality:
This indicates the fineness of engraving per unit area.
Please adjust the height according to the picture. If the height is too low, there will be gaps, and if it is too high, there will be excessive burning.
Direction:
The default X direction is generally not changed, which ensures engraving stability.
Adjustmer of Laser Power:
Adjust the laser power, speed, and frequency of engraving tasks.
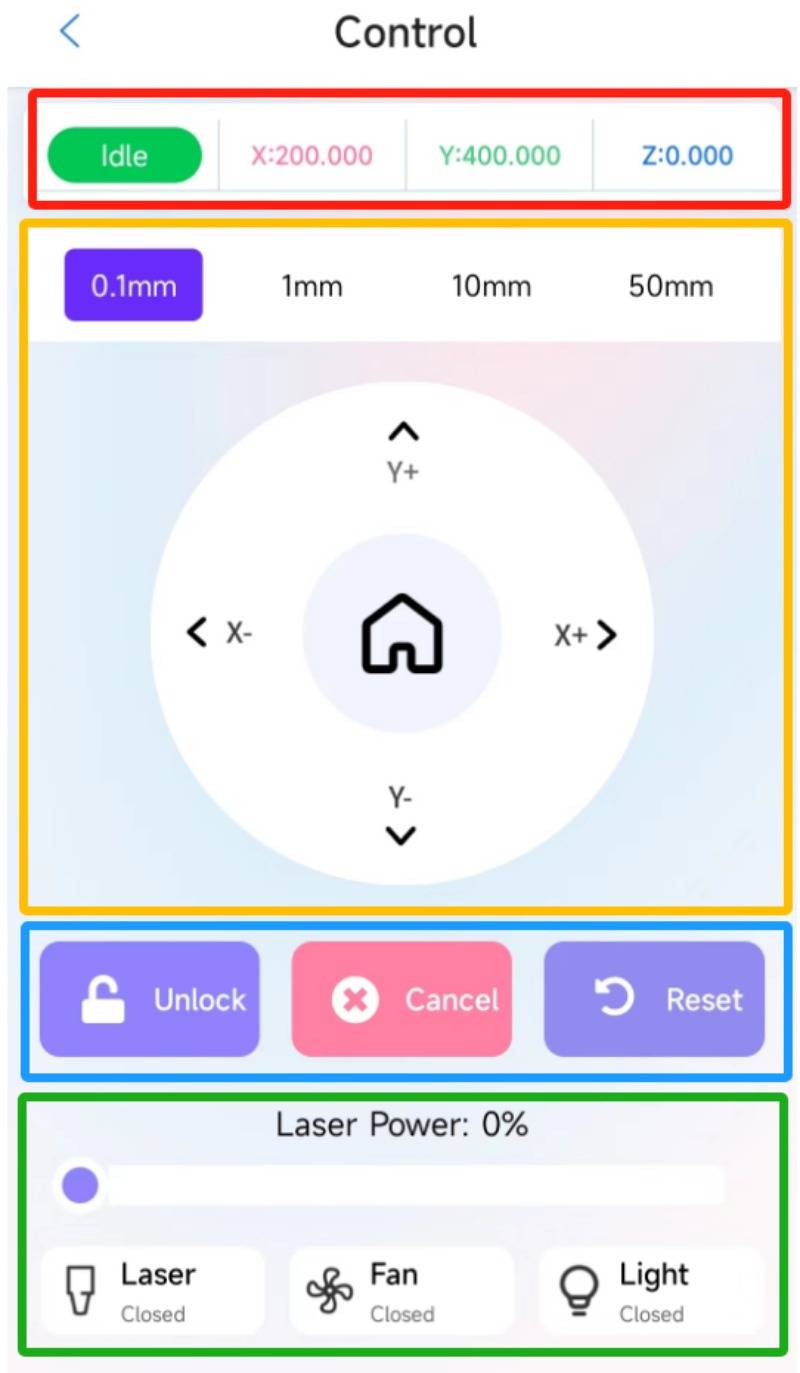
The position of Laser module and the status of Machine
Movement of Machine
Movement distance
Unlock, Cancel, Reset
(For alert)
Laser power testing
Fan and light are not available at this moment
Free SVG & Gcode Files for Laser Engraving & Cutting can be found here, wich you can import into our laser cutters directly.


