


How to use LaserGRBL for Simple Laser Engraving
This guide is to show the user how to complete simple laser engraving projects with LaserGRBL, with the presentation of a five-minute engraving task from start to finish.
Before starting, please ensure that the machine is powered on and homed.(ensure the machine operates normally.)
Furthermore, when engraving various materials for the first time, it is recommended to engrave the small test pieces to avoid mistakes that could result in the waste of material and money!!!
1)The UI introduction
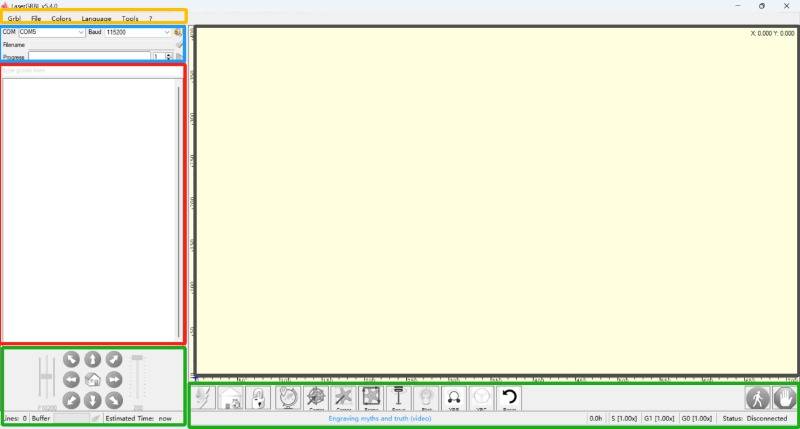
Menu: Advanced functions (e.g. WiFi connection, firmware code modification, etc.), parameter database, language and other settings.
Connection and Working Status (This will be covered later.)
Console: Observe the status of the machine operation as indicated by the pop-up message.
Function Bar: Used to control the laser module.
Page of Engraving Workspace: Showcase the content and process of engraving.
2)Connect the Laser Engraving Machine
a.Observe the COM list when the USB is not plugged into the machine.
b.Power on the machine, plug in the USB, observe the new COM and select it.
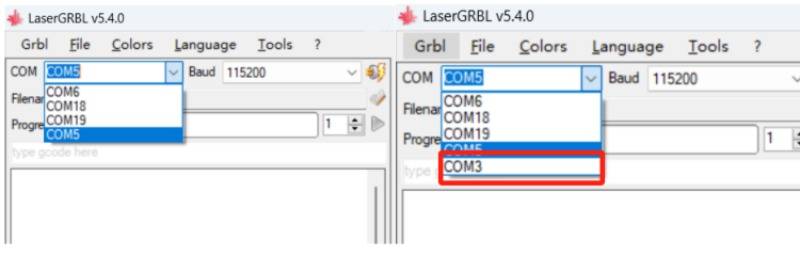
(For example, the added COM3 is the current machine.)
c.Default Baud is 115200
d.Click the lightning symbol on the right to initiate machine connection.
e.The console displays a machine message indicating a successful connection.

Note: Windows 7 and 8 require manual installation of drivers to correctly recognize the COM.
How to install the driver on Window 7 & 8
3)Operating Procedure:
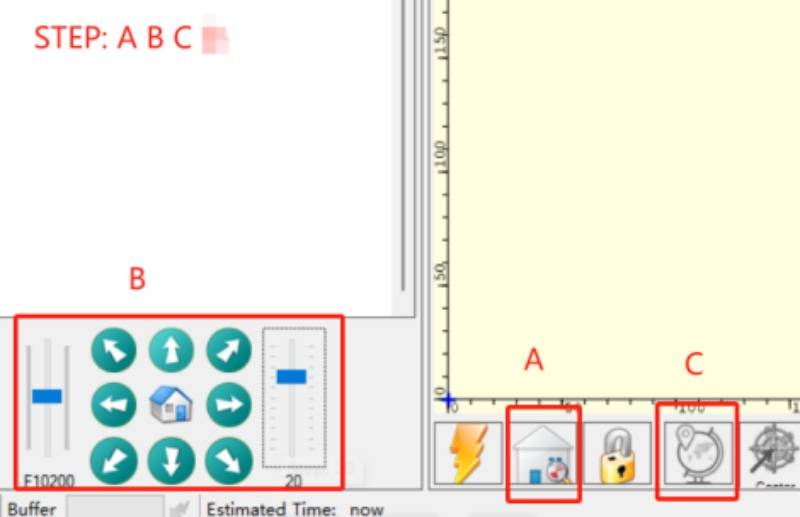
Preparation:
A.Click the homing button, machine will automatically go to the origin point (the lower left corner ).
(This is limited to use on machines with limit switches, which AlgoLaser machines are equipped with.)
B.Move the laser module by clicking on the arrow symbol to move it to the engraving point. (Do not move it by hand). Sets the current laser module position to the engraving origin point.
Select the image and set the parameters:

a. Open a file

b. Observe the preview area and adjust the parameters on the left to achieve the required engraving effect.

c. Engraving materials and modules are selected and applied based on the database.
d. Select the M4 laser mode and adjust the laser power range to a value between 0 and 1000. Set the engraving size. Click on the blue boxed icon to set the lower left corner as the engraving start point.
Preview the engraving page:
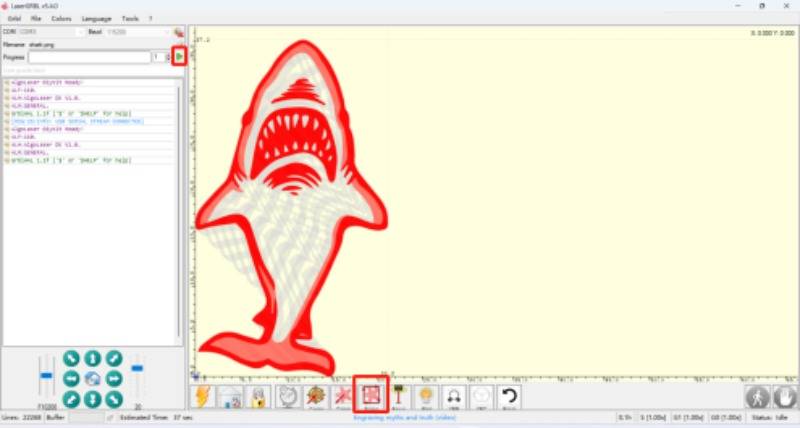
a. Click on the 'Frame' to check if the engraving area is suitable and adjust the position of the engraving item.
(Note: When using Frame, it leaves a mark on the engraving material. Right click on the Frame choose Edit button, change M3 to S[$30*2/100] or S[$30*1/100], the figure is the power of Frame)
b. Click Start and wait for the engraving to complete.
Free SVG & Gcode Files for Laser Engraving & Cutting can be found here, wich you can import into our laser cutters directly.


