


How to Laser Cut Wooden Sheet Bends to Create an Integrated Lamp Shade
Creating an integrated lamp shade from laser-cut wooden sheets is not just a design challenge—it's a mesmerizing blend of digital fabrication, woodworking, and lighting design. For anyone with access to a laser cutter, this project offers a fascinating opportunity to turn rigid materials like plywood into organic, flowing curves. At first glance, bending wood might seem impossible without steaming or laminating, but strategic kerf cutting allows flat panels to gain extraordinary flexibility. Using a laser cutter, you can engrave hinge-like patterns onto wood that makes it behave almost like fabric, letting you craft complex, sculptural forms.
The science behind the bend lies in the kerf cuts—the slits made by the laser cutter reduce material stiffness. These cuts don't fully separate the wood; instead, they act as controlled weak points, enabling you to curve the panel in a particular direction. The pattern, spacing, depth, and direction of the cuts dictate how smoothly the wood can bend, and how tight the radius of curvature can be. Birch plywood is a popular choice due to its strength, uniform layers, and minimal grain, which reduces the chances of breakage during bending.
Whether you're crafting a tornado-inspired pendant light, a modern dome, or a flat-pack standing lamp, the laser-cutting process gives you total control over the material. Software like Adobe Illustrator, Fusion 360, or Inkscape allows you to draw the cut patterns. After finalizing your design, you can load it into LightBurn or similar software to send it to your laser cutter. Once your panel is engraved, all you need is a little pressure and some fixtures to shape it into a stunning, curved lamp shade that looks more like a modern art installation than a DIY project.
Video credit: AtelierNiche - Etsy
How to Laser Cut Wooden Sheet Bends to Create an Integrated Lamp Shade – 5 Specific Steps
Step 1: Choose the Right Material and Prepare Your Design
Start by selecting the right type of wood for your lamp shade. The best material for laser bending is thin (typically 3mm or 1/8") birch plywood due to its fine grain and minimal voids. Avoid MDF or thick hardwoods, as they can crack or burn during bending. Open your vector design software—like Adobe Illustrator, Inkscape, or Fusion 360—and sketch your lamp's flat layout. Integrate kerf cut patterns into areas you want to bend. These are rows of closely spaced cuts that let the wood flex. Depending on your design, you may use straight-line kerfs for simple curves or diamond-shaped and wave-like patterns for more complex forms. Save your file in a format compatible with your laser cutter (e.g., SVG, DXF).
Step 2: Test Your Kerf Pattern and Calibrate the Laser Cutter
Before cutting your final lamp shade, it's critical to test your kerf patterns on scrap plywood. Use your laser cutter's control software (like LightBurn) to calibrate power and speed settings. For 3mm birch plywood, start with 80–100% power and a speed of 6–10 mm/s, depending on your laser's wattage. Your goal is to cut through the top layers just enough to make the panel flexible without weakening the structural integrity. Too deep, and the wood may break when bent. Too shallow, and it won't bend at all. Fine-tune your design and repeat testing until the kerf allows for a smooth curve with minimal resistance.
Step 3: Laser Cut the Main Structure and Parts
Once you're confident in your pattern, load your final design onto your laser cutter and prepare your wood sheet. Make sure your work area is well-ventilated and that your air assist is on to prevent scorching. Secure the plywood flat on the cutting bed using clamps or magnets. Execute the full cut: kerf sections first, followed by the outer contour. If your lamp shade requires joints, hooks, or interlocking tabs, cut them in this phase too. After cutting, use a soft cloth or low-grit sandpaper to gently clean any soot or burn marks along the edges, especially if you plan to stain or finish the wood later.
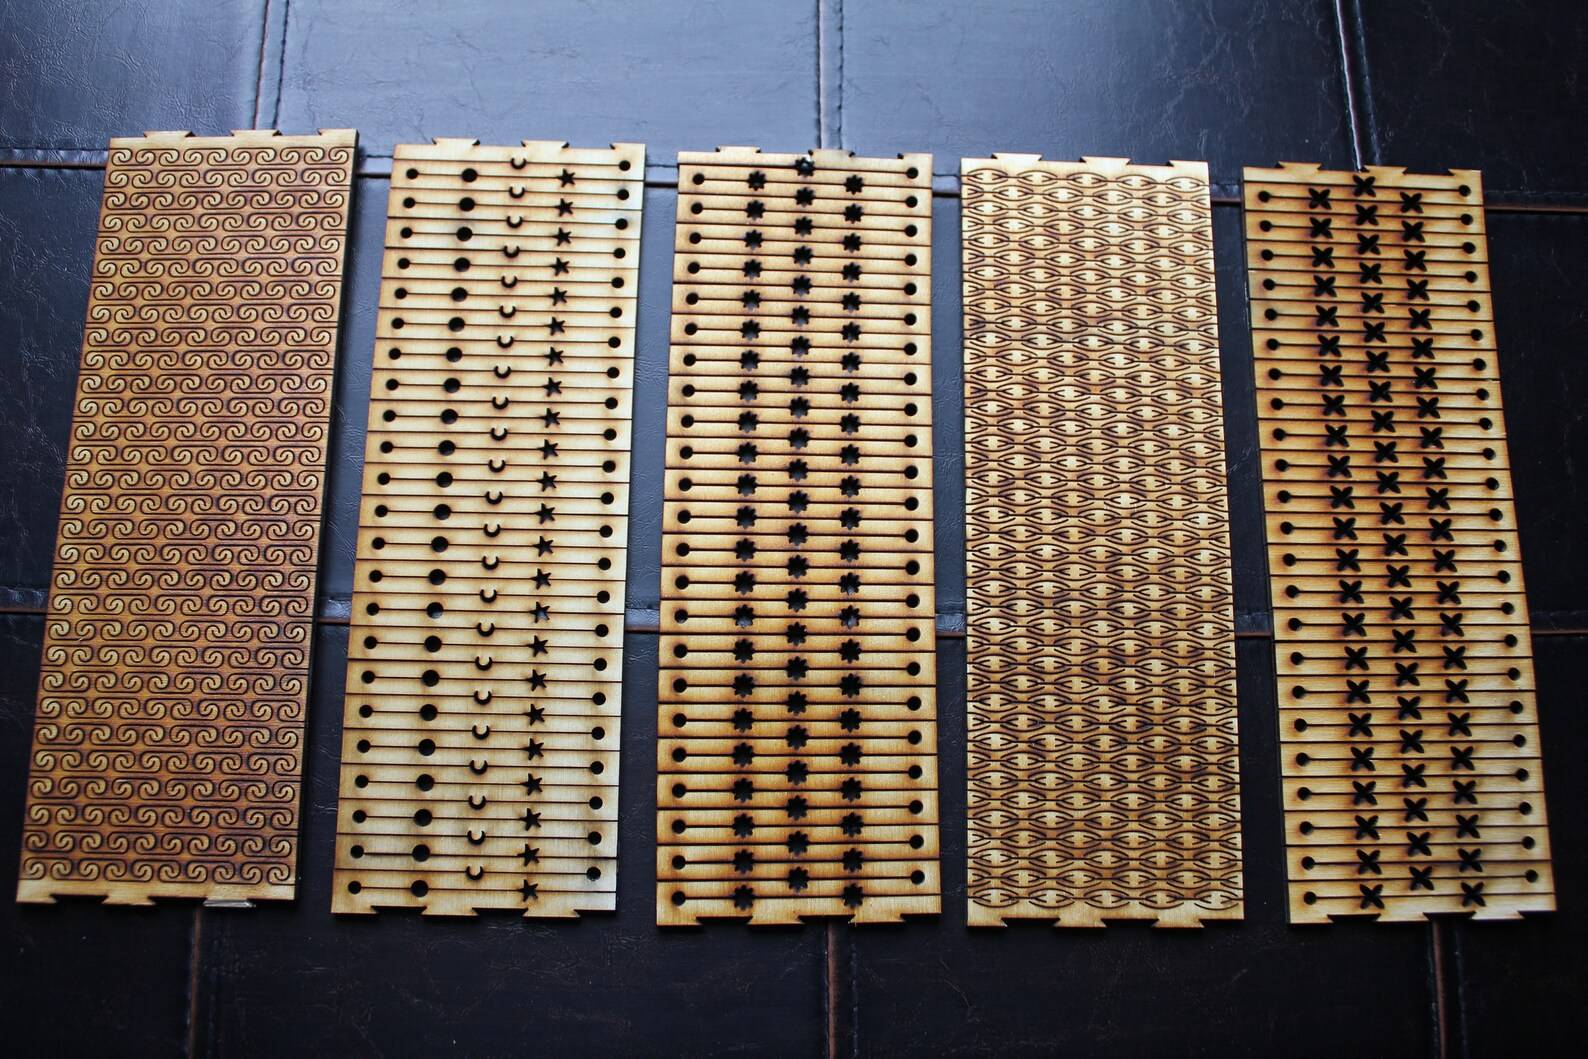
image credit: CounterglowDesigns - Etsy
Step 4: Form the Lamp Shade and Fix the Shape
With your laser-cut panel ready, it's time to bend and assemble the shape. Gently begin curving the wood along the kerf lines. For more complex forms, you might want to create a bending jig or mold to guide the curvature. Clamp the wood into shape and leave it for several hours, or use wood glue at key points if needed. Many designs don't require glue—laser-cut tabs, slots, and locking joints can hold the shape securely. This is where the magic happens: the flat sheet transforms into a fluid, sculptural shade. Make sure your bulb mount and internal structure are compatible with the lamp shape.
Step 5: Final Assembly and Finishing Touches
Now that your lamp shade has taken shape, attach the bulb socket or lamp base. Most DIYers use standard E26/E27 light sockets with LED bulbs for safety and low heat output. Make sure the lamp is stable and that all parts are secure. If desired, apply a wood finish such as clear polyurethane, natural oil, or colored stain to enhance the look and protect the surface. Don't over-saturate the bent sections, as excess moisture can soften the kerf cuts and distort the shape. Once completed, plug it in and admire your custom-designed, laser-bent wooden lamp shade—a testament to what's possible with creativity, planning, and a precision laser cutter.

image credit: CounterglowDesigns - Etsy
10 Best Laser Cut Wooden Sheet Bends to Create an Integrated Lamp Shade Projects
1. Tornado-Inspired Spiral Lamp
One of the most iconic examples of a kerf-bent lamp shade is the tornado-inspired spiral lamp. This design cleverly uses tightly spaced kerf lines cut by a laser cutter to make a flat plywood sheet twist and spiral upward like a cyclone. The light diffuses through the gaps between the bent layers, casting dynamic shadows on surrounding walls. Designers love this concept because it combines elegance and engineering. The structure holds its shape without internal supports and assembles from a single sheet, making it ideal for flat-pack shipping or minimalist home décor.
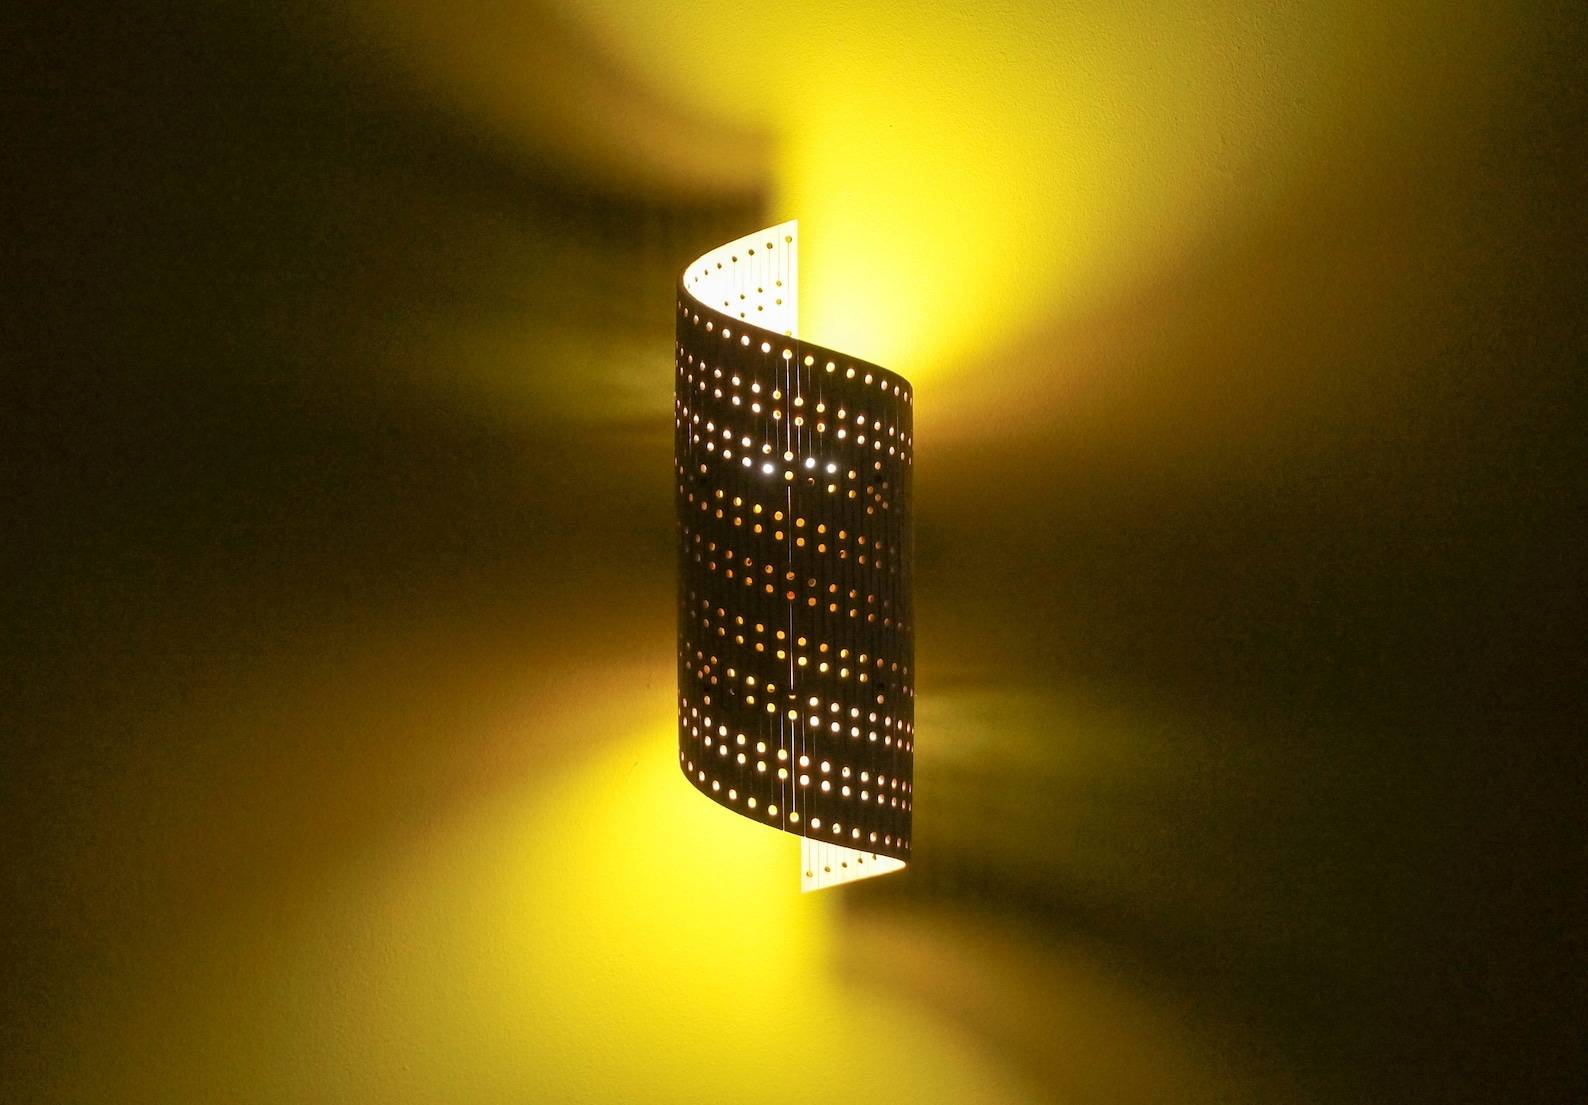
image credit: GervazyWoodworking - Etsy
2. Scallop-Shell Table Lamp
This project mimics the soft curvature of a seashell using precisely placed kerf cuts. A flat sheet of birch plywood is transformed with a laser cutter into a gently folding structure that arches like a scallop shell. The lamp looks delicate but is surprisingly durable, making it great for side tables or bedrooms. The warm, glowing light shining through the cut gaps offers a cozy, beachy vibe. You can customize the scale and curve tightness in your design software, letting you personalize the look and size based on your desired ambiance and furniture setting.
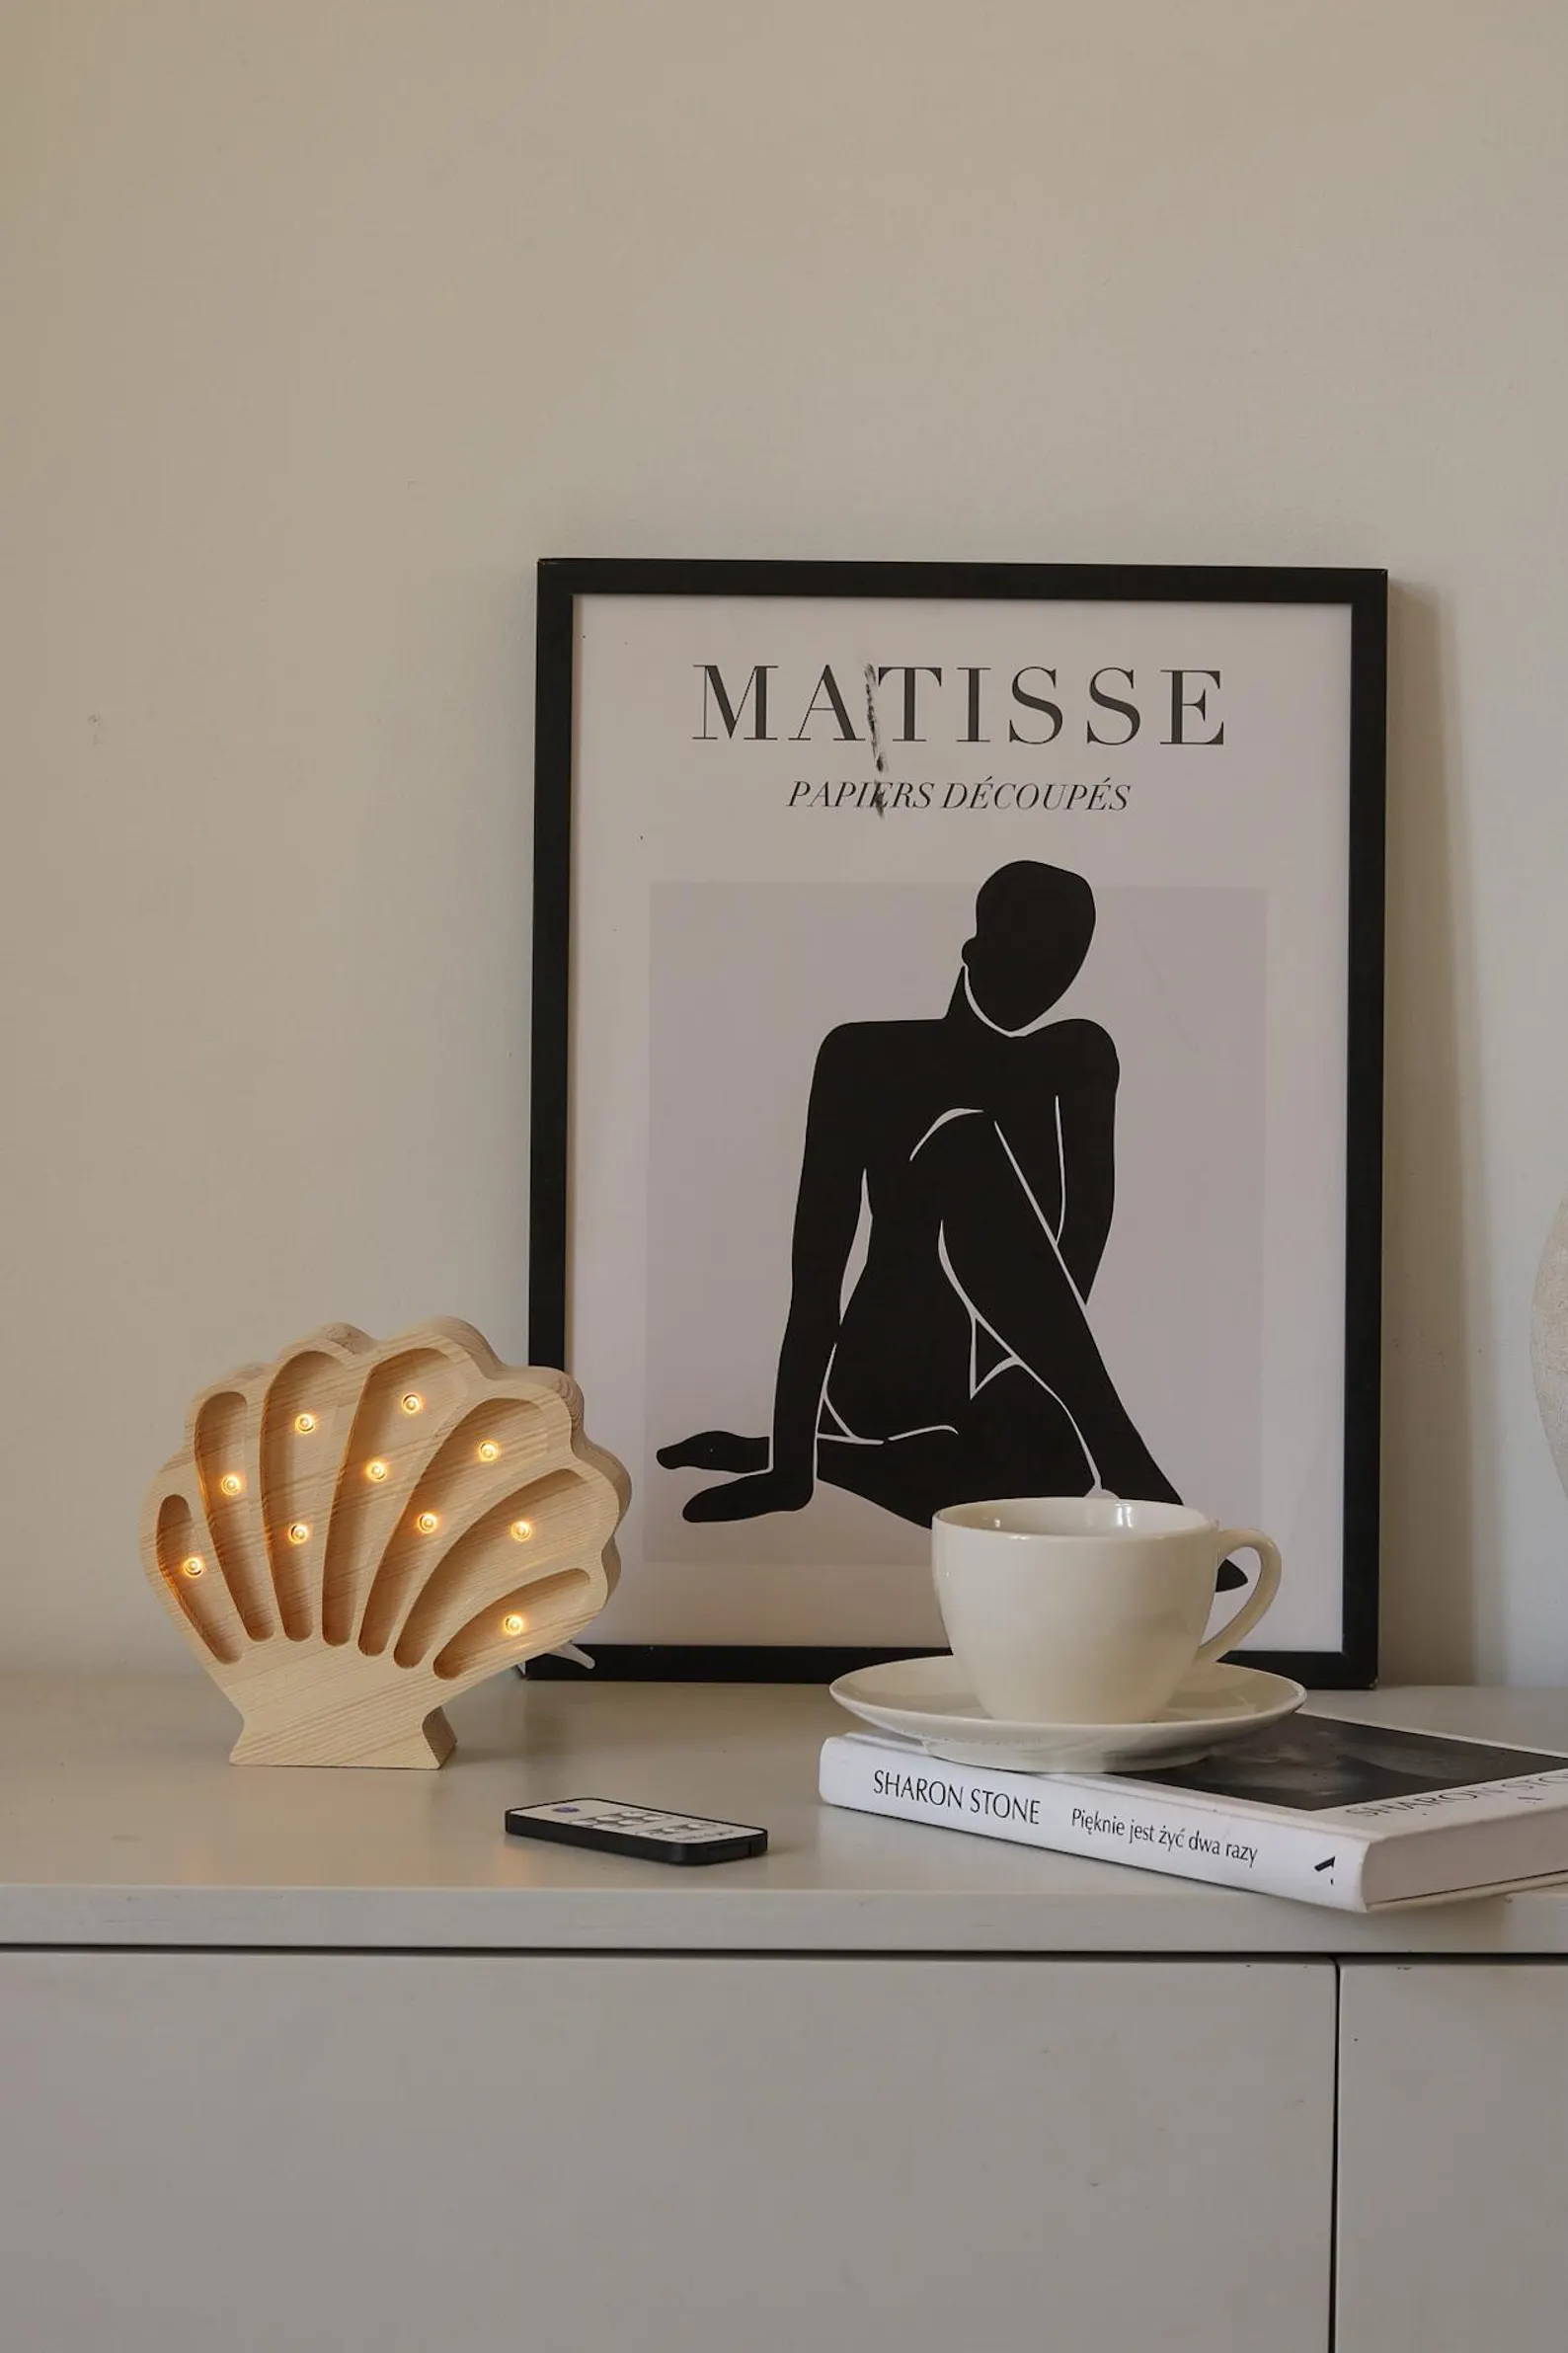
image credit: LittleLightsPL - Etsy
3. Minimalist Cone Shade
Sometimes, simplicity makes the strongest statement. The minimalist cone shade uses straight, evenly spaced kerf cuts to bend a rectangular wooden sheet into a clean, conical shape. The cone is then fastened with hidden tabs or wooden joints, without needing adhesives or screws. This makes it perfect for those who want to explore laser bending with a basic, elegant form. Because the project requires minimal hardware, it's beginner-friendly for anyone learning to use a laser cutter. It fits well with Scandinavian or Japandi design aesthetics—functional, natural, and uncluttered.
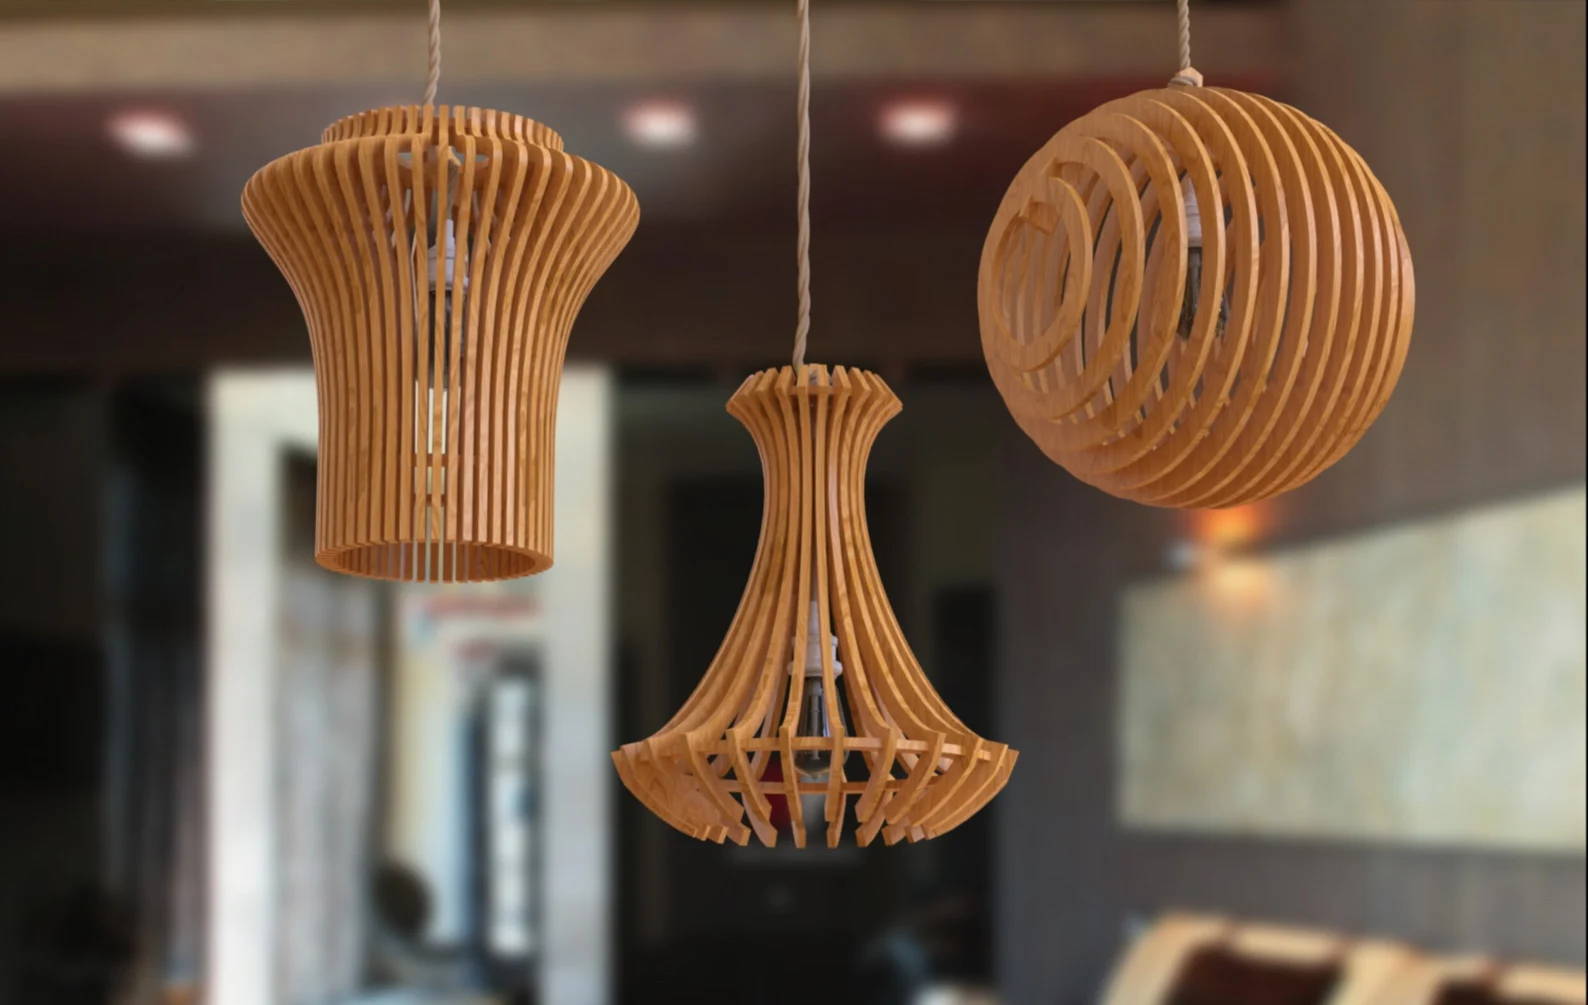
image credit: LaserSvgTemplates - Etsy
4. Modular Flat-Pack Dome Lamp
This design takes the flat-pack concept seriously. Each part of the dome lamp is cut using a laser cutter from thin plywood and then assembled into a spherical form using only tabs and slots. The curved pieces bend gently thanks to kerfing, allowing them to form a complete globe without breaking. It's a brilliant blend of engineering and art, offering ease of transportation and storage. Makers love this model because it can ship flat and be assembled by the customer at home with no special tools.
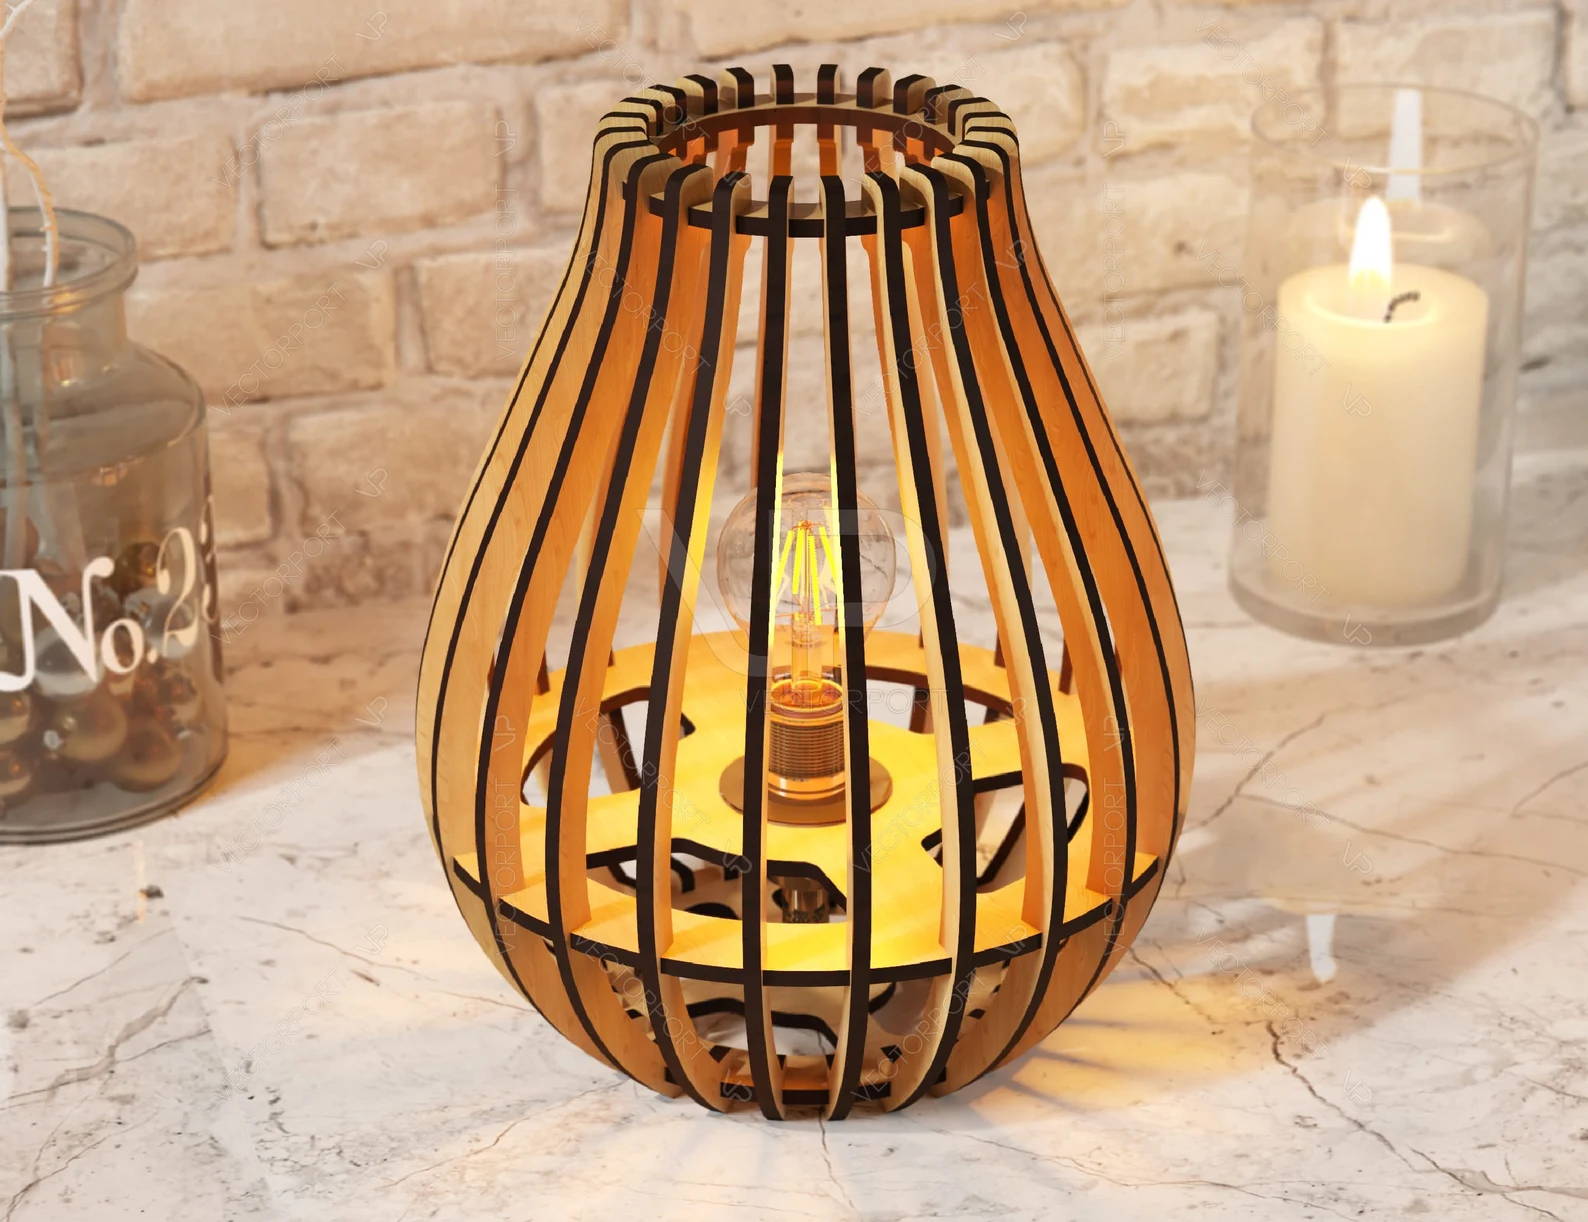
image credit: VectorPointUK - Etsy
5. Geometric Honeycomb Pendant
The honeycomb pendant lamp showcases the structural integrity of hexagonal kerf patterns. The flat plywood sheet is laser-cut into hundreds of small hexagons that remain partially connected. This pattern enables multidirectional bending, creating a rounded lamp with a distinct geometric style. When illuminated, the honeycomb gaps scatter the light into intricate patterns. This project is a favorite among designers who like to combine math and art. A laser cutter is essential to achieve the precise spacing needed to balance aesthetics with strength in such a complex design.
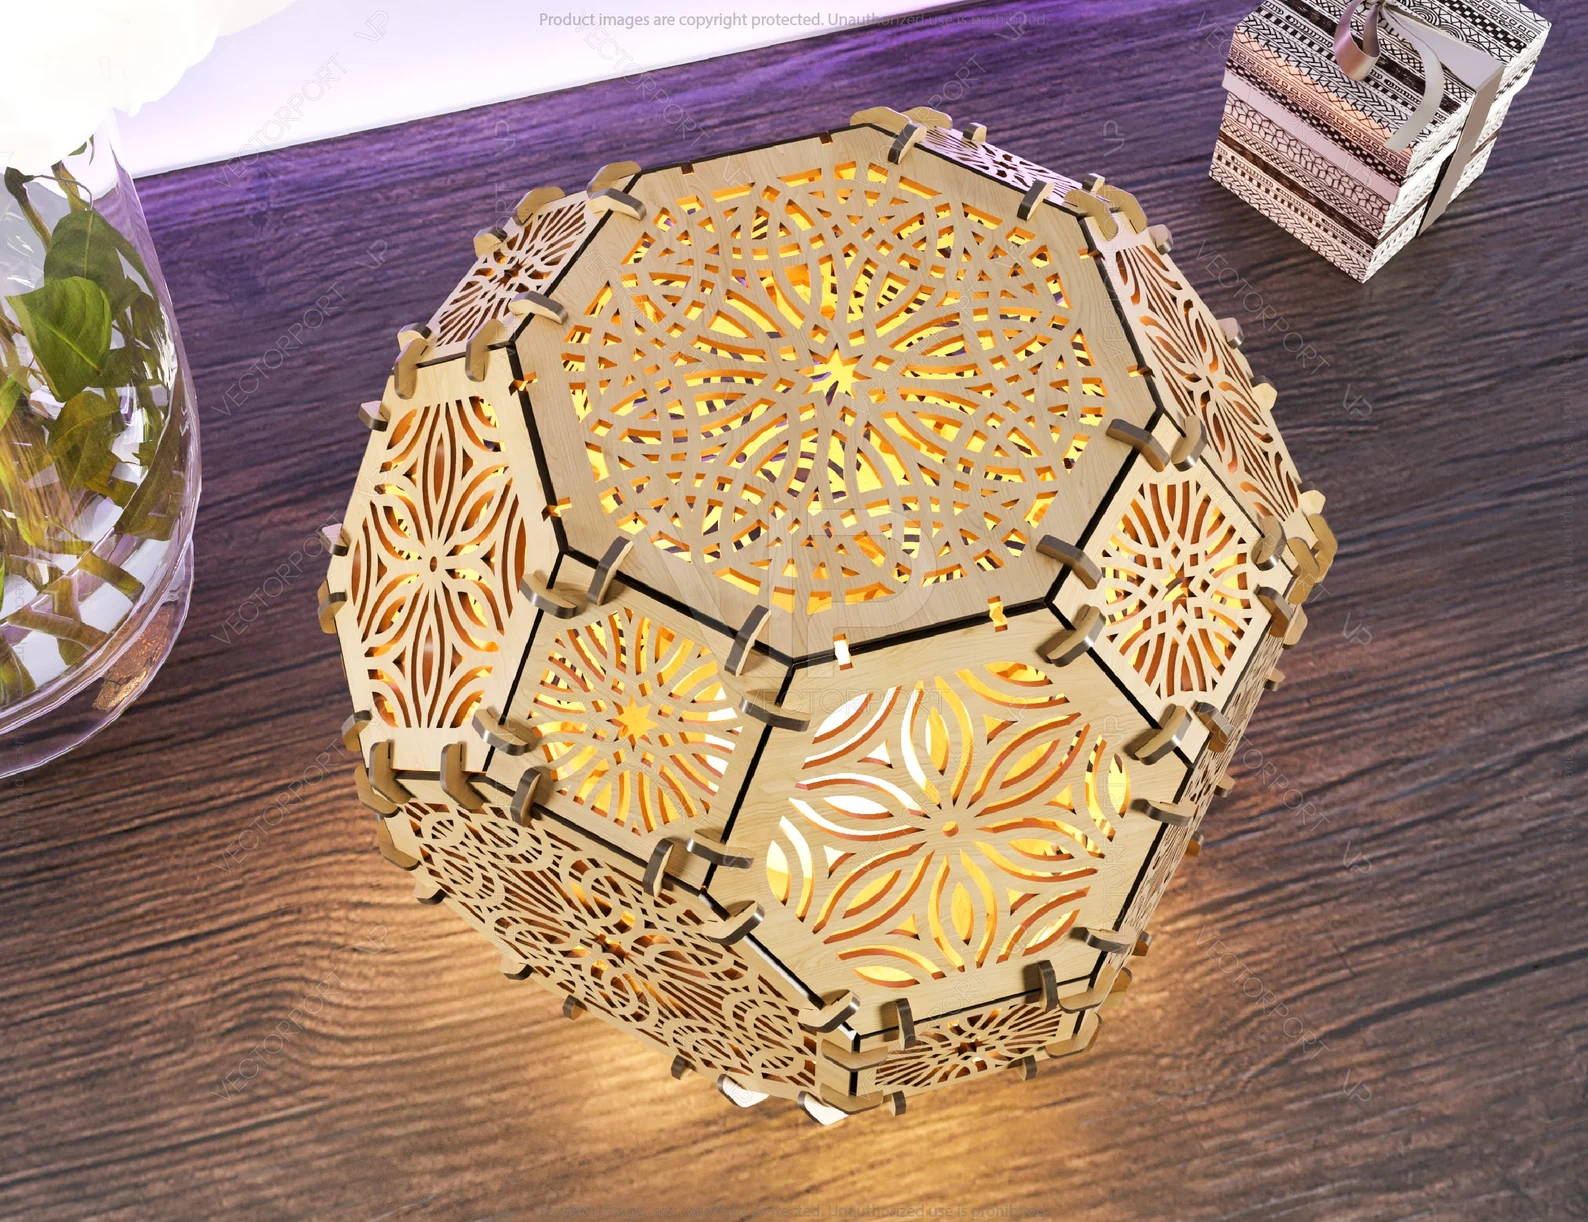
image credit: VectorPortArt - Etsy
6. Layered Cylinder Lamp
This cylindrical lamp uses stacking to achieve volume and texture. Each layer is made from a ring of laser-cut wood with flexible kerf segments that allow it to be bent and glued into shape. Once stacked, the layers create a smooth vertical profile with subtle grooves from the kerf lines. The warm wood tone paired with modern layering makes it ideal for living rooms, libraries, or cafes. A laser cutter ensures consistency in each ring, which is crucial for the final alignment and look of the lamp.

image credit: RKSdsign - Etsy
7. Organic Flow Form Lamp
Unlike geometric styles, this lamp follows an organic, freeform structure. The kerf pattern varies across the surface, allowing some areas to bend more than others. This variance gives the final lamp an almost wave-like motion, similar to draped fabric frozen mid-sway. This design requires careful planning and high-precision laser cutting to prevent cracking at high-bend zones. The asymmetry creates a natural, sculptural appearance that draws attention whether the lamp is turned on or off. It's ideal for modern, high-concept interiors where you want your lighting to double as a centerpiece.
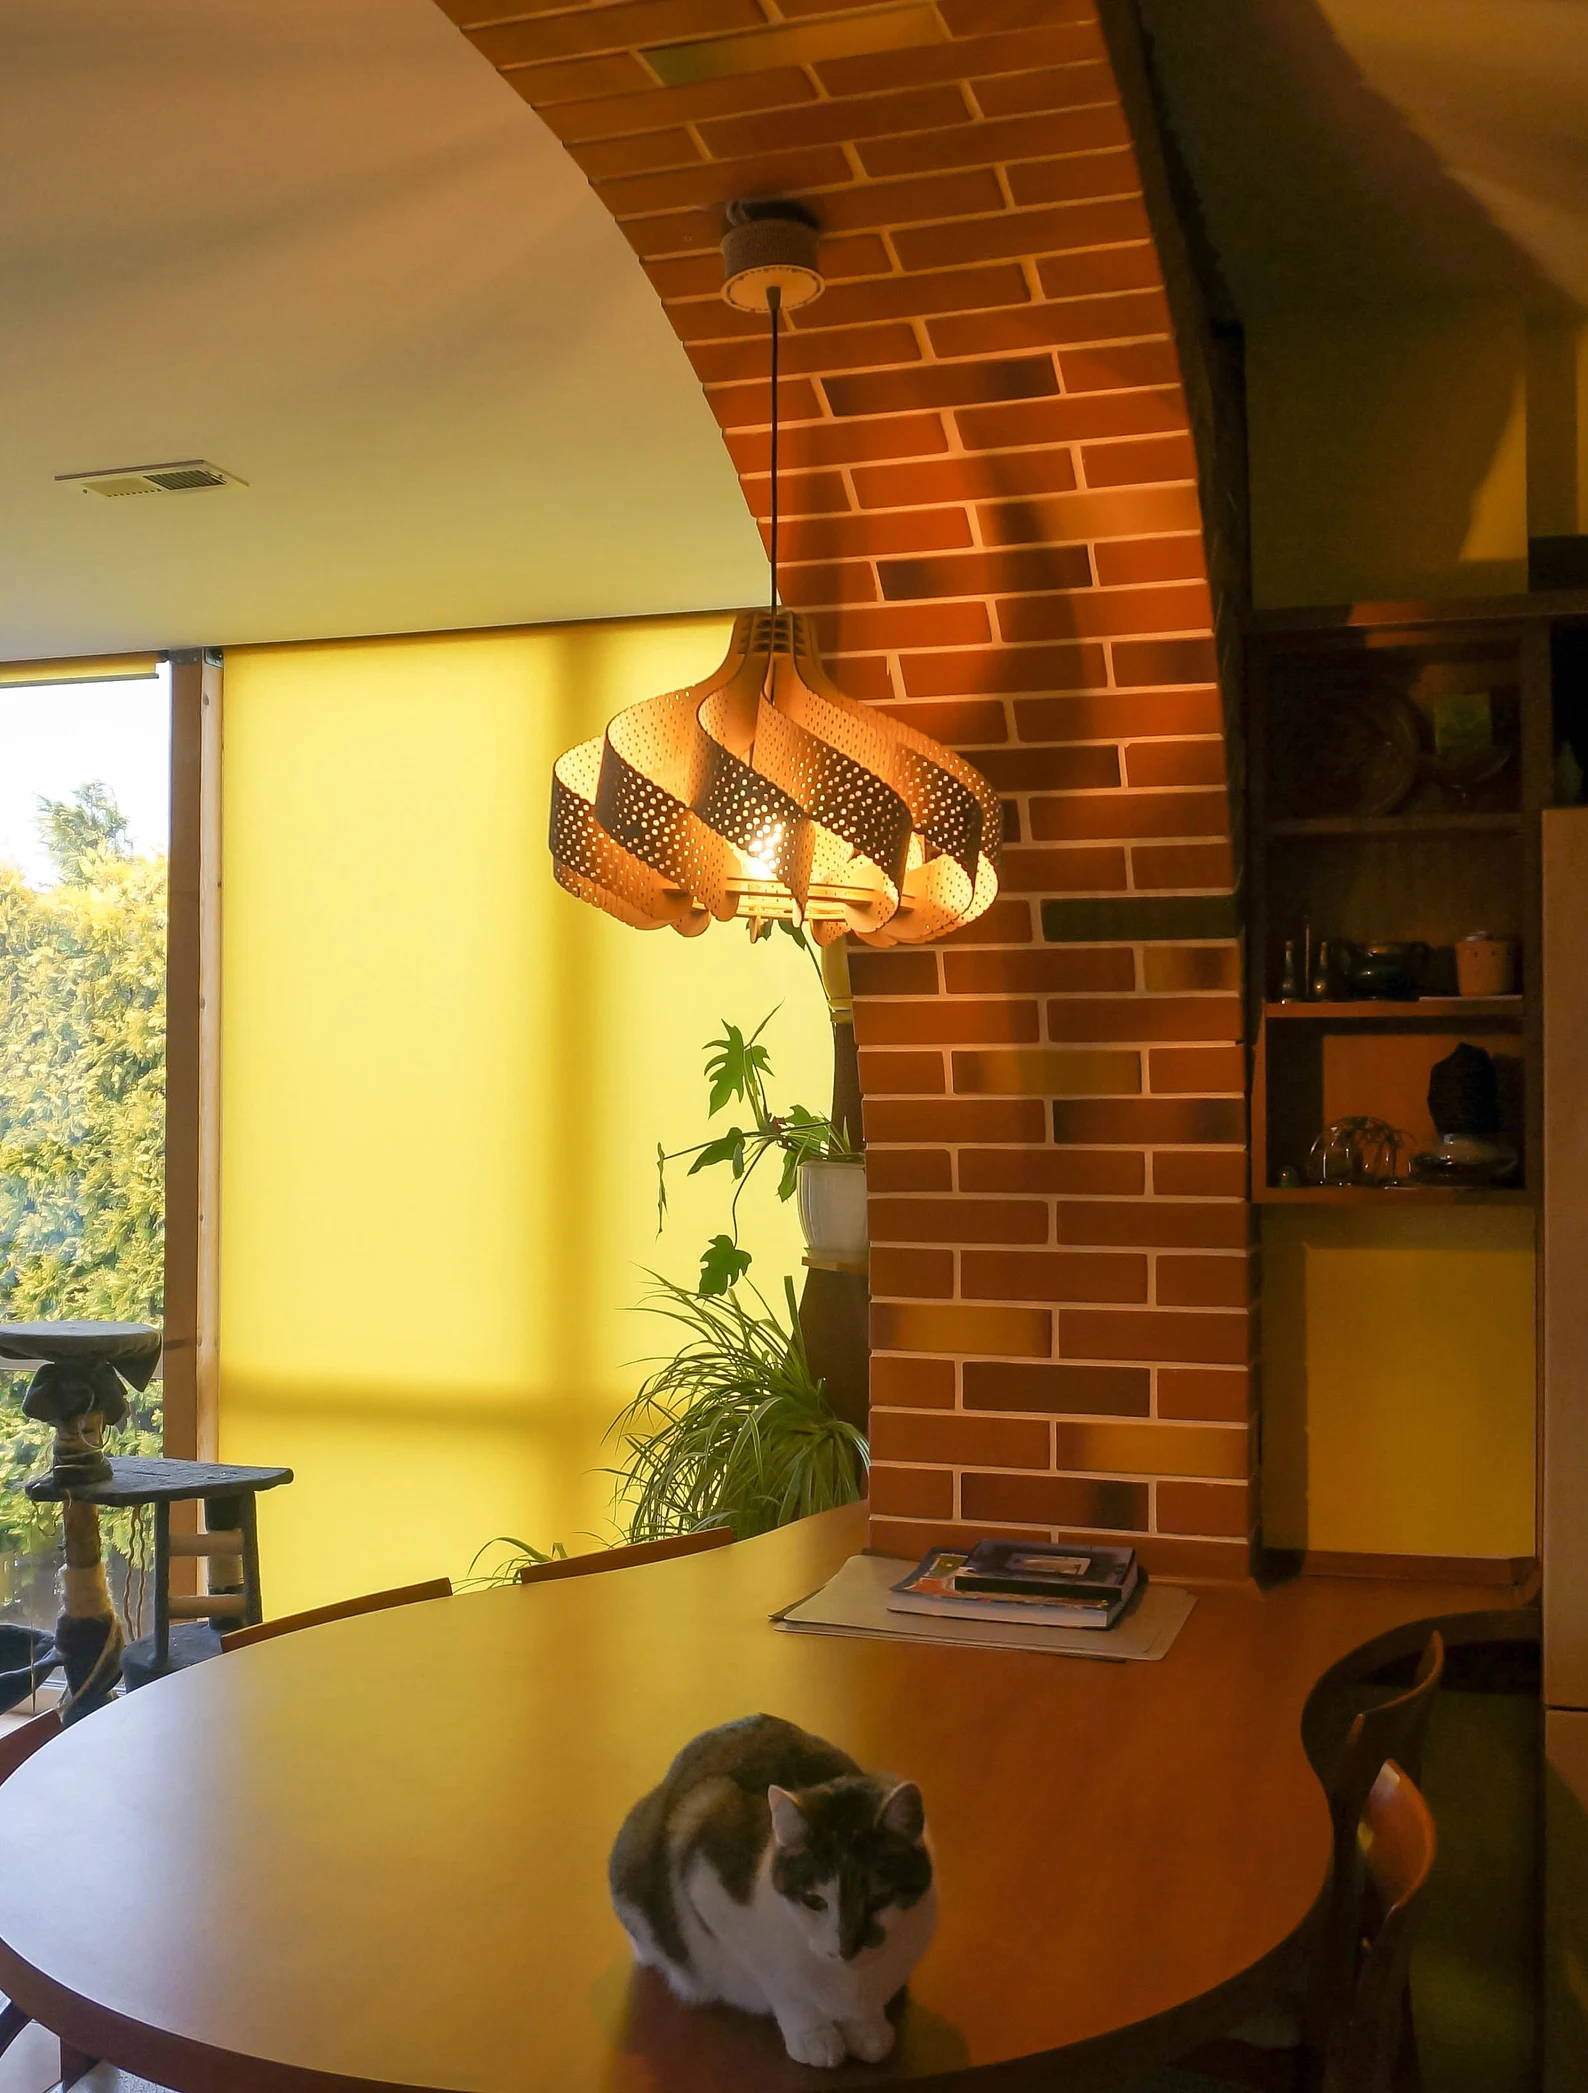
image credit: GervazyWoodworking - Etsy
8. Zen Lantern Box
A modern twist on the traditional paper lantern, this box-style lamp bends its corners inward using subtle kerf lines, creating soft edges while keeping its boxy silhouette. The wood grain and light diffusion resemble rice paper, but the structure is far sturdier. A laser cutter makes the clean joints and engraved detail work easy, offering both a functional lamp and a meditative design piece. This project pairs well with low-watt LED lights and fits into minimalist or Eastern-inspired interiors.
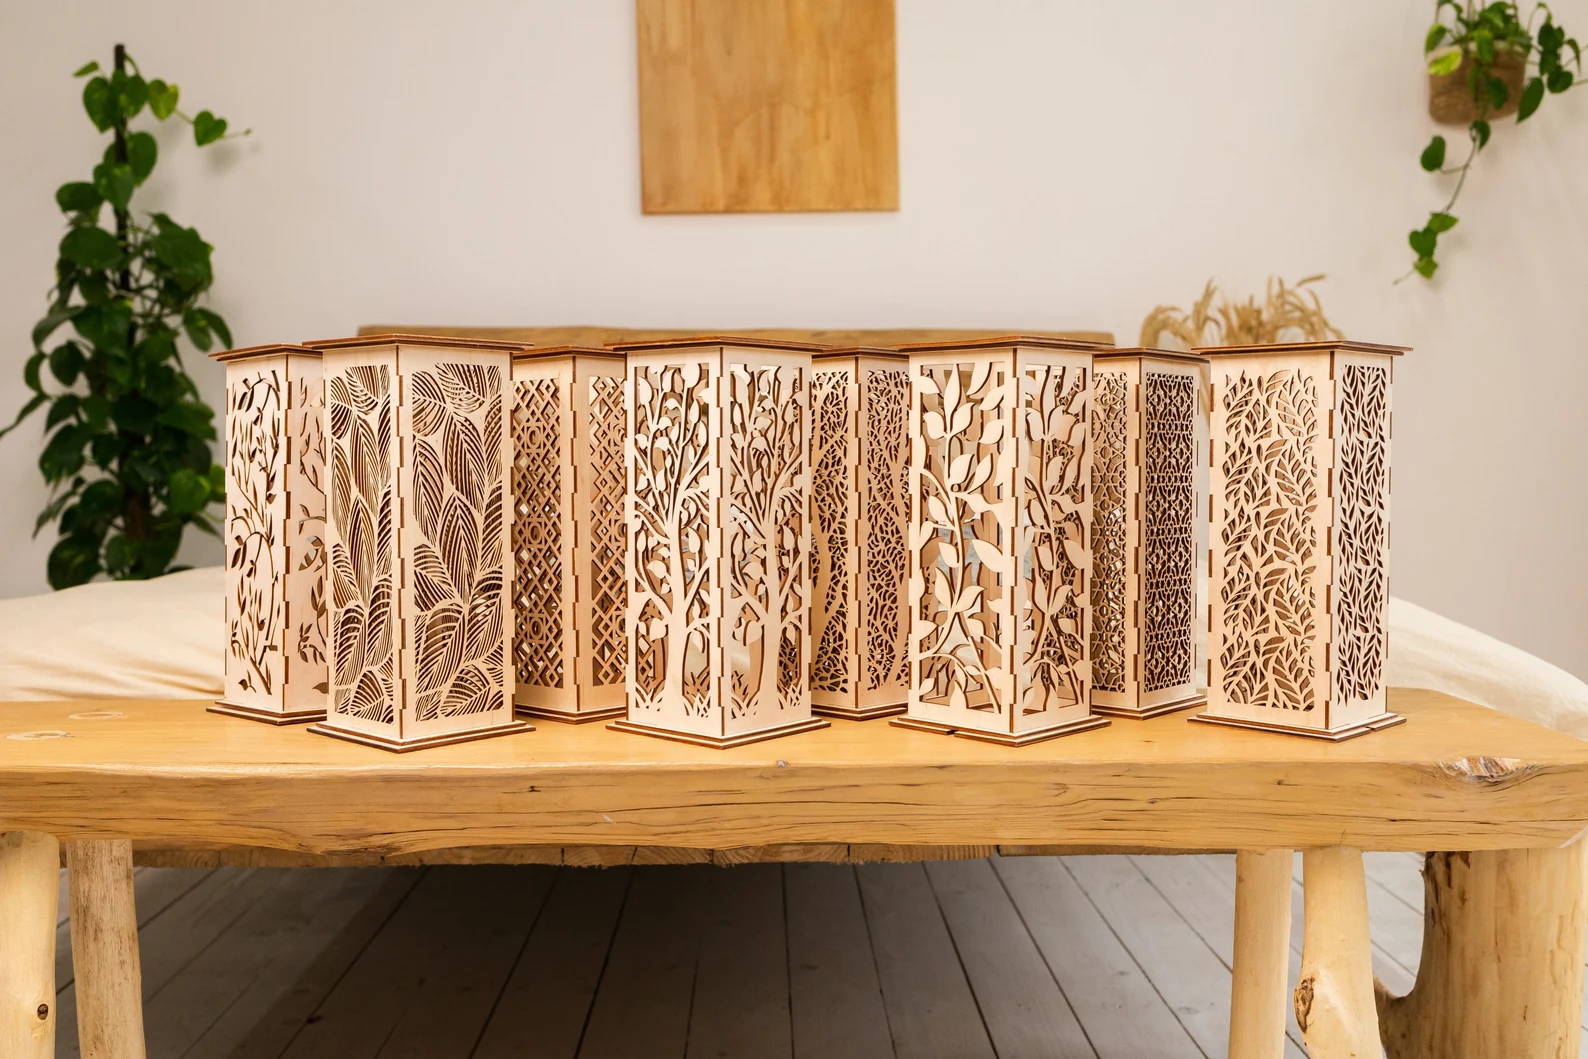
image credit: LaserSvgTemplates - Etsy
9. Hinged Petal Lamp
This floral-inspired lamp shade is composed of multiple bent wooden panels that resemble petals. Each petal is cut from a flat sheet using a laser cutter, then bent inward to form a dome or flower shape around a central bulb. The natural gaps between the petals allow light to leak out beautifully, while the curvature softens shadows. This type of design is great for pendant lights over dining tables or reading nooks. It's highly customizable—change the petal shape, number, or spacing for different looks.

image credit: SONLINER - Etsy
10. Suspended Ribbon Light
The suspended ribbon light is one of the most dramatic uses of kerf bending. Long, flowing strips of wood are cut with tight kerf lines and then gently twisted and looped to hang in midair. The result looks like a wooden ribbon caught in motion. It's a design that's impossible to replicate without the precision of a laser cutter, due to the length and accuracy required in each cut. This showstopper piece is ideal for commercial spaces, hotel lobbies, or anywhere you want to make a bold lighting statement.
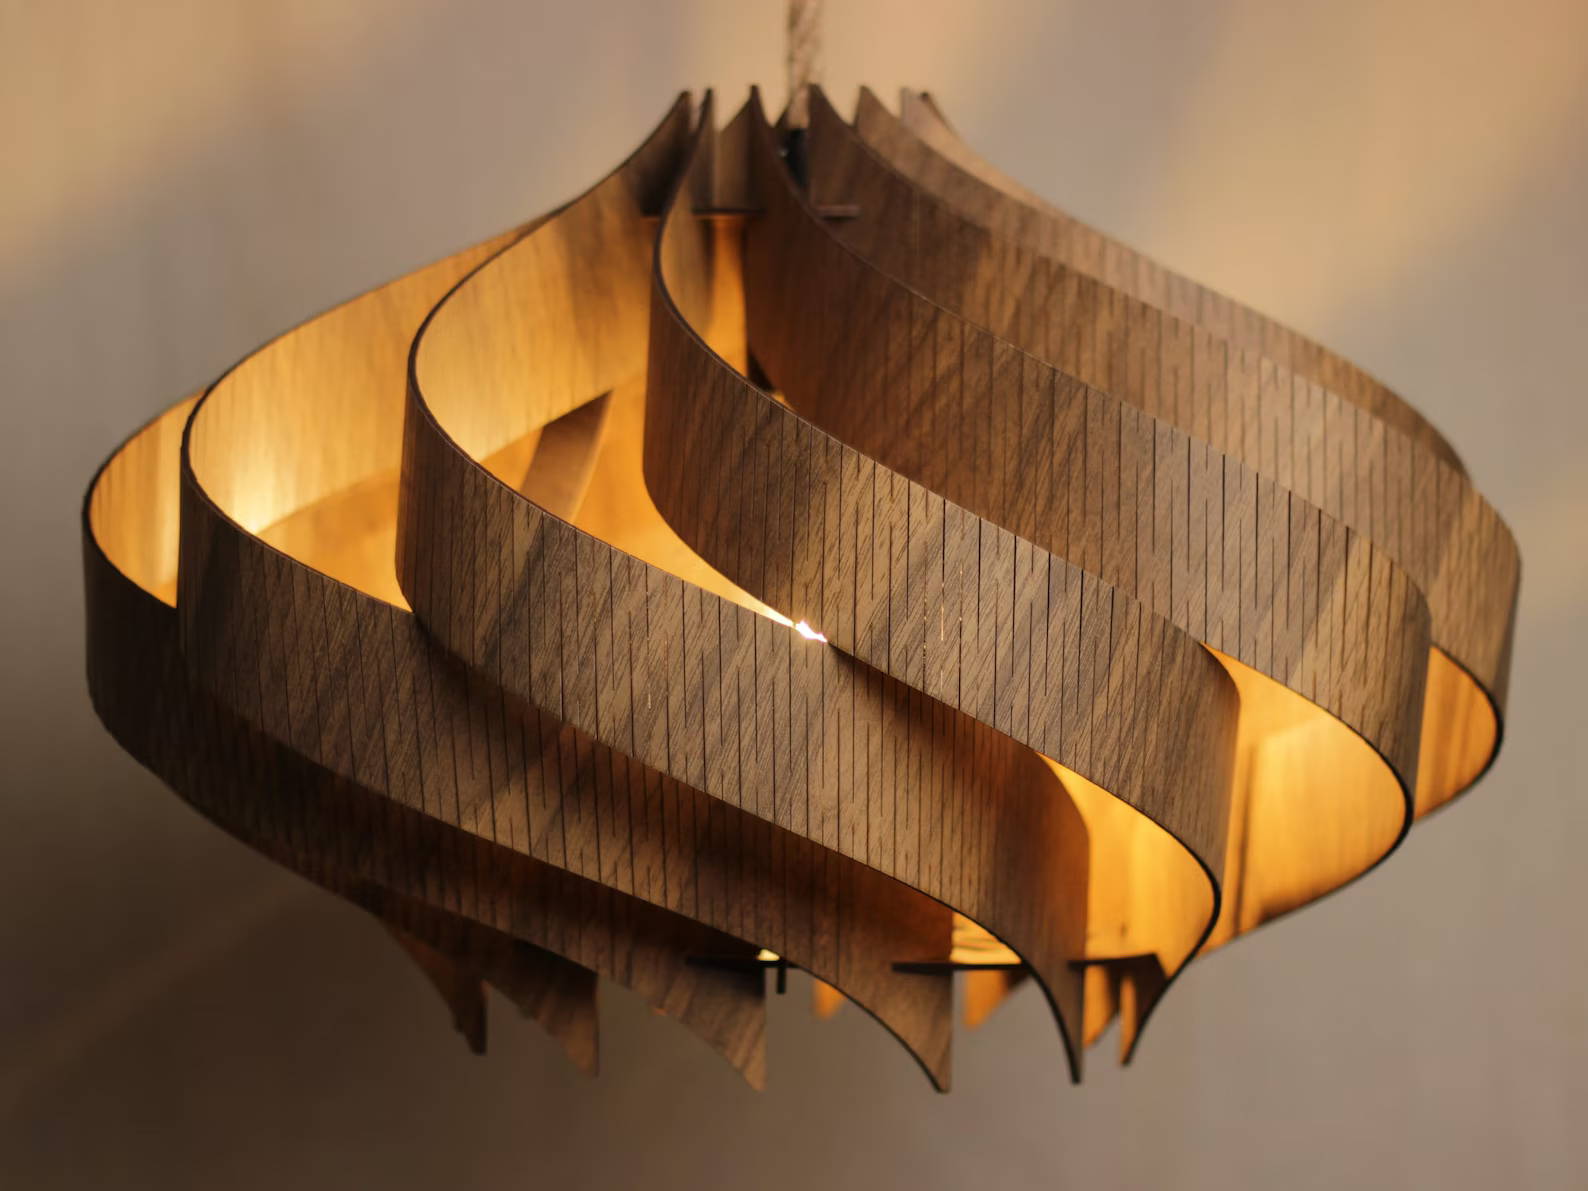
image credit: AtelierNiche - Etsy
6 FAQs for Laser Cut Wooden Sheet Bends to Create an Integrated Lamp Shade
1. What type of wood should I use for kerf bending with a laser cutter?
Plywood, particularly Baltic birch plywood, is highly recommended. It has even layering and minimal voids, making it strong enough to hold shape while also flexible enough to bend without breaking. Thinner sheets like 1/8" or 3mm work best for tighter curves.
2. How do I design kerf patterns for flexibility?
Kerf patterns are essentially arrays of cuts made by the laser cutter. Common patterns include straight lines, diamonds, honeycombs, and arcs. The key is controlling the spacing and depth of the cuts. Tighter patterns bend more easily but can weaken the structure; looser patterns are stiffer but stronger.
3. Can I simulate the bend before cutting the wood?
Yes. Tools like Fusion 360 and Rhino offer simulation tools, and parametric plug-ins like Grasshopper let you experiment with pattern flexibility digitally. You can also prototype in cardboard or foam core before cutting your wood.
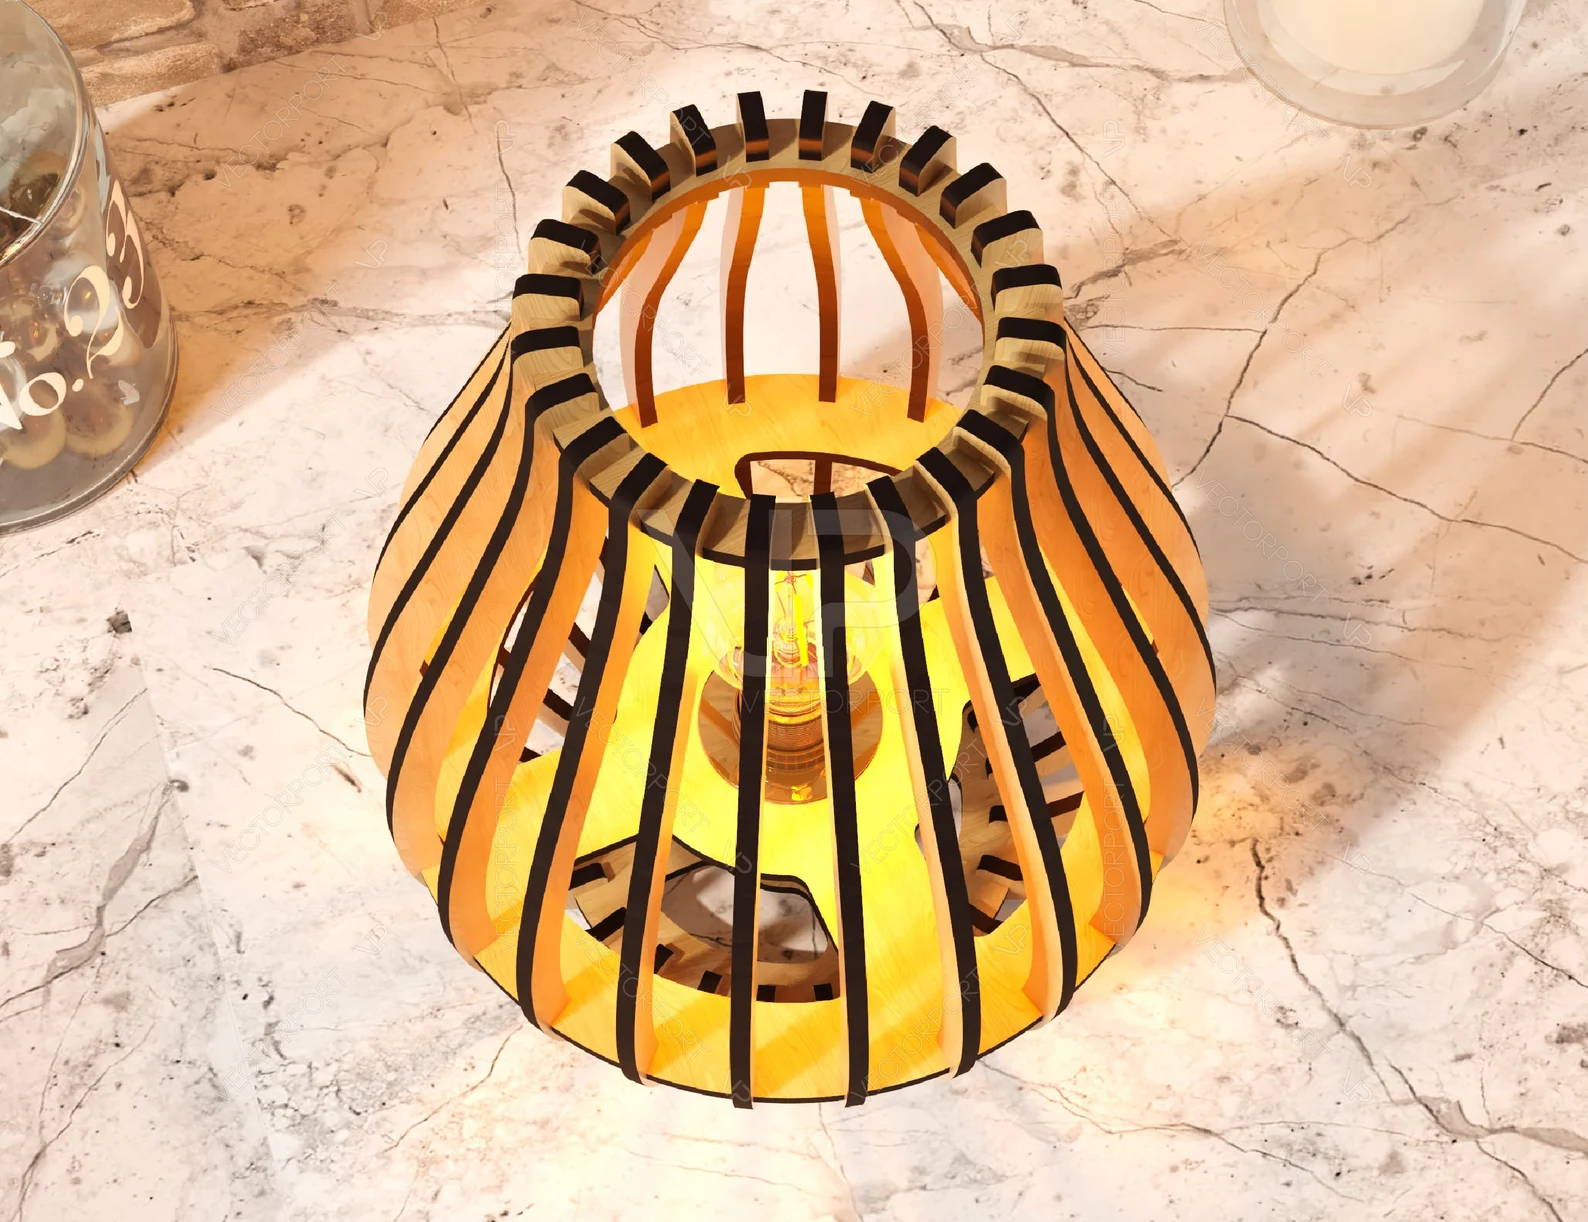
image credit: VectorPointUK - Etsy
4. Do I need to use heat or steam for bending the laser-cut panels?
No. The kerf cuts themselves allow the material to bend. In fact, applying steam or heat can sometimes damage the integrity of laser-cut plywood. Gentle hand pressure, clamps, or jigs are typically enough to shape the piece.
5. Will my laser cutter need special settings for kerf cuts?
Yes, especially in terms of power and speed. For a 3mm plywood, settings like 80% power and 6-10 mm/s speed (depending on the machine) work well. Always do a test piece before cutting your final project.
6. Can I paint or finish my lamp shade after cutting?
Absolutely. Once shaped and secured, you can sand the edges, apply wood stain, paint, or even add a clear polyurethane coating. Just be careful not to over-saturate the bent areas, as too much moisture can relax the kerfs and distort the shape.
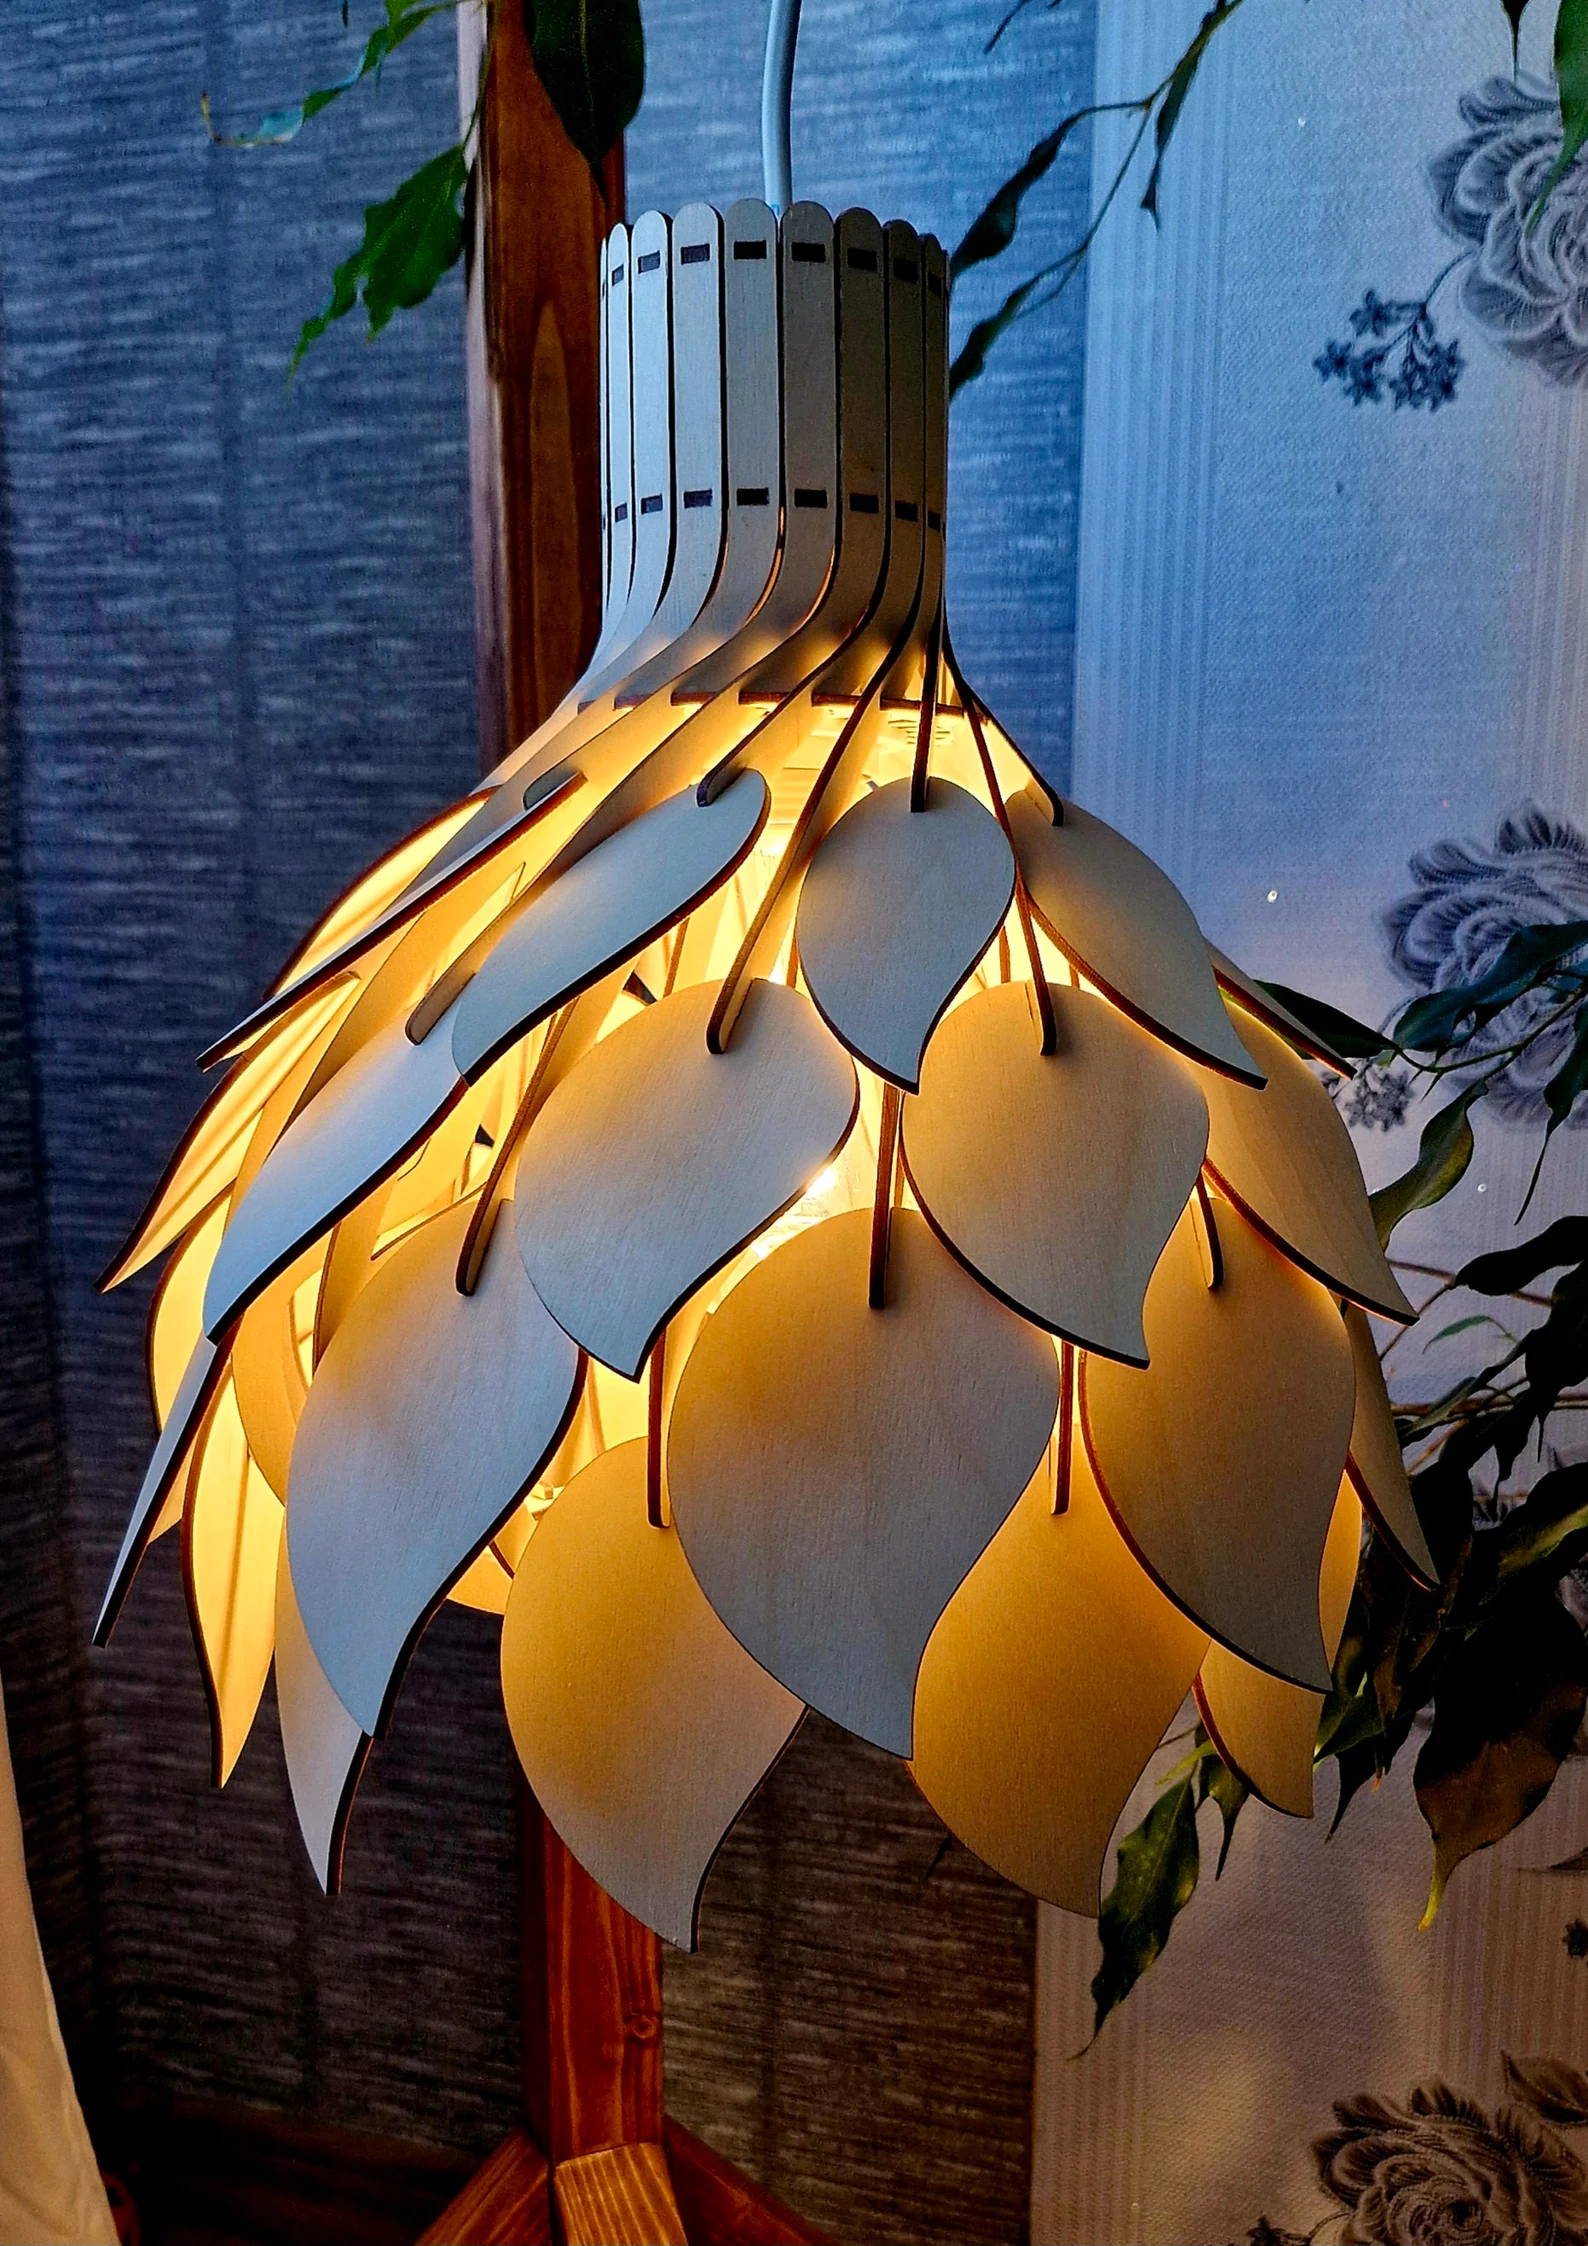
image credit: HomeOfLaserCut - Etsy
Conclusion
Laser cutting wooden sheet bends to craft integrated lamp shades isn't just a hobby—it's a form of modern artistic expression. The combination of digital precision and organic flow makes every piece a unique blend of technology and creativity. By leveraging the capabilities of a laser cutter, you're not limited by the rigidity of wood—you can make it dance. Whether you're producing minimalist pendant lights for your home or launching a small lighting brand, mastering kerf bending will open new frontiers in your design capabilities.
Best of all, this project doesn't require an industrial workshop. A desktop laser cutter, some design software, and a few pieces of plywood are enough to get started. As you experiment with different cut patterns, radii, and forms, you'll develop a deeper understanding of how digital tools and natural materials can come together in harmony. And when that first lamp shade lights up your space, it won't just illuminate your room—it'll shine a spotlight on your craftsmanship.


