How to Improve Engraving Effect for DIY KIT Laser Engraver
This guide is to help users to improve the engraving effect of DIY KIT.
The engraving process may produce some unwanted effects such as straight line distortion and text pattern ghosting.
This article will introduce how to adjust DIY KIT laser engraving machine.
I: Belt Adjustment
Adjust the X-gantry to ensure that it is parallel to the front and rear frames / (in the picture)
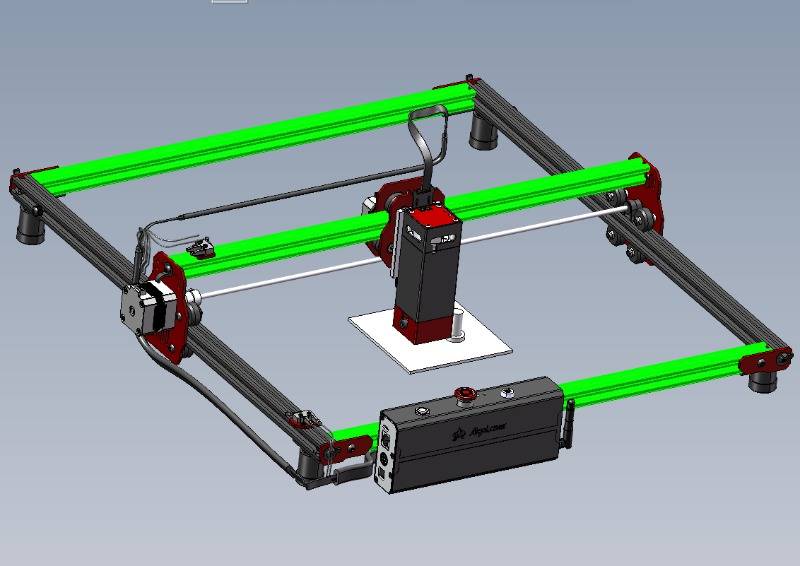
Steps:
a) Unscrew the belt fixing screws at the end of rear frame. (Fig. 1).
b) Then push the gantry back to ensure that both ends reach the "Full Backward Reach Position" (Fig. 2).

(Fig. 1)
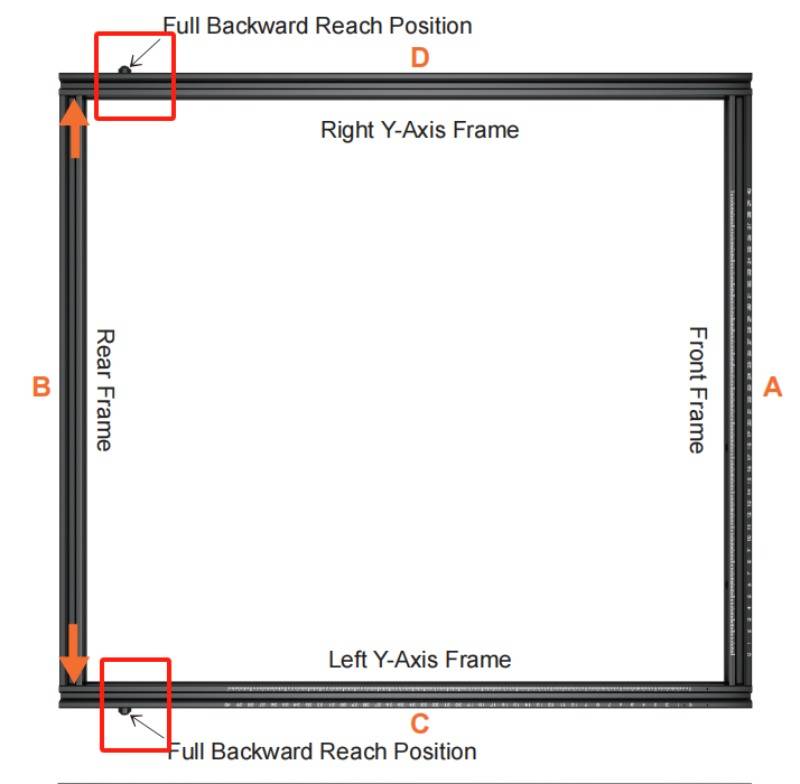
(Fig. 2)
c) Use the pliers to tighten the belt firmly while installing the washers and screws, then tighten them. Ensure the belt is tight and straight.
II: Coupling Adjustment:
Steps:
a) Loosen the coupling under the X-axis gantry in the position shown (Fig. 3). An Allen key from the toolbox can be used.
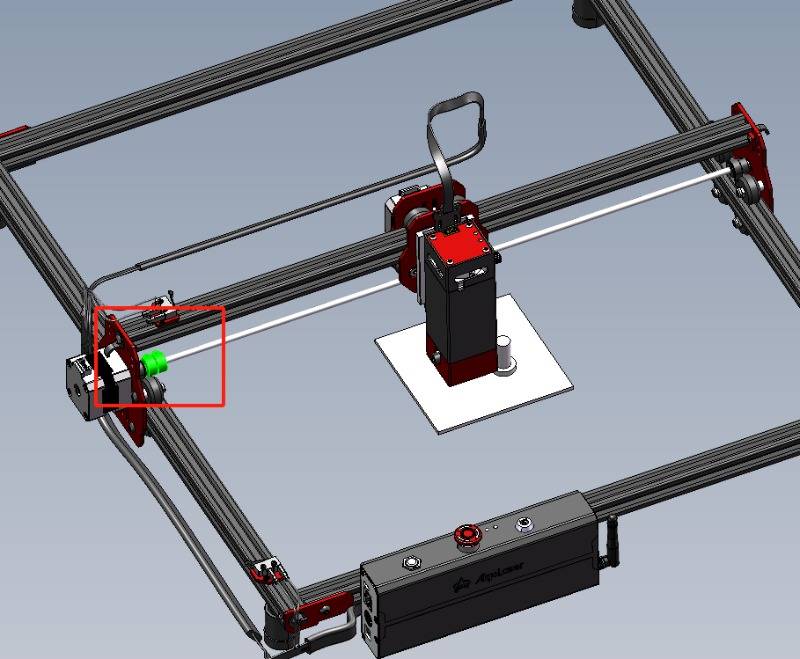
(Fig. 3)

b) Adjust the position so that the gap in the center of the coupling corresponds to the gap in the connection of the two shafts. (Fig. 4)
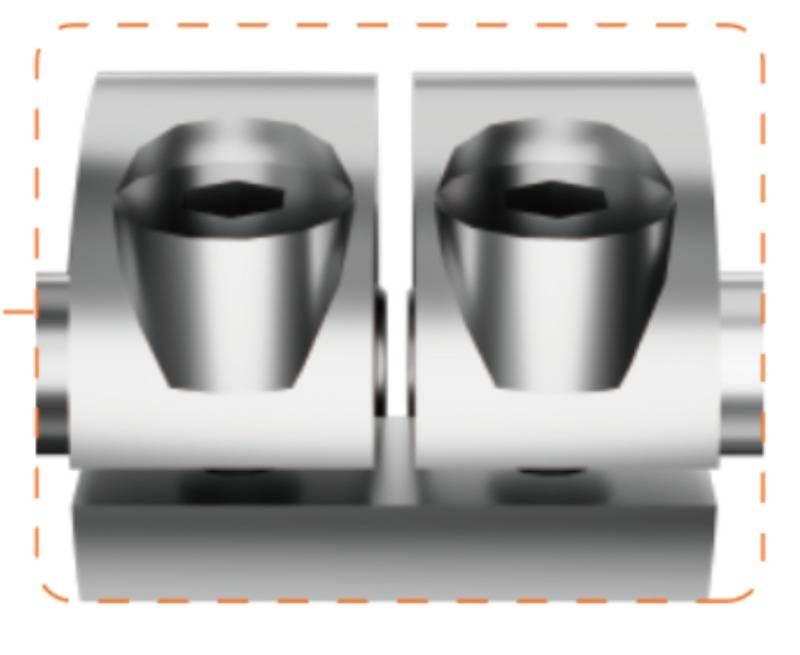
(Fig. 4)
III: Adjustment of the eccentric nut (Attention!)
Eccentric nuts are present in three locations: where the Z-axis connects to the X-axis and where the X-axis connects to the Y-axis. (Fig. 5)
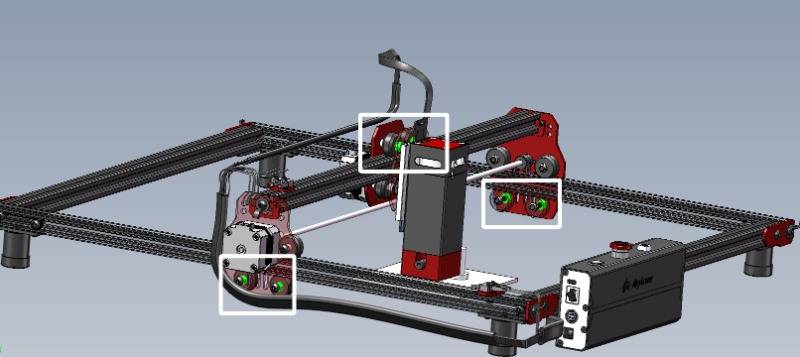
(Fig. 5)
Engraving parameters: Eccentric nuts need to be adjusted for different engraving parameters to achieve optimal engraving results.
1. High speeds with large engraving sizes:
Tighten the eccentric nut so that it moves smoothly.
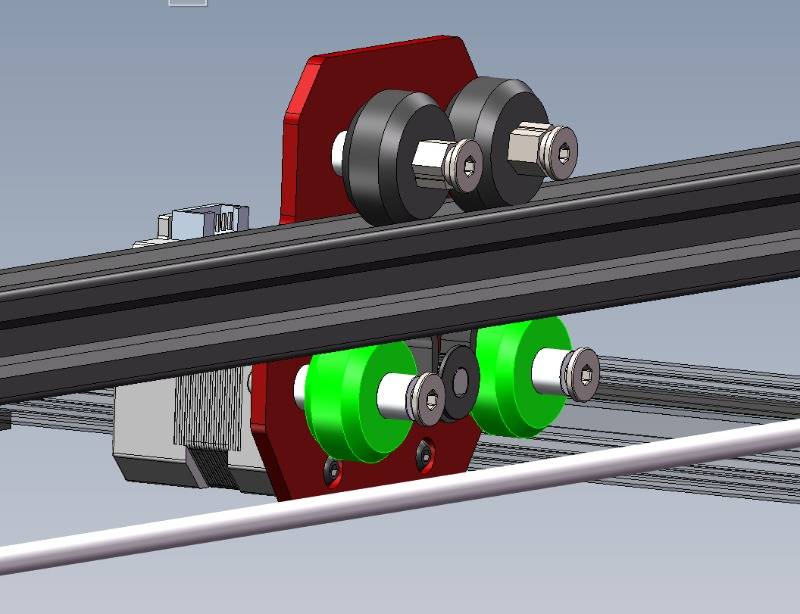
(Take the x-axis as an example)
Standard for Judging:
1) Touch and try to move the rollers to ensure that both rollers cannot be moved by hand at the same time.
2) When pushing the module or X gantry, there is an even resistance.

(Fig. 6)
How to adjust:
Twisting in the direction shown (Fig. 6) can change the distance between the roller and the rail.
Make sure that the distance is the same at both ends and that the rollers are evenly stressed.
Also need to make sure that the rollers are able to catch the rail.
2. Engraving at low speeds and in small sizes:
In the case of smaller sizes, if the eccentric nut is too tight, the movement of the machine will be resisted by the eccentric nut, which will lead to phenomena such as heavy shadows in the engraving.
So it needs to loosen the nuts.
Standard for Judging:
1)Touch and try to move the rollers, both rollers can move.
Key Note:
The adjustment method is only suitable for small scale engraving content (e.g. fonts within 5mm).
It cannot be used for engraving large pictures, otherwise it will cause engraving errors such as twisted engraving lines.
So after engraving small-size items, you need to re-adjust the nut back to the compact state.
- Choosing a selection results in a full page refresh.


