


How to Fix the Crashing Sound of the Alpha MK2 Laser Engraver
1. Introduction to the Problem
When you switch on your laser engraver and initiate the homing process, you may sometimes hear a knocking sound, crashing noise, or even a slight grinding noise coming from the machine. This type of abnormal machine noise, typically originating from the left side of the frame, is a clear sign of an internal issue within your laser engraving machine. In most cases, the root cause is that the limit switch not triggering correctly due to an uneven X-axis alignment, where the gantry alignment is off and the parallel gantries are no longer synchronized.
The X-axis alignment is essential for maintaining precise laser positioning and ensuring smooth engraving motion across your material. As part of the linear motion system, the X-axis controls the movement of the laser head via a belt-driven system powered by a stepper motor movement. If the dual gantry system becomes skewed, it can result in uneven movement, increased vibration during engraving, and even laser head stuttering. Addressing this issue promptly is critical for restoring stable machine operation and achieving high-quality engraving results.

2. Initial Steps: Emergency Stop and Preparation
When encountering a motion resistance issue or unexpected noise, immediately press the emergency stop to prevent further damage. This is a key step in any laser engraver troubleshooting guide. Once the machine halts, disconnect the power to safely begin your laser engraver repair process.
Gather your machine tool kit, including an Allen wrench tool and socket head cap screws, which are essential for performing manual adjustment and hardware adjustment tasks. Being prepared ensures a smooth DIY laser engraver repair experience.
These initial steps are fundamental to proper laser engraver maintenance and safe handling before starting any mechanical calibration or machine calibration process.


3. Adjusting the Front Tension Screws
Start by inspecting the timing belt tension using the front tension screws. Improper belt tension in a belt-driven system is one of the most common causes of uneven movement and misaligned gantry issues.
Loosen the screws slightly and stabilize the frame during adjustment. Then tighten gradually to achieve balanced belt tension adjustment. Repeat this on both sides to ensure parallel gantries and eliminate any motion resistance issue.
Correct mechanical tuning at this stage significantly improves smooth engraving motion and reduces strain on the stepper motor movement, contributing to precision laser control.


4. Removing the Y-axis Couplings
Next, remove the Y-axis coupling, which connects the motor to the motion system. This step isolates the linear motion system, allowing accurate inspection of gantry alignment without motor interference.
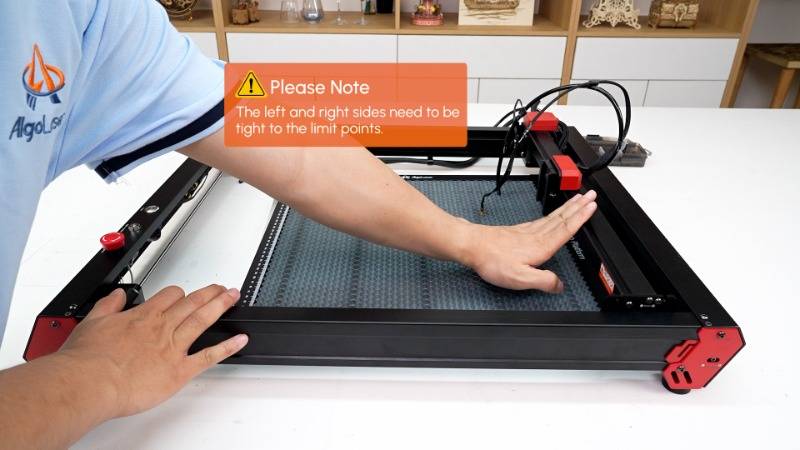
Once removed, manually slide the gantry and observe whether both sides trigger the limit switch simultaneously. If not, this confirms a laser engraver limit switch problem fix is needed due to uneven X-axis or gantry misalignment.
This is a critical diagnostic step in any laser engraver troubleshooting guide.


5. Assessing the Gantry Push Resistance
Now test the gantry alignment by pushing both sides individually. If one side moves freely while the other shows resistance, this indicates a motion resistance issue caused by improper V-wheel adjustment or rail pressure imbalance.
This imbalance often leads to vibration during engraving, inconsistent cuts, and reduced engraving accuracy. Identifying this issue is key to applying the correct laser engraver calibration step by step method.


6. Adjusting the Eccentric Nuts
Proceed with adjust eccentric nuts, a crucial step in fix uneven axis problems. These components control wheel pressure on the rails in your guide rails system.
Remove the laser module and flip the machine to access the underside. Locate the tight side and carefully loosen the eccentric nut using your maintenance tools. This ensures proper V-wheel adjustment and eliminates excessive friction.
Simultaneously, apply counterbalance adjustments on the opposite side to maintain even pressure. This process is essential for fix gantry misalignment laser cutter issues and ensures proper mechanical calibration.


7. Reassessing the Gantry Push Resistance
After adjustments, test again. Both sides should now exhibit equal resistance, confirming proper gantry alignment and restored linear motion system balance.
At this point, the knocking sound and crashing noise should be eliminated, resolving the laser engraver uneven movement solution and restoring stable machine operation.

8. Reinstalling the Components
Reattach the Y-axis coupling, ensuring correct alignment with the shaft. Move the gantry to its full range and secure all components.
Check belt tension again to confirm optimal belt tension check results. A properly tuned system ensures consistent cutting performance and long-term reliability.
This step finalizes your DIY laser engraver repair tutorial.


9. Final Checks and Power On
Perform a full machine inspection checklist, ensuring all components are secure and aligned. This includes alignment verification, checking for equal looseness, and confirming proper installation.
Reconnect power and run a homing cycle. If successful, the machine will operate smoothly without abnormal machine noise or homing failure.
This confirms a successful fix homing issue and validates your laser engraver calibration step by step process.

10. Conclusion and Best Practices
Resolving the knocking sound caused by an uneven X-axis is essential for maintaining your laser cutter and engraver. Regular preventive maintenance ensures long-term machine durability and consistent performance.
Incorporate routine maintenance practices such as belt tension check, alignment verification, and regular calibration into your workflow. These steps help prevent future issues and maintain precision laser control.
A well-maintained diode laser engraver delivers high-quality engraving results, improves efficiency, and minimizes downtime. Following this laser engraver troubleshooting guide ensures your machine stays in peak condition.
Ultimately, proper care and consistent laser engraver setup and maintenance will guarantee improved engraving accuracy and reliable performance for every project.


